Unclogging the Carburetor
I bought the beetle in the middle of July 2006. I drove it 400 miles
to Middlesboro, and then drive it around town and to flying lessons
for weeks. For over 1000 miles the engine ran like a sewing machine.
Then one day, coming back from Knoxville, it wouldn't run right. Once
it was totally warmed up, it would almost run Ok, but it wouldn't idle
quite right. I actually died a couple of times getting warmed up,
which hadn't happened during the time I'd owned it.
I don't have a lot diagnostic tools, so I had to do a lot of
guessing. I decided it had to be the carburation system. The engine
would start (cold) and then run perfectly for 30 or 45 seconds, and
then sputter and start to die. I could keep it running if I fought it
with the accelerator.
It just didn't seem like a vacuum leak
or an ignition problem (it just wouldn't run right at all in those
cases). However, if one of the jets in the carb was plugged, then the
engine would start and I could keep it running with the accelerator
pump, but it wouldn't run without that (which was roughly the way it
was).
Before cleaning the carburetor, I wanted to eliminate crud coming in
from the fuel lines. After disconnecting the incoming fuel line from
the tank, I opened up the fuel pump to check the screen and found
this:
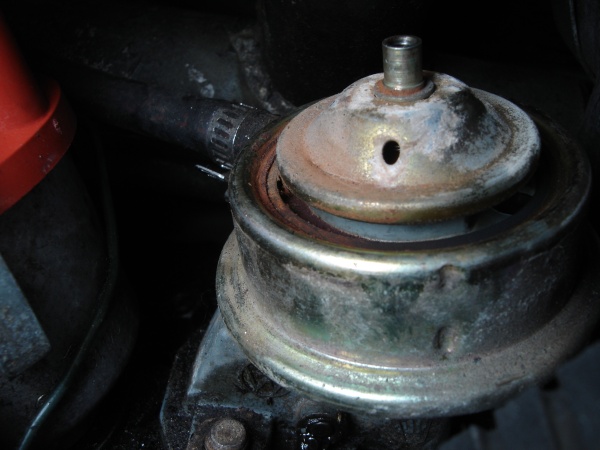
The bottom part of the pump is under the screen, and is on the
downstream part of the pump. So that stuff was going into the
carburetor. So I bought a carburetor rebuild kit (that contains
gaskets and replacement screws and valves), a new fuel pump, and a set
of in-line fuel filters, and a bunch of fuel hose. The plan was to
clean out the carburetor, and then put it back into the engine having
cleaned out the upstream components.
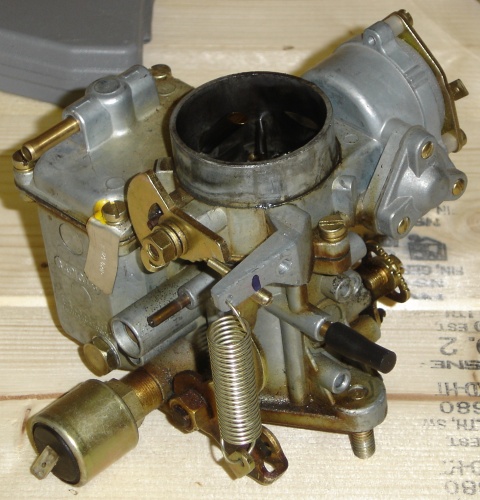
So here's the Solex 34PICT-3 carburetor out of the car and on the work
bench. The thermal-electric choke is on the upper right, and the
electromagnetic cut-off valve sticks out to the bottom left on this
view.
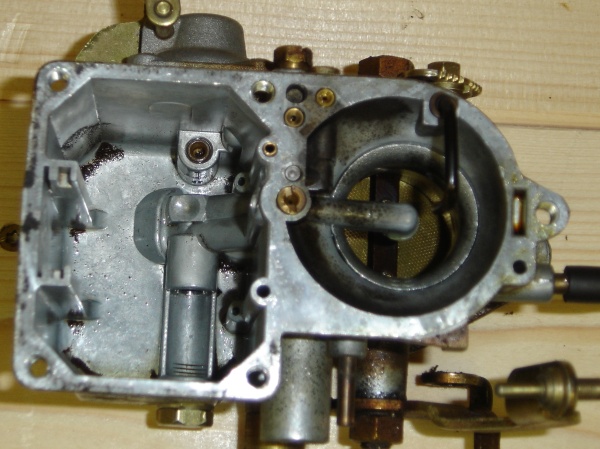
The carburetor with the top half and float assembly removed. The
float bowl is the part on the left. You can see the crud that has
collected in the corners. I don't know if that was harmless or a
symptom of the same stuff that eventually clogged the carburetor. The
basic operation of my "repair" was to use compressed air to blow out
all the orifices and "jets" in the carburetor to remove contaminents
and such.
The bowl of the carburetor acts as a "sediment bowl"; that is, chunky
stuff floats to the bottom of it. Unfortunately, that's where the
main jet of the carburetor is:
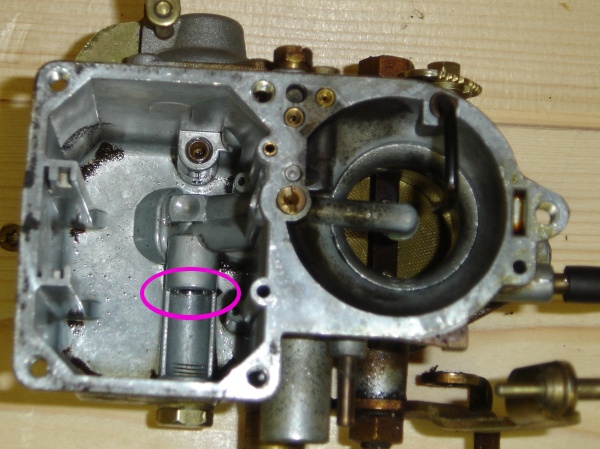
so whatever stuff gets into the bowl gets sucked in there.
One thing that threw me for a loop was this brass piece:
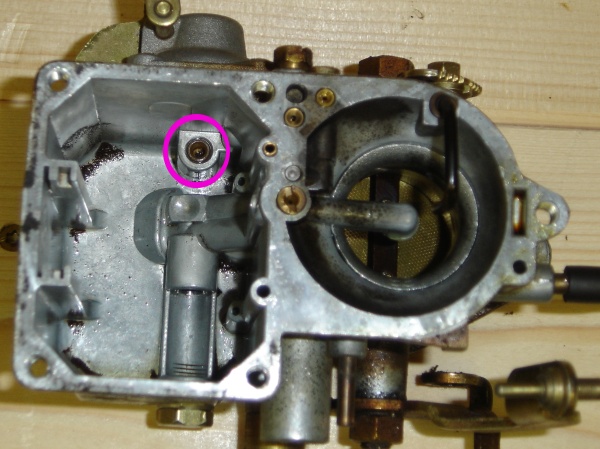
It's a brass colored insert threaded into the body of the carburetor,
just like all the other jets. However, it doesn't have a hole in it.
I blew at it with high pressure compressed air, thinking it was
plugged. Then I looked a second time at one of my diagrams of the
carburetor. This is actually the plug over the check valve ball for
the accelerator pump (the pump itself is on the outside of the carb at
the top of the photo). So it's not supposed to have a hole in it.
Good.
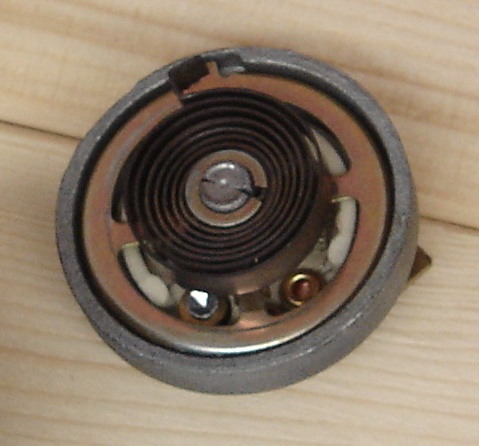
Here's the famous automatic choke that
Muir
hates so much:
One thing that threw me for a loop was the design of the replacement
fuel pump is different than that of the old one. Here's the new pump
next to the top parts of the old one:
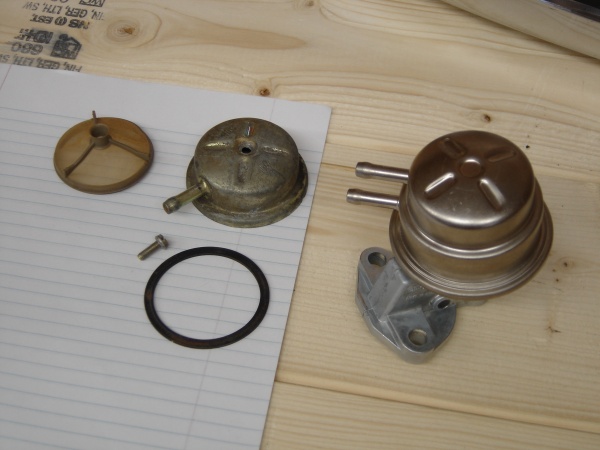
The old pump had a screen under the top cover, and the cover was held
up by a screw in its center. The new pump is entirely one piece, with
no way to take it apart at all. I assume that means that the
mechanical parts of the new pump are the same as the old, but that it
doesn't have a fuel screen at all (because there would be no way to
clean it)? I had already ordered in-line filters as a supplement to
the screen in the pump. It's good that I did; I would have definitely
wanted one with the possiblity of the pump not doing any filtering at
all.
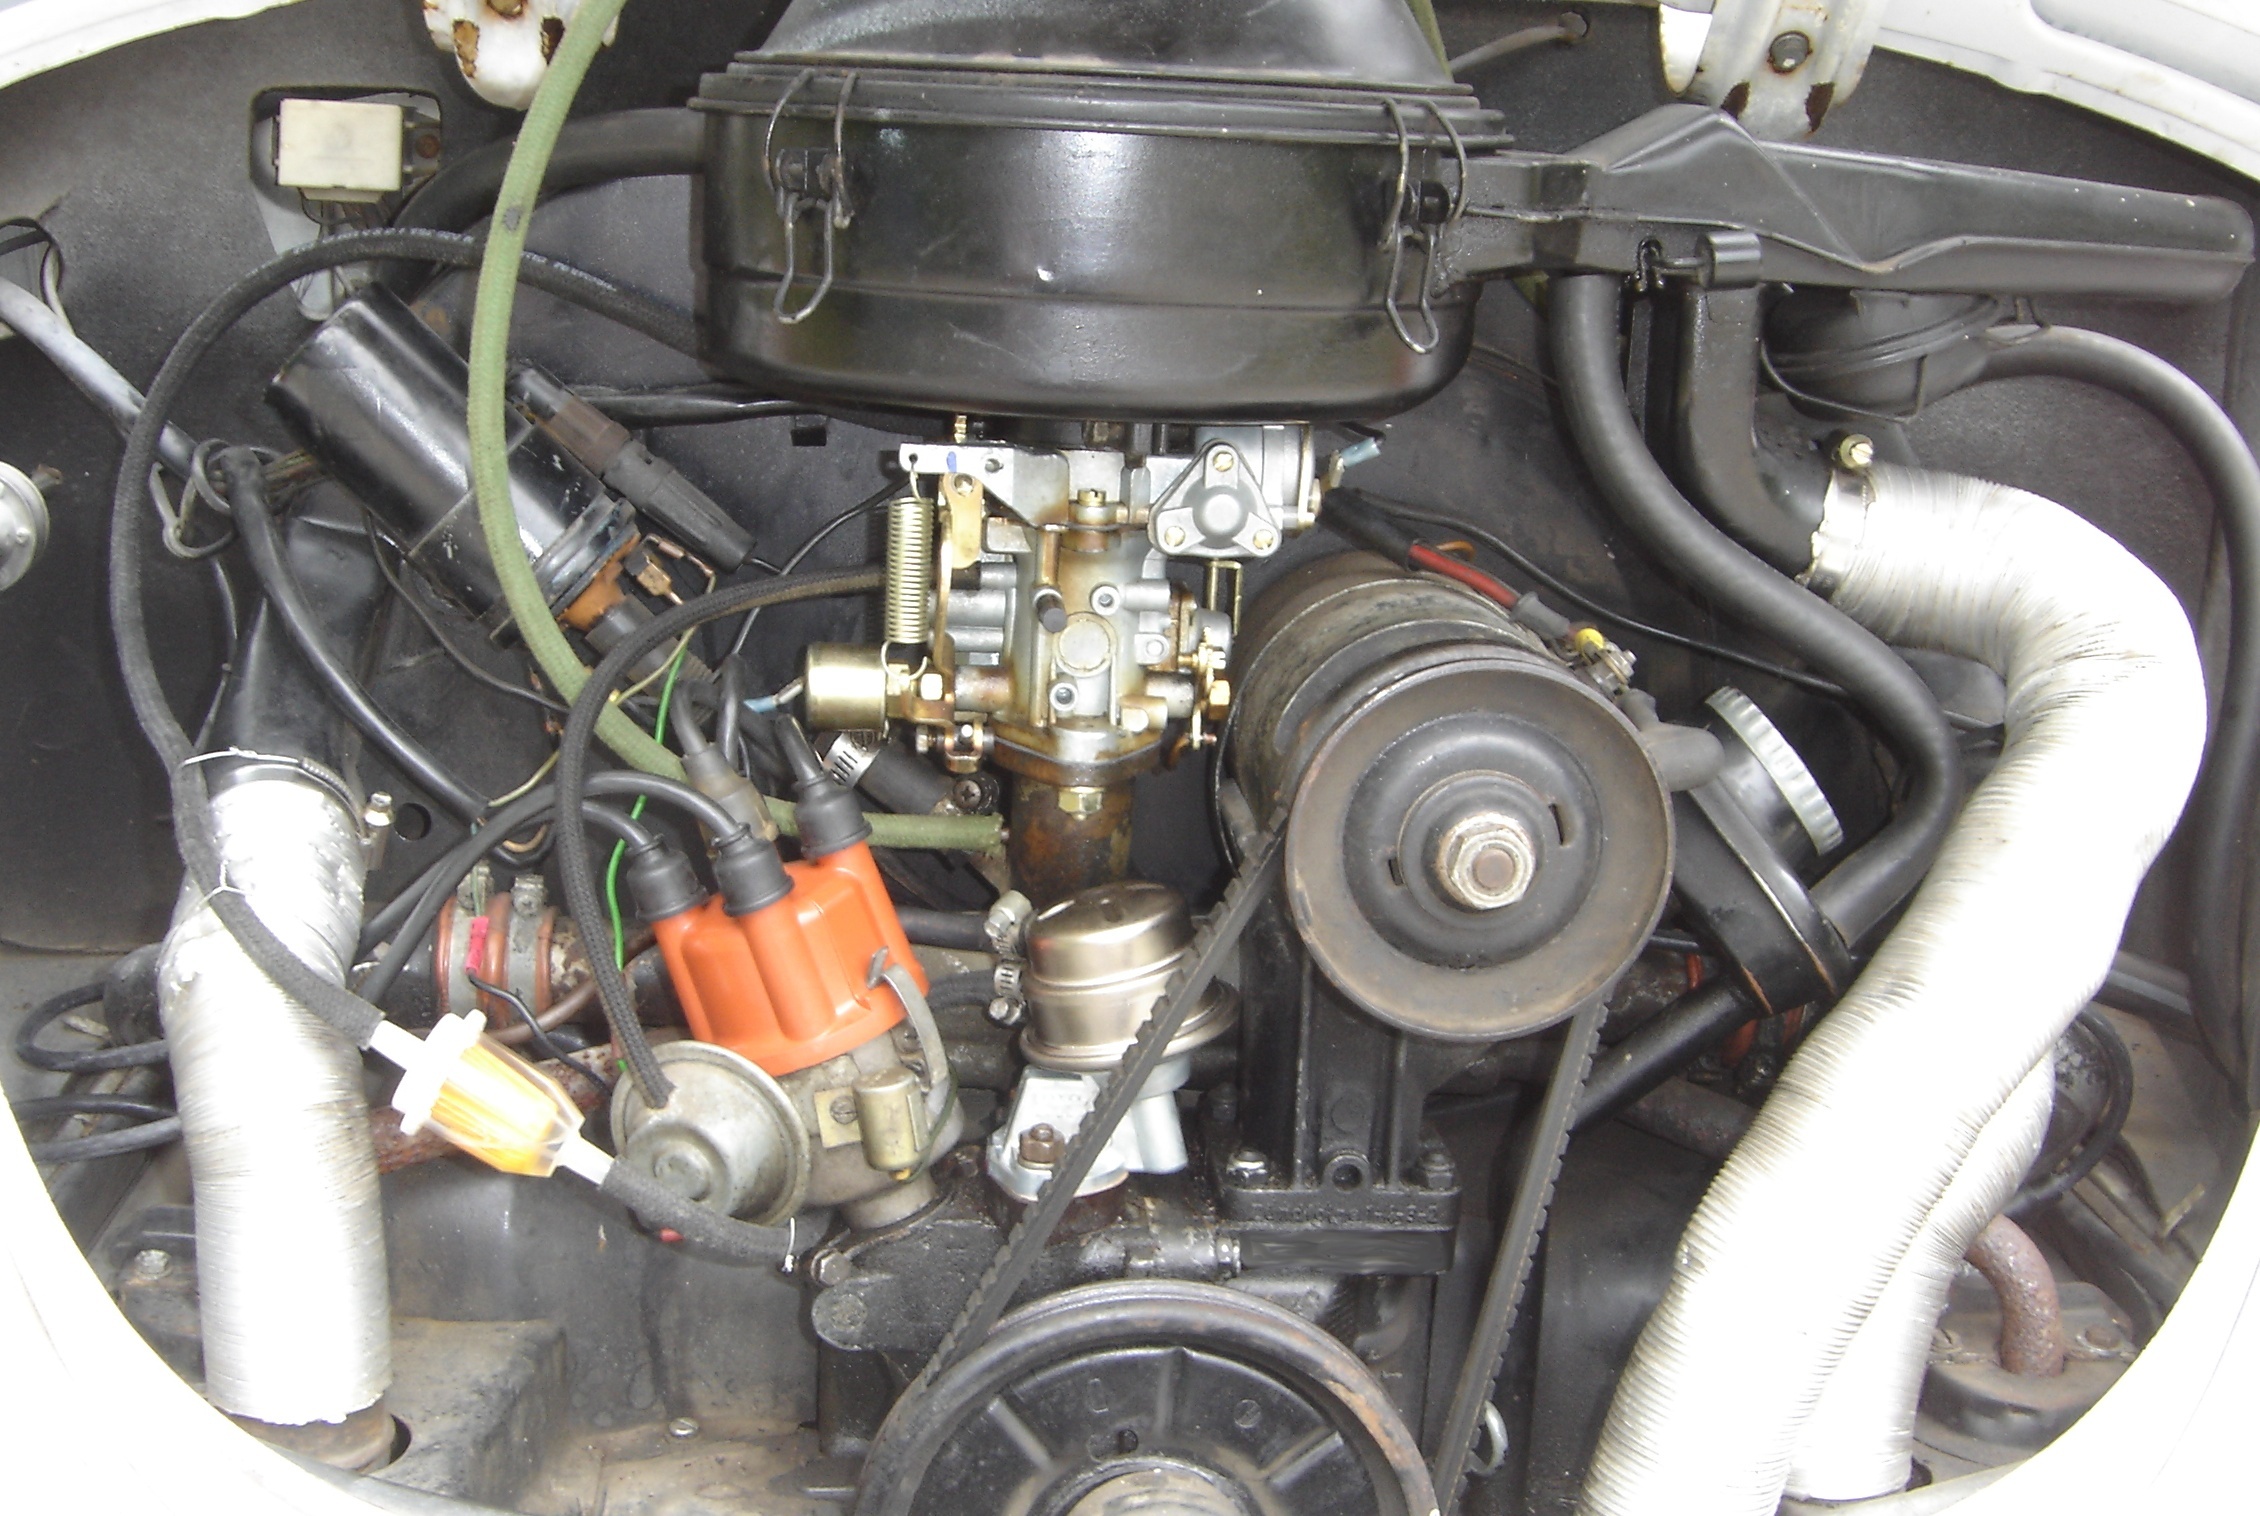
Here's the engine all assembled and ready to test:
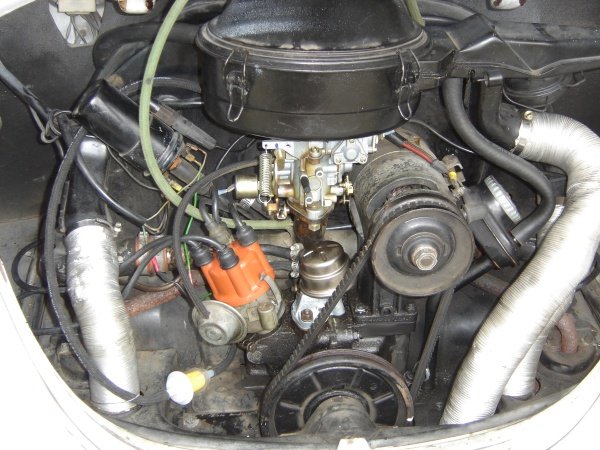
The carburetor is all installed and set up. Note the fuel
pump just to the left of the generator, without a screw in the
top. Note also the in-line fuel filter that I've installed downstream
of fuel pump:
It Is Alive!
After all that, the engine actually runs. Whoo-hoo! This is three or
four minutes into idling, which means that the problem definitely has
been fixed. A sucessful conclusion to my first real car repair.
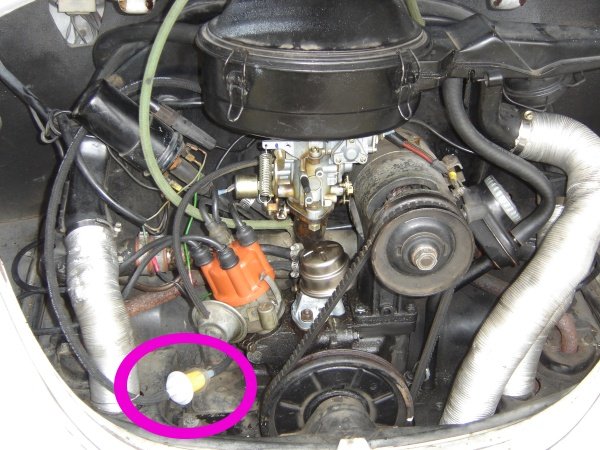
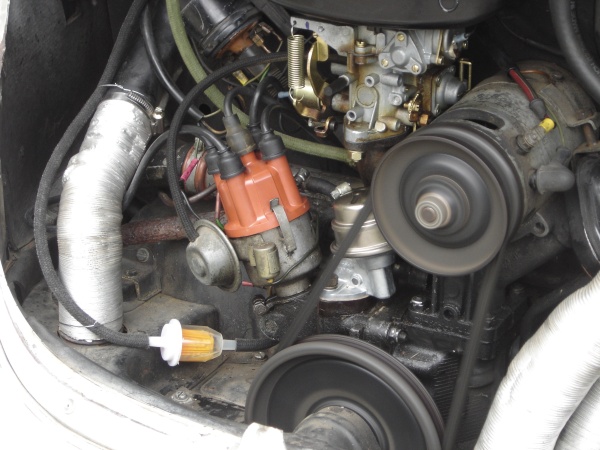
One last tweak before I considered the car commissioned again. In the
previous photos, the fuel filter is sitting on the floor of the engine
on the cooling tin. Well, the underside of the engine is where the
"hot" air goes, and so in my first test drive, the fuel filter got
pretty hot down there. So here I've re-secured it up away from the
floor, but still keeping the fuel hoses away from the generator belt.

The left fuel hose (to the carb) is secured to the air tube to the
heater box, the right fuel hose (from the fuel pump) is secured to the
vacuum can on the distributor.