Site Navigation:
Craig's twitter feed:
Tweets by @gevmage
One of the things about my Beetle that hasn't worked and really bugs me is the brake system warning light. I'm not sure why this has obsessed me so. It's a minor system after all. I guess it's a little bit like getting into playing Lemmings; it should be so simple, so you spend way too much time trying to make it work.
I placed a classified ad on the TheSamba VW site (a fantastic Volkswagen resource by the way), and someone taking a beetle apart sold me one. I didnt' want to go soldering on the only one I had. The light housing is basically a cylinder with the light at one end and connectors at the other, but here's what the innards look like:
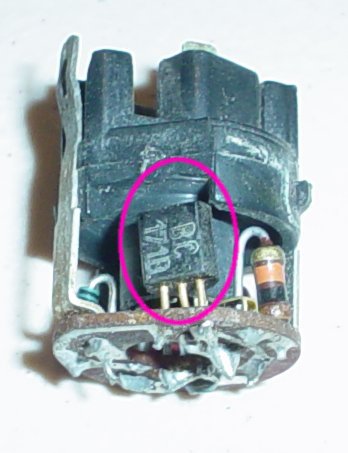
Starting shortly before my car was manufactured, VWs had "transistorized" brake warning lights. The transistor is circled in purple here. I guess the improvement was that you didn't need to press on the light to test the bulb, instead the light comes on when you turn the key to "on", like the other warning lights. Unfortunately, it turned out that the components that formed the two circuits in the light (one for warning indication and one for power-on-test) were far less reliable than the bulb itself.
To fix it, I needed to figure out how it was supposed to work. With a magnifying glass and an ohm-meter, I figured out how the wiring was supposed to work. Here's a diagram for those of you into that sort of thing:
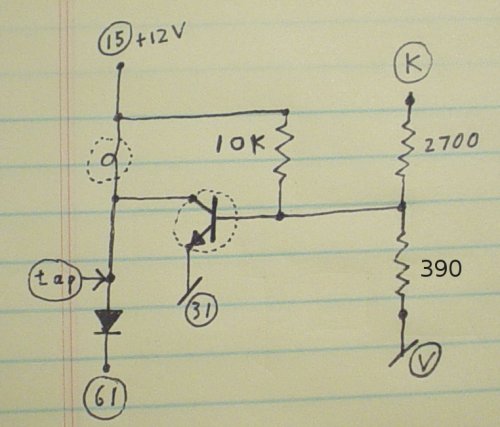
The labels in circles (15,K,31,V, and 61) are the labels on the connectors at the back of the warning light housing. Where I've labelled "tap" is a metal stud on the back that isn't meant to be hooked up in the car but is useful as a diagnostic tool when you have the light out of the car. (To keep this post blogg-ish, I will relagate the explanation of this circuit to my full write-up).
This was my reverse-enginneering of the bulb, but before I went soldering on stuff, I wanted to make sure I wasn't hallucinating. So I wandered down to Radio Shack and got a pack of NPN transistors and resistors suitable for duplicating this circuit. After reading on-line and resurrecting my dim memories of electronics class (1994-ish), I go this circuit to work properly.
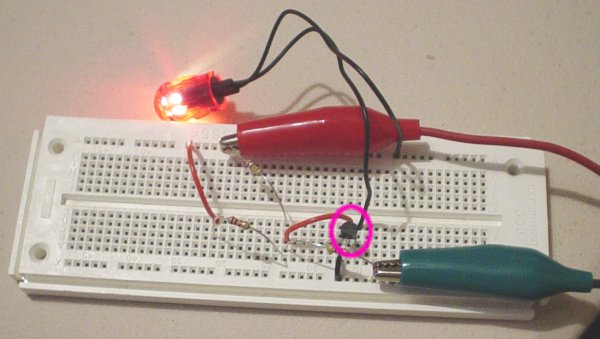
Again, the transistor is circled in purple.
So I removed the old transistor, soldered in the new one, and hooked it up to the car, and it works. I'm currently in the process of getting the red lens for the light into a shape that will stay in the light, and then it will be done.