Site Navigation:
Archives:- May 2018
- September 2017
- February 2017
- December 2016
- February 2016
- December 2015
- July 2015
- April 2015
- January 2015
- December 2014
- April 2014
- December 2013
- 2018
- 2017
- 2016
- 2015
- 2014
- 2013
- 2012
- 2011
Craig's twitter feed:
I talked in this post about wanting to get a Hyundia Accent as my next car. I still liked the VW (New) Beetle fine, but I haven't been really excited about it in years. The air bag light came on and stayed on recently. And I had a couple of stressful days about things that I couldn't do anything about. So I decided that was the day to go swap out cars. I searched for a Hyundai Accent with cruise control, and came up with one. So we went and bought it and swapped cars out.
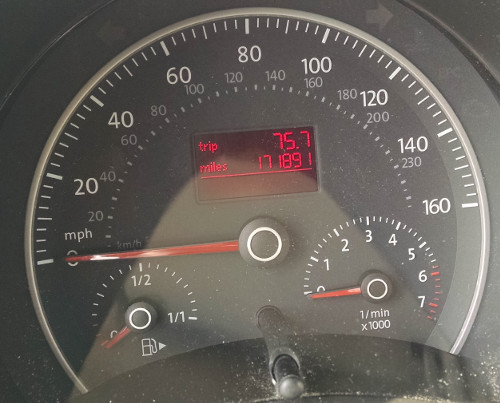
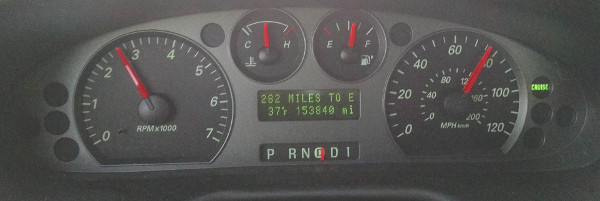
Here's the last Beetle odometer reading when we traded it in at the
dealer:
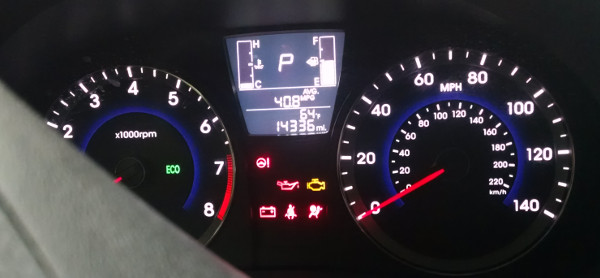
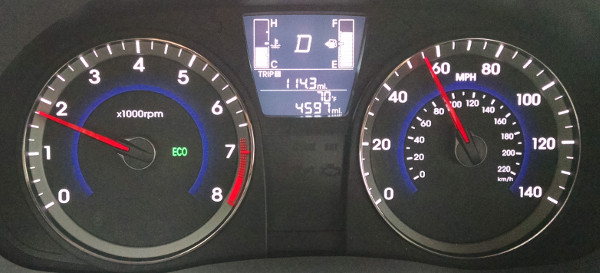
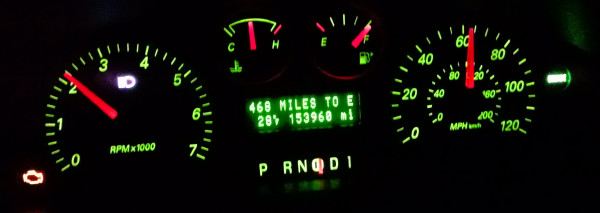
and the new(er) Accent at startup:
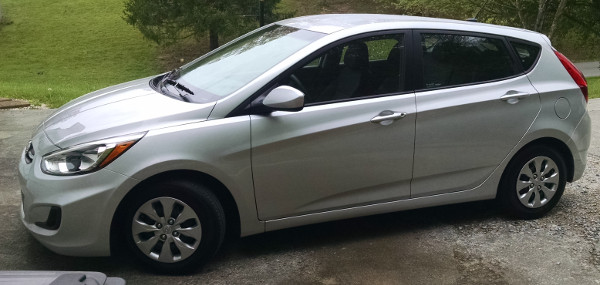
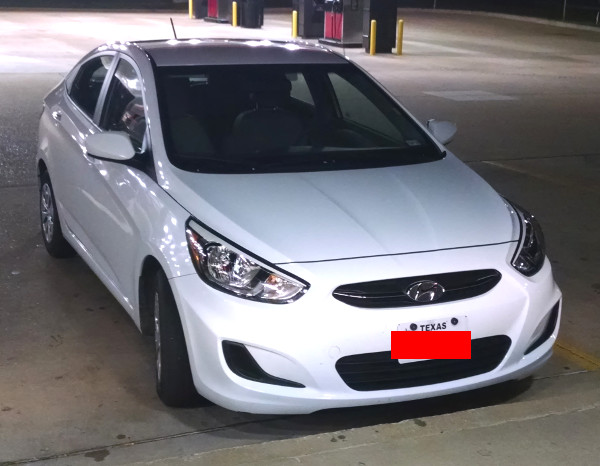
And parked at our house:
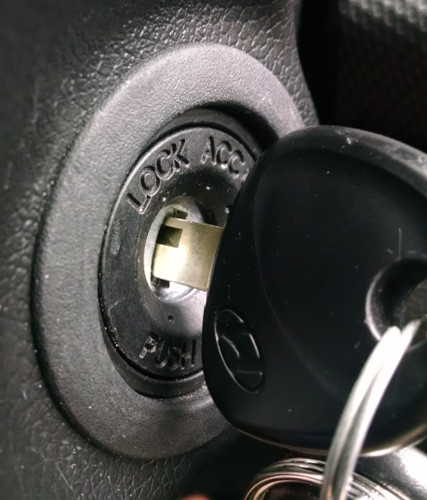
It has a real live key to start, and the only genuine "ACC" position
on a key cylinder that I've seen in a modern car in a very long time!
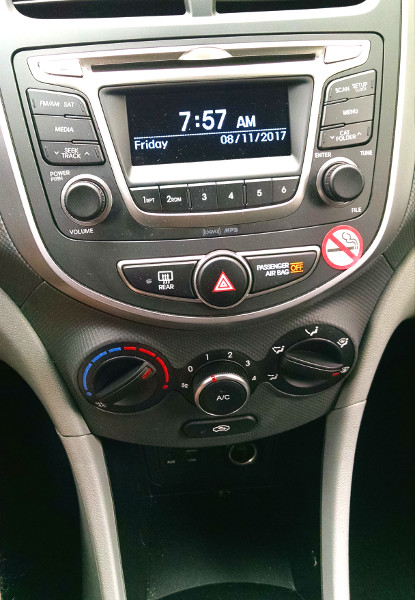
It has a built-in satellite radio, which I got configured on
Saturday:

which is nice in that there's many fewer wires around than I had in
the beetle.
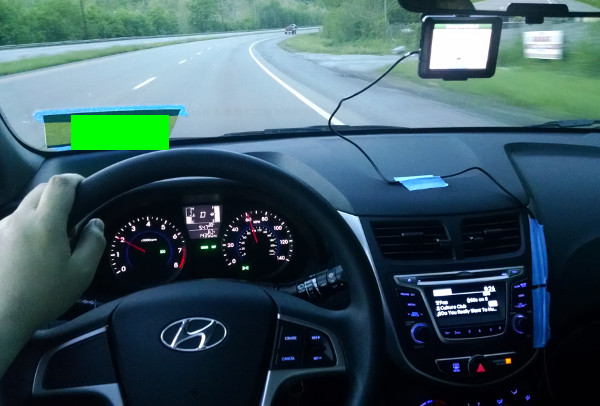
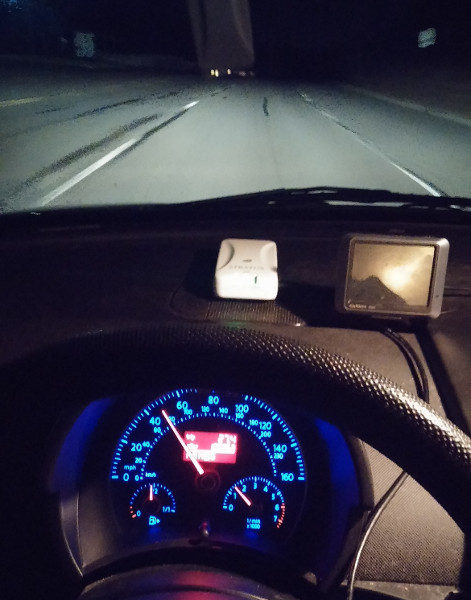
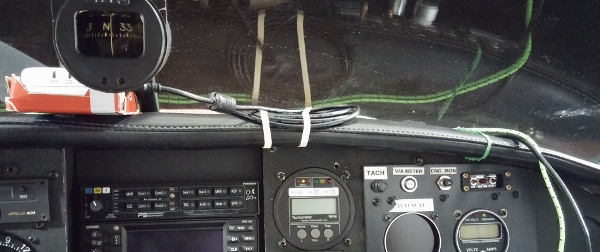
Here's my view driving. I do still have the power wire for the dash
GPS navigator.
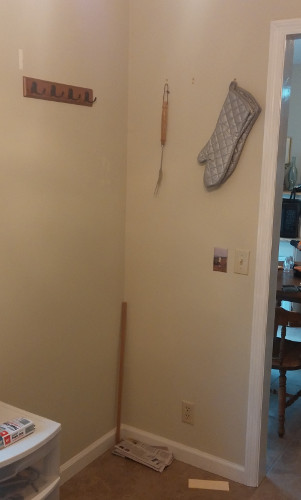
I worked on a couple other infrastructure problems this week. I've
had a ink stamp that I've used for putting our return address on
things since we moved here. I got a new ink pad recently, but I also
needed to replace a couple of the characters. I do that, and I also
wanted to create a place to hang up the stanp. I decided to do that,
and then 15 minutes later, I had one made out of double-headed nails
and a piece of scrap wood:
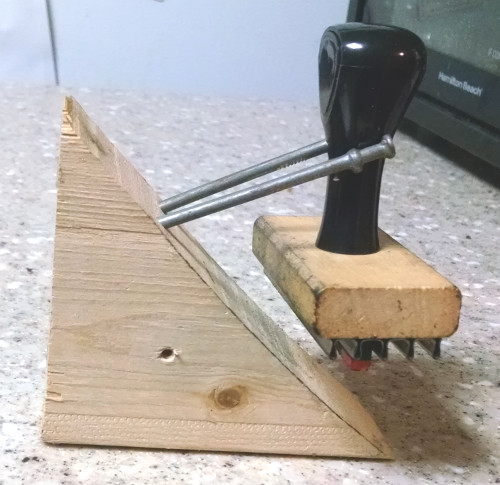
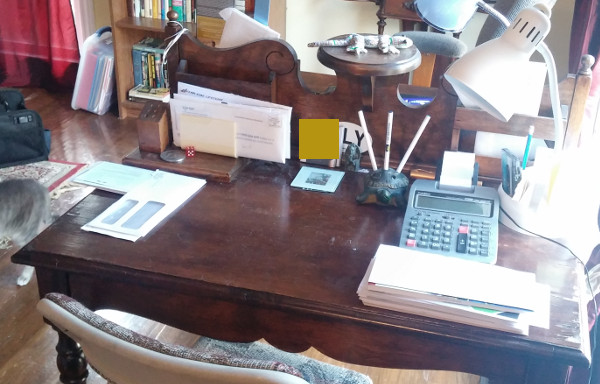
which now sits at the desk where I pay bills.
And I'm going to try to carve out the time to put the vintage Beetle
back together and get it running. On Monday I used over cleaner to
clean some of the carbon off the cylinder heads:
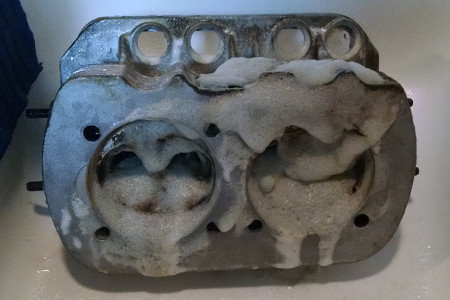
(I forgot to take an "after" photo.)
And I've been getting all the engine pieces together in the garage.
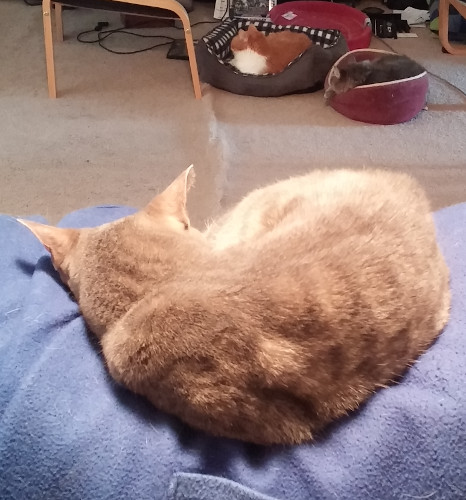
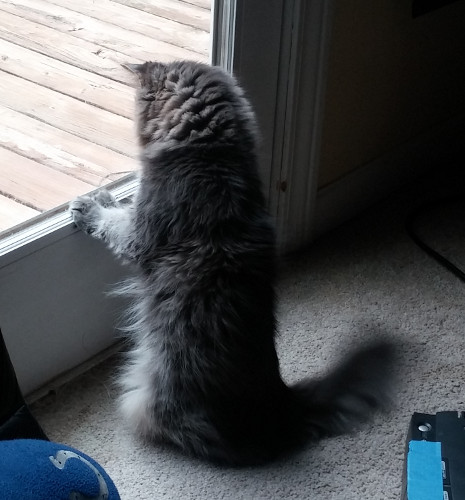
Here is Pangur, inspecting my work:
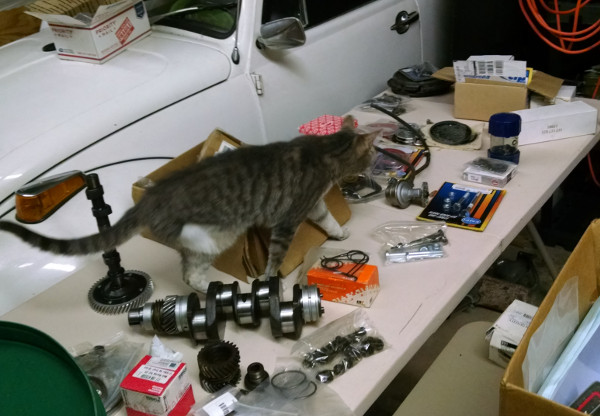
In the foreground you can see the freshly reground crankshaft and the
new camshaft. In the background, engine mount sets, seals, hardware,
and way at the back the clutch.
At some point my 2008 VW, which has been my trusty steed for over 8 years
and 145,000 miles, is going to fall out from under me and won't be
worth keeping. I do a lot of my pre-car shopping from rentals. I've
liked Hyundais for years, but due to a rental I had recently when I
was getting my airplane back from annual, the Hyundai Accent is now at
the top of my list.
For one thing, it's just a pretty car, especially the white ones.
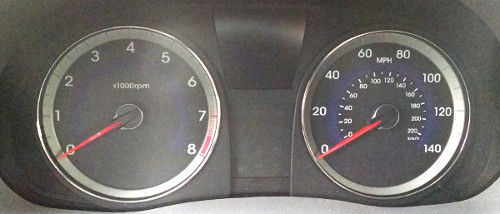
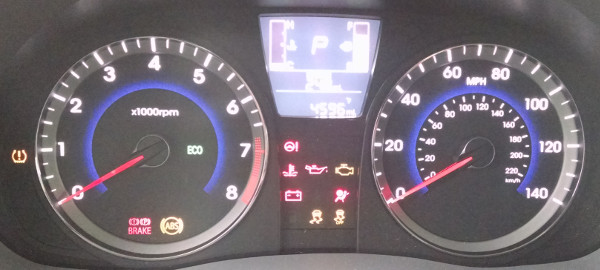
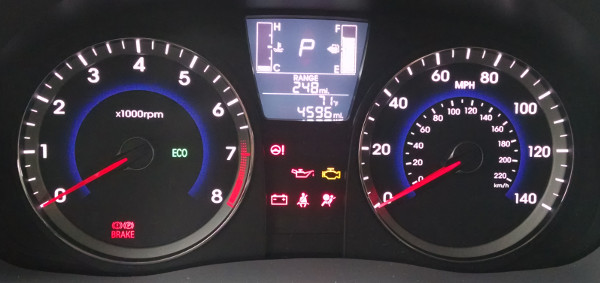
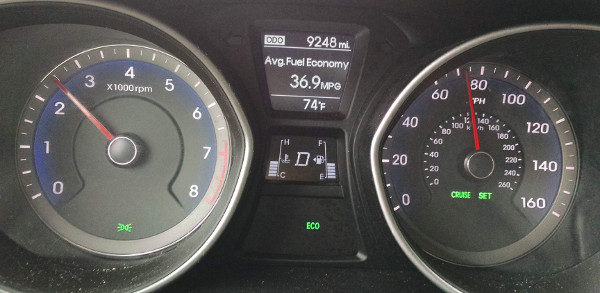
I have to say, I really like the combination of the big analog gauges
at the sides for rpm and speed, and the digital strip gauges for temp
and fuel at the top.
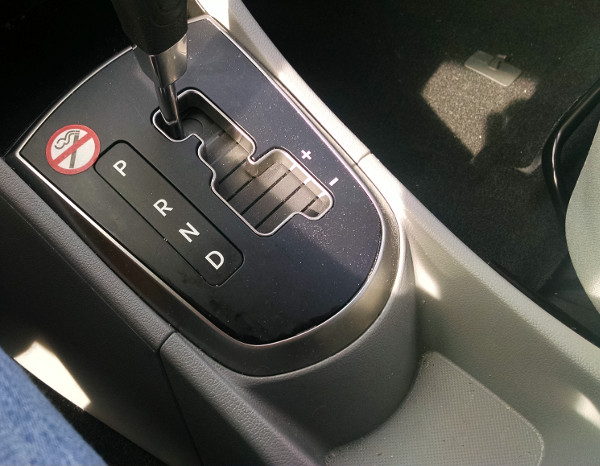
I like the gear shift setup and the feel and the action of the gear
shift. And it has manual shifting when you want it. It doesn't have
the sport shift that my VW does, but I'm not sure how much I'd miss
that.
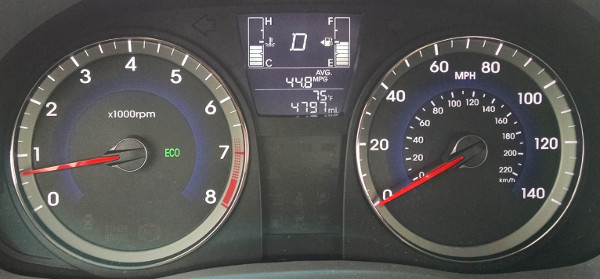
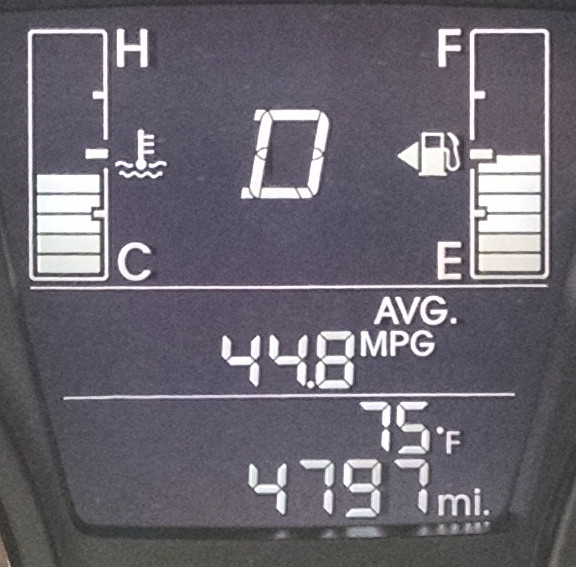
It got over 44 miles per gallon during the time I was driving it,
which is crazy-good for a gasoline car.
And it was nice to drive. One annoying thing was the rental didn't have cruise control. I know they come with them, so I'd want to be sure to get that or have it added. (This is a blog post that's as much a reminder to myself as anything.)
Sleeping overnight in Meridian, Mississippi on the way back home, I was figuring the trip was going pretty well. I'd been delayed by half a day by weather, but that was vastly better than several of my colleagues. So I headed to the airport first thing Monday morning to fly the last leg home.
.....aaaaaand there was no response from the electrical fuel pump.
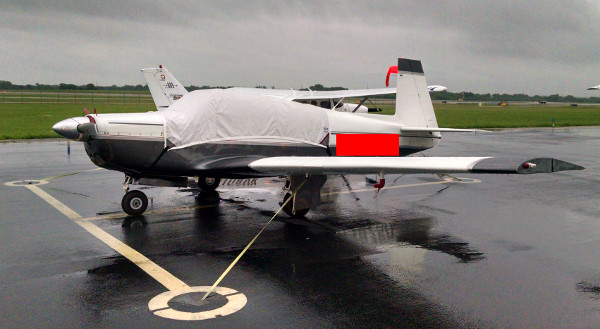
It's not NECESSARY to fly the plane, or even to start it, but it IS
the backup in case the engine-driven fuel pump fails. So I had it
towed to the local repair place:

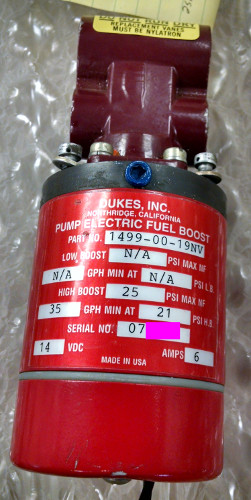
Here's the culprit, ready to be shipped off as an exchange for an
overhauled pump:
The shop on the field was mostly a turbine-airplane place, but I was able to help a mechanic get the proper access panel off and get him to the electric fuel pump. I then arranged to overnight the bad pump to the people with spares, and my wonderful wife (thanks darling!) shipped a check to the repair place (they don't take credit cards). Then I rented a car a drove back home, and left the plane there to be fixed once they got the pump back.
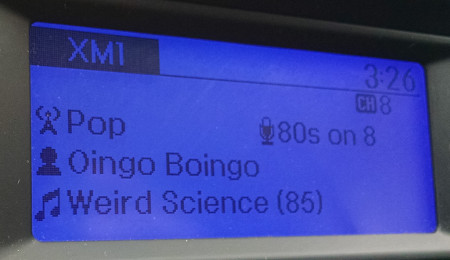
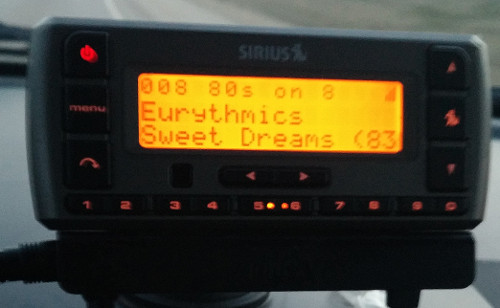
I ended up renting a Hyundai of some sort. I felt it was good omen
when songs like this kept coming on the satellite radio:
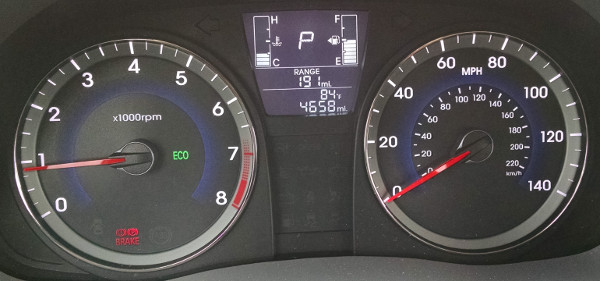
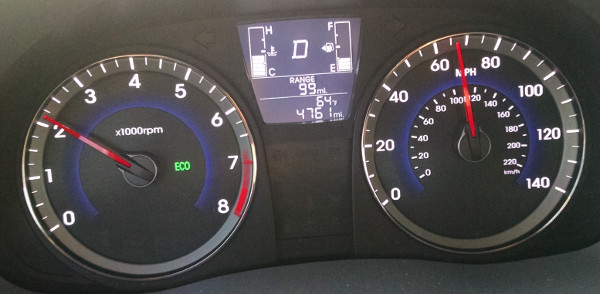
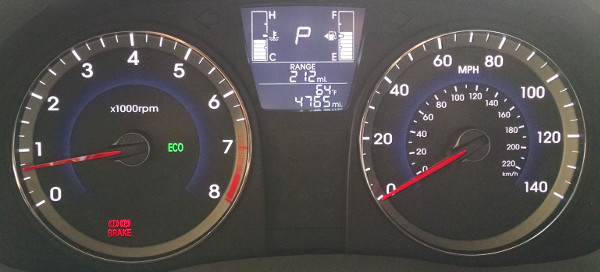
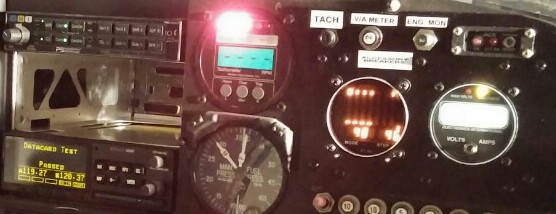
Obligatory instrument panel photo (pretty efficient car):
And a nice underpass on the way home.
I did get the airplane back eventually. But first, other house stuff.
Back in Austin, the plan was to fly my plane to Kerrville to the
Mooney fly-in, so that I could, finally, have my plan parked on the
field in front of the Mooney factory. The weather was crappy enough
that I decided to leave it tied down in Austin
and rent a car and drive to Austin instead.
My vague memory of the original planned sequence was this. I flew commercial from Oregon to Austin Friday morning. I got into Austin mid-afternoon Friday. I had planned then to fly my airplane to Kerrville and stay Friday and Saturday nights, and then fly all the way home on Sunday.
(My vague recollection is): The weather was bad in Austin when I got there, so I decided to wait to Saturday morning to fly. I was so tired I mostly went to bed. Saturday morning, the weather was slightly better but I'd have to be doing an instrument approach into crappy weather into Kerrville, so I decided not to. I rented a car to drive to Kerrville and back. (A lot of this is because I was giving a talk on electronic flight bag solutions that I hadn't finished yet. I'm a really really bad procrastinator sometimes.)
I rented the car in a huge hurry Saturday morning because I had to get on the road. I drove to the hotel in Kerrville and then sat in my hotel room for an hour finishing my talk. I gave the talk, that was fine, and then that evening was the banquet, which I stayed for the food and about the first half of the entertainment part. Since I was leaving so early the next morning, I ditched out of the rest of the evening.
I left super-early Sunday morning, like 4am. My plan was to race the thunderstorms that were coming in to Austin and try to get off the ground going east before they hit. It was interesting to drive with thunderstorms right behind you in the dark on roads you don't know. I got to Austin, and before I could get out of the rental car, it was bucketing down rain.
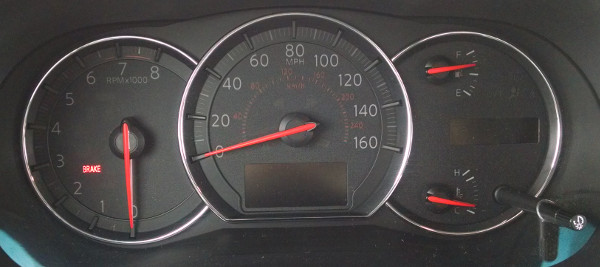
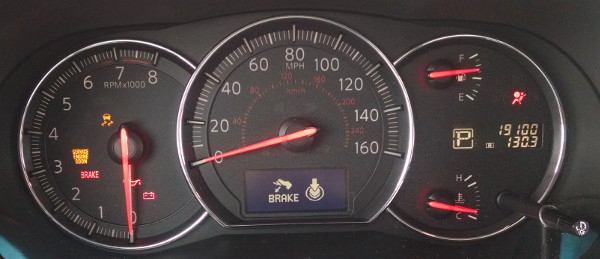
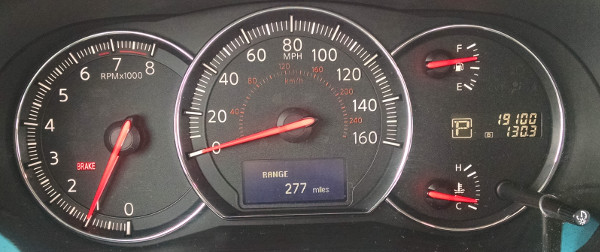
The car was GREAT to drive; I found out later one of the reasons it
accelerated so smoothly is that it has a continuously-varable
transmission. What with all the hurrying, I never got a photo of the
outside of it. I just have these three instrument panel shots. I
managed to figure out from screenshots that this is a Nissan Maxima.
Very nice car.
Mooney was prototyping a plane that they're going to be selling. A
small two-seater. Here's a couple of shots inside.
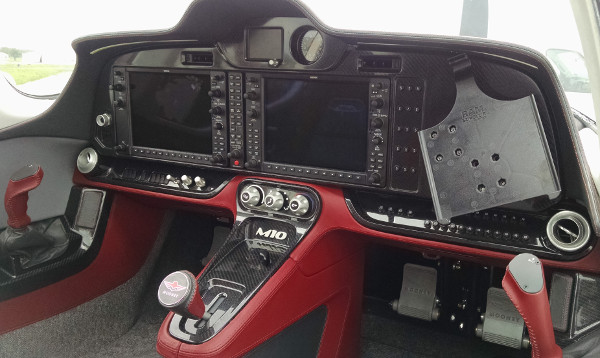
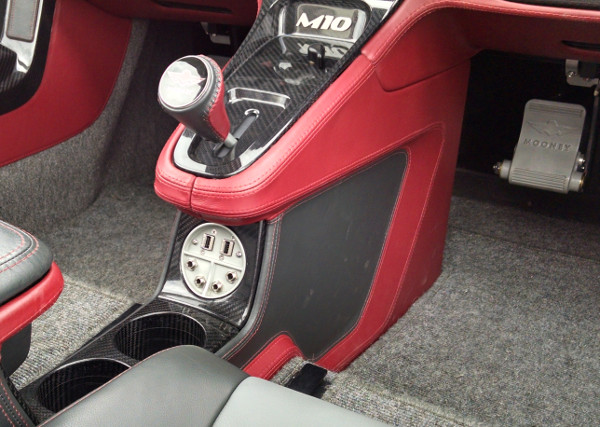
Note the single-level engine control in the center console. All
glass-panel; I think that's a Garmin 500? And with an iPad mount
already built-in. And USB power jacks in the center console:
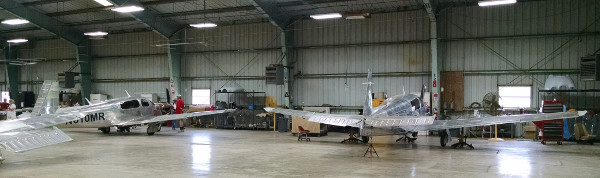
As usual, there were tours of the Mooney factory. Here's the final
assembly area:
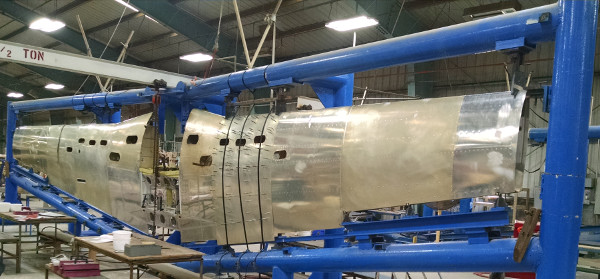
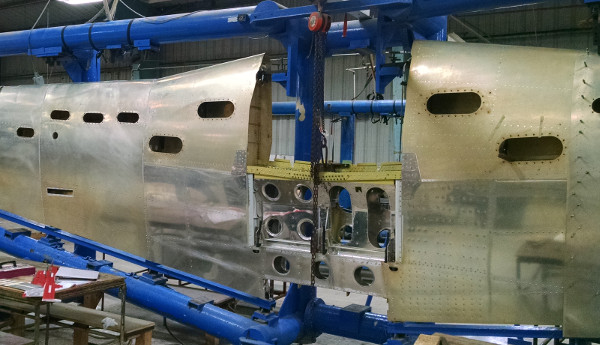
And the wing assembly jigs:
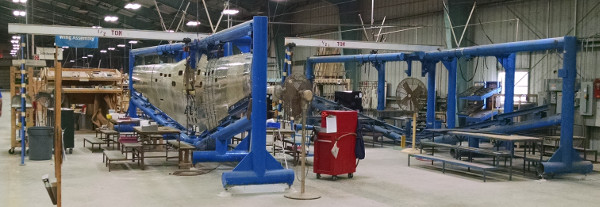
The oval holes in the wings are fuel tank inspection/service hatches.
These mooneys will have fuel tanks that fill more of the wing than
mine. My tanks only have three service hatches per side.
I dropped of the rental car just as the storms hit. So I ended up
chilling in the FBO for several hours. I actually used their pilot
nap room to make up for having such a short night. I left
mid-afternoon; too late to make it halfway home but early enough to
get fuel in Meridian Mississippi again.
So I grabbed a hotel there for the night.
The saga of leaving Meridian the next morning will be the next post.
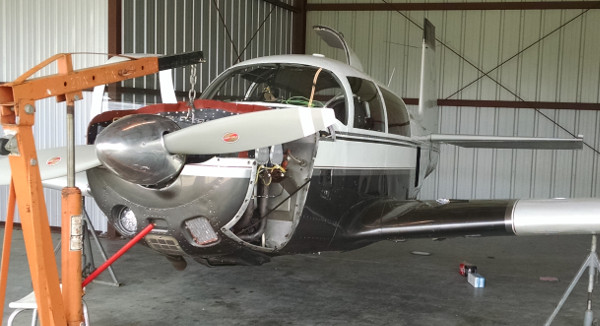
April/May 2015 was the first annual for my airplane since the propellor was replace and engine overhauled in 2013-14. This was the first semi-normal annual. Still plenty of work done, but not major systems were replaced.
Taking apart the spinner to annual the propeller.
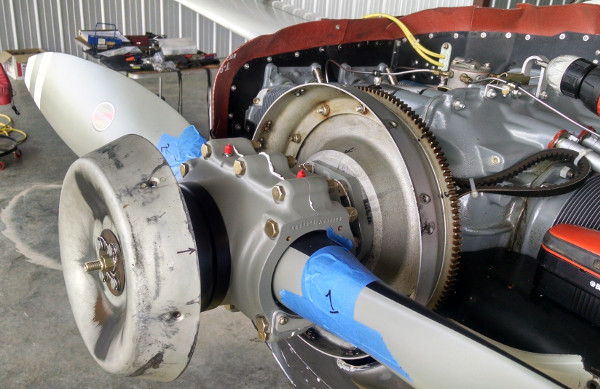
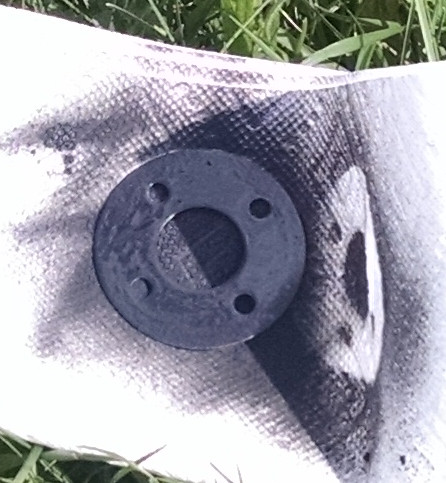
The pressure plate was a bit rusty and wasn't holding pressure on the
front spinner bulkhead.
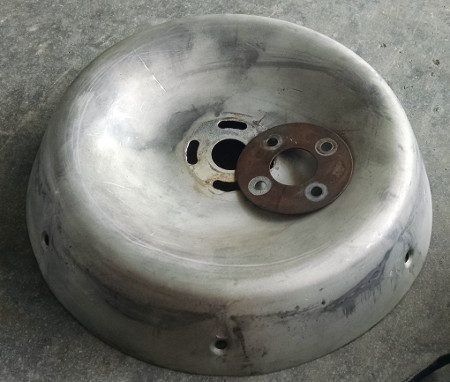
We painted the pressure plate so it at least wasn't corroding.
Prop dome with the spinner bulkhead removed.
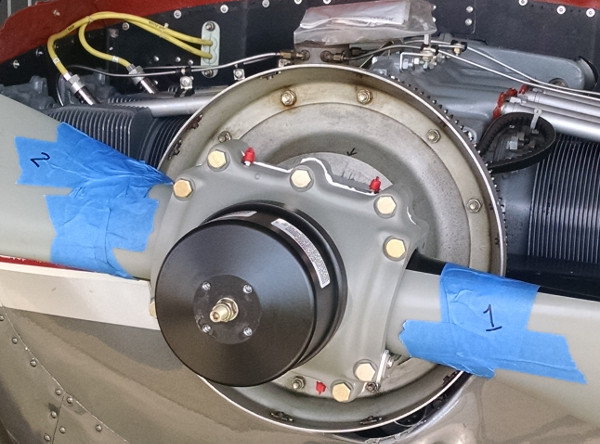
Electric fuel pump, fuel selector and fuel system sump at the bottom
of the photo.

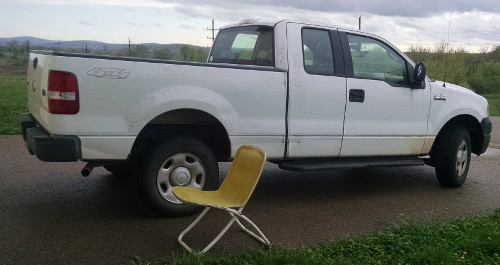
While parts came in and we worked on stuff for the annual, I was
driving my father-in-law's truck around.
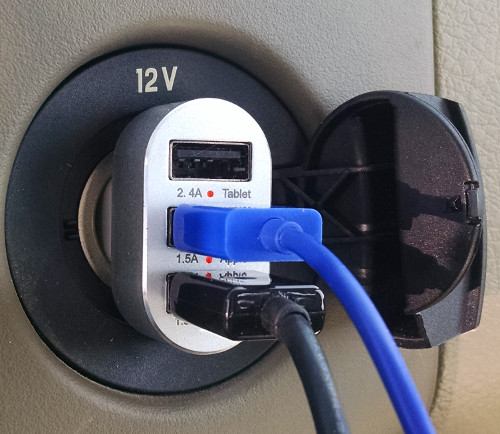
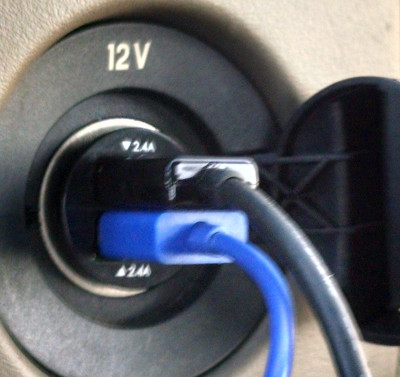
When we had a break, I took a couple of days and drove to HQ and spend
a couple of days in the office. Here's the office recharging setup.

I spent a good bit of time during this trip testing chargers in the
truck for use
in the airplane.
Back to the annual, all the belly panels off.
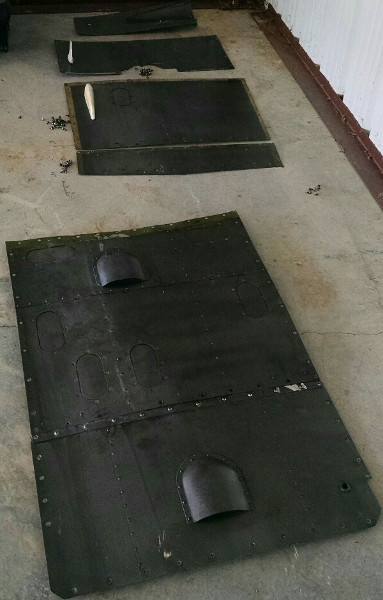
It was my first time taking the panels off. Over a couple hundred
screws; I stripped three and had to extract them by cutting a slot
with a dremel tool.

We did some work on the landing gear. Here's the plane on jacks, gear
retracted, looking vaguely Airwolf-like.
It's been a long fall. And November was very rocky, for various reasons. Oy. Mostly the election. Double-oy. I frankly still have an emotional hangover from that, five weeks later. But trying to put the pieces back together, I guess I'm also trying to resume normal life.
So last time I was blogging about the past, I was back up through April 4, 2015, roughly. We continue the narrative from there. I bought a new phone then, so photos since are from my current phone, the Droid Maxx, which I got because it has MUCH better battery life than the LGE.
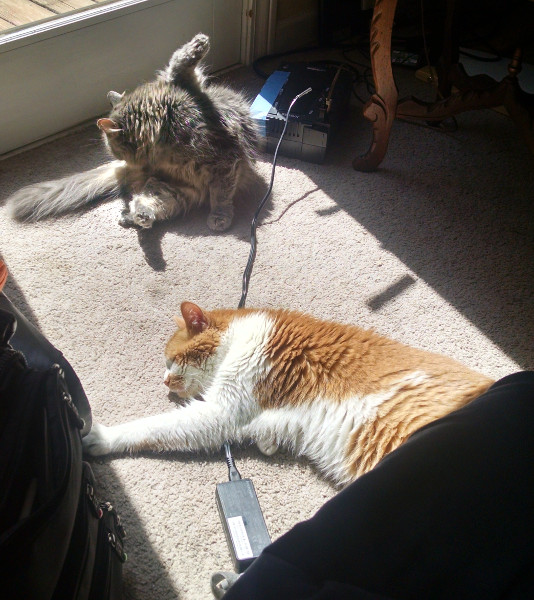
Here's Pangur reviewing the Verizon bag my phone came home in:

and the other cats editorializing what they think of all of this:
I was still working on commissioning the front stoop/porch. The gate
didn't close well with two hinges, so I added a third spring hinge in
the middle.

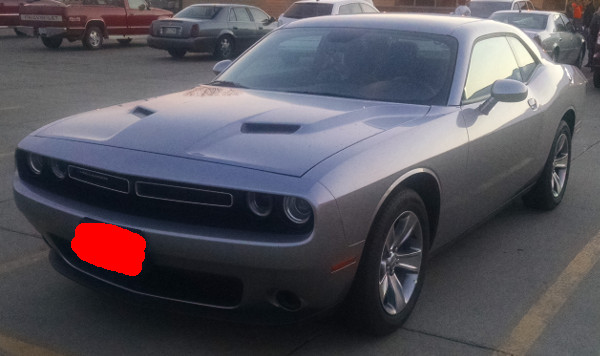
And finally, my mother's mother, who had been in declining health for years, died in such a way that we had a time window to go to the funeral. My wife and I flew to Omaha and then rented a car to drive up to South Dakota for the funeral.
In all my travelling for work starting in 1994 through now, twice I've
randomly received a cheap rental car upgrade to any car on the lot.
Once in 2010 when I was in Minnesota to get my instrument rating, and
the other was trip I took in March of 2015 to California via
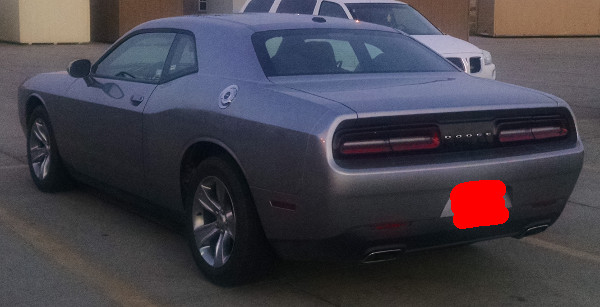
Minnesota. I was all prepared to get compact sedan, but she wanted to
get a fun car too, so we got a Dodge Challenger:
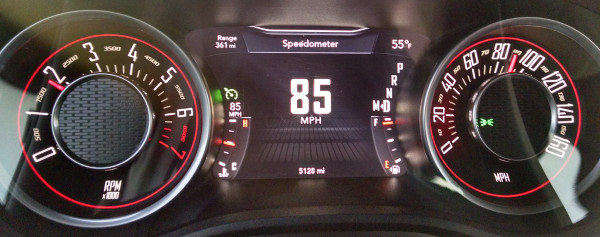
The drive up was along Interstate I-29 along with Missouri river
valley, which has an 80 mph speed limit. We spent the time driving 85:
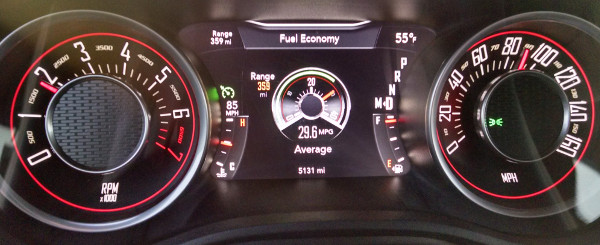
What was amazing was we got almost 30 mpg. The engine was only
turning 1800 rpm:
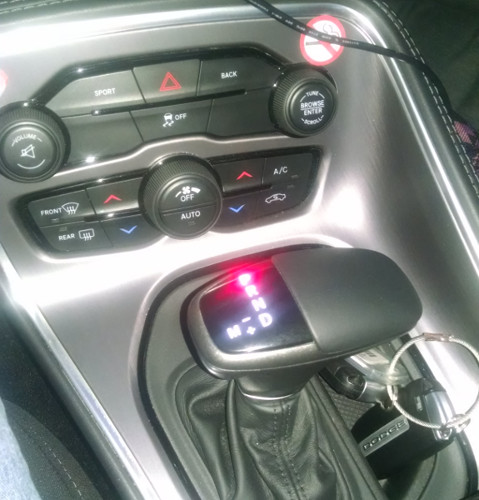
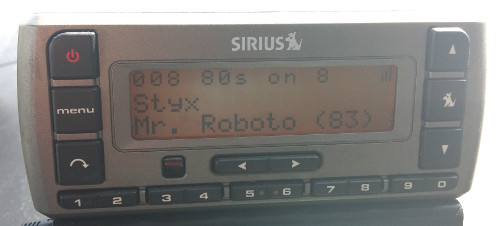
It had Sirius Satellite Radio. Of course, this was on:

Not much of an entry, but I wanted to get back into it. That takes us through April 12, 2015.
One of the things that frequently bogs me down in blog posting is when I have a post to make that has a ton of photos, I end up not doing the post for weeks because I don't have the time to put together to edit, crop, and prep them. So the really good, dense posts end up being the ones that slow things down. So for this post, I'm just going to split up the posts, and do the image editing and writing when I have time to do them separately. So this is part 1 of something, maybe 3 for the whole trip.
In March of 2015, I took a trip to a conference in San Jose, California for work. The conference went the entire week, starting on Monday evening and going through Friday. The airline flights lined up in a wierd way; there basically wasn't any way to construct the trip to fly out of my normal airport (Knoxville, TN)(TYS) without adding several hundred dollars, so the base price ticket would have been flying out of Louisville, which more than I want to normally drive.
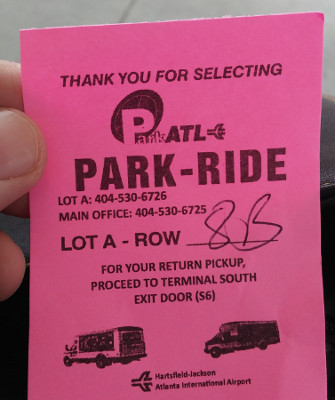
So I set the cost of the base ticket by the Lousiville flights. But if I'm driving out of Lousiville, I might as well drive slightly farther and fly out of Atlanta. That gives me MUCH more flexiblity in picking flights. In fact, it gave me enough flexibility to actually add a whole leg to the trip by only kicking in a bit more on the tickets myself. So instead of flying directly to California, I flew out of Atlanta to Minnesota first thing on Saturday, spent the weekend visiting family and friends, and then flew from Minnesota to San Jose on Monday.
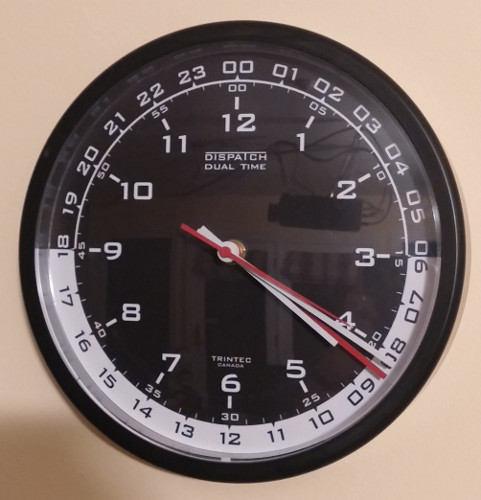
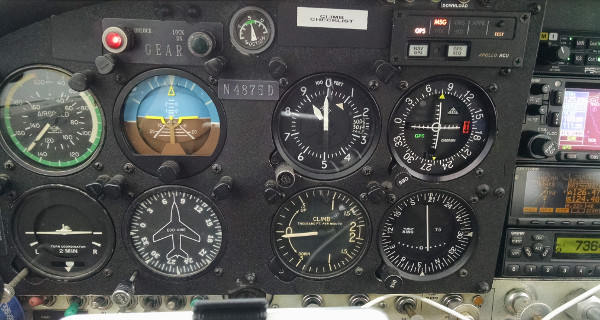
Just about to leave the house at 04:20 in the morning. It amuses me
that the clock with four hands (the long red one is the 24-hour hand;
it's just after 08:20 GMT) are all pointing in basically the same
direction.
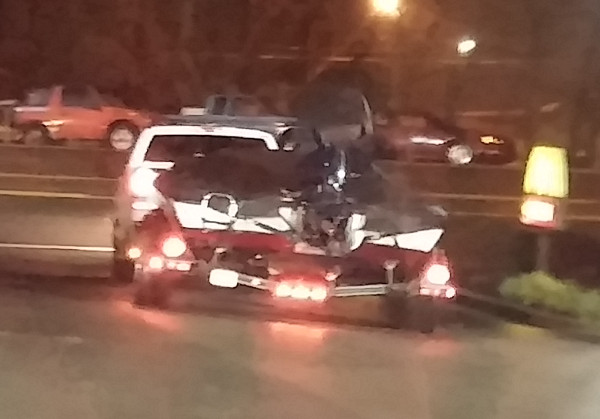
It was first thing on Saturday morning, and it was a relatively warm
spring-like day. There were a ton of people out at that time of the
morning towing boats; I presume for the first outing of the spring.
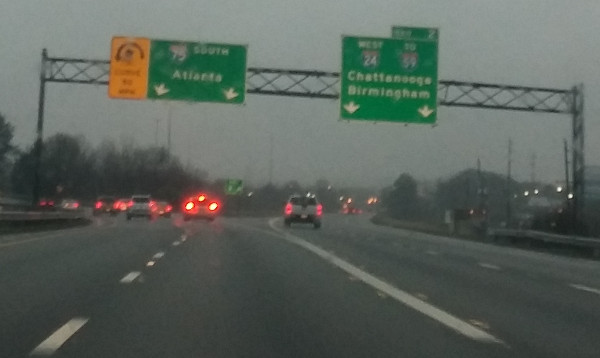
By the time I got to the I-75/I-40 split on the west side of
Knoxville, the sun was a bit up.
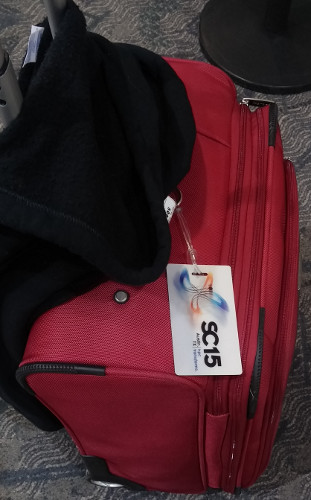
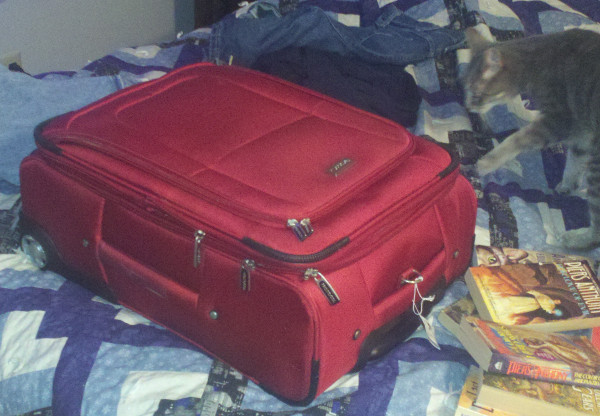
My suitcase, notable because it's bright red (easy to spot if they
tell you the wrong carousel by one) and for having a tag for a
conference that hadn't happened yet.
And it got interesting when we got to the airport. Enterprise rental
at MSP apparently had a surplus of cars, so they were offering to
upgrade to anything on the lot for a very small sum. They had an
electric blue almost-new Ford Mustang on the lot, so I took it.
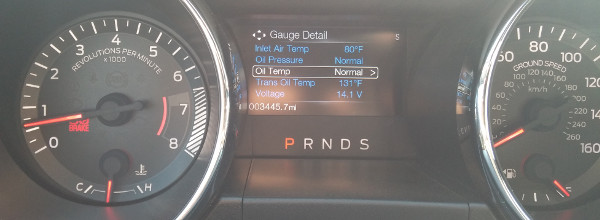
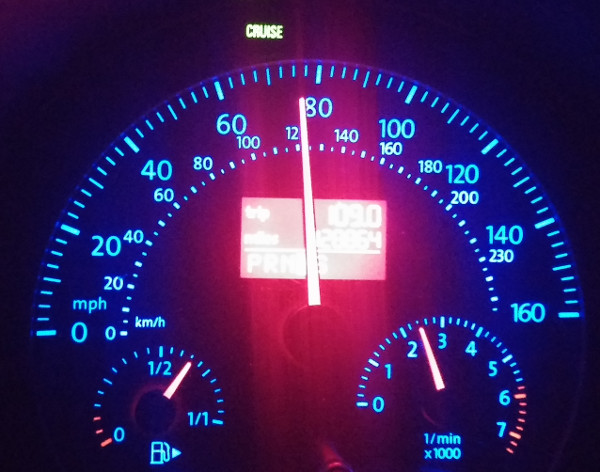
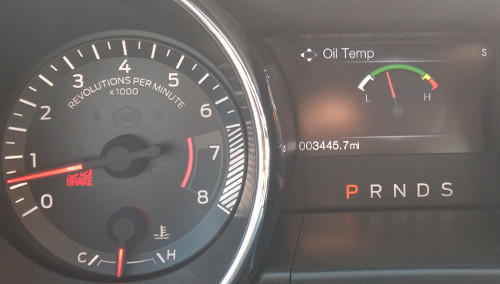
The dash on the Mustang was interesting. The center box can be
configured for a number of different things. It can display text
gauges:
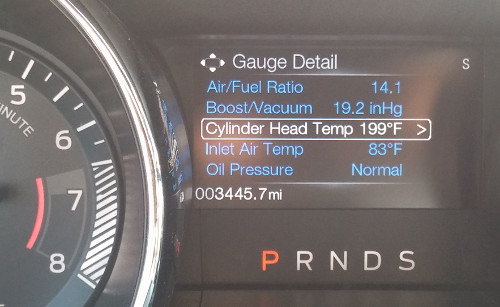
or quasi-analog gauges:
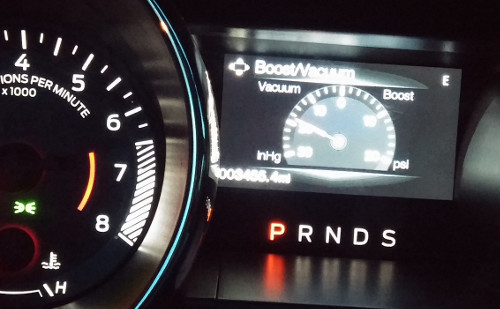
The "vacuum/boost" gauge is amusing. One, because I'm pretty sure
that car wasn't turbocharged. Also, I paid attention to that gauge
while driving. It probably was connected to some sort of manifold
pressure sensor, but it definitely wasn't reading true, or else the
zero was (possibly deliberately) way off. To get the gauge to come
anywhere close to 0 vacuum, you should have to bury the accelerator,
and I could get it to hit "zero" with only moderate acceleration. Ah
well, probably for the best.
So I visited family on Saturday. But I decided that with a magnificent car like that, it was a moral imperative to a least do a little road driving with it. It would be a shame to have something like that and just stay around the Twin Cities. So I pinged a college friend, who also lives in the Cites, and proposed that we take a Sunday morning road trip down to our alma mater. She was game, so I headed up to her house first thing Sunday and we did some driving across the state. The photos from the trip itself will be from the next post.
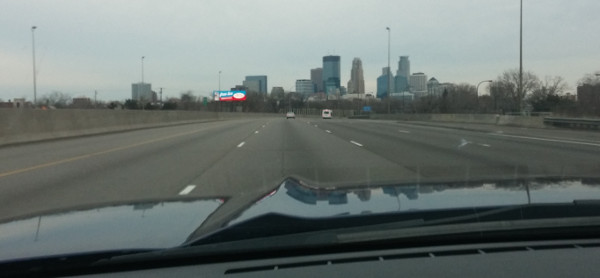
The Minneapolis skyline over the hood of the Mustang.
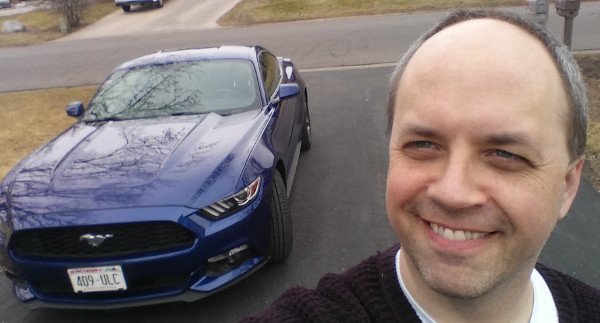
Me, ready to road trip. I kept me in this photo mostly because it
amuses my wife.
This trip continued in a future post.
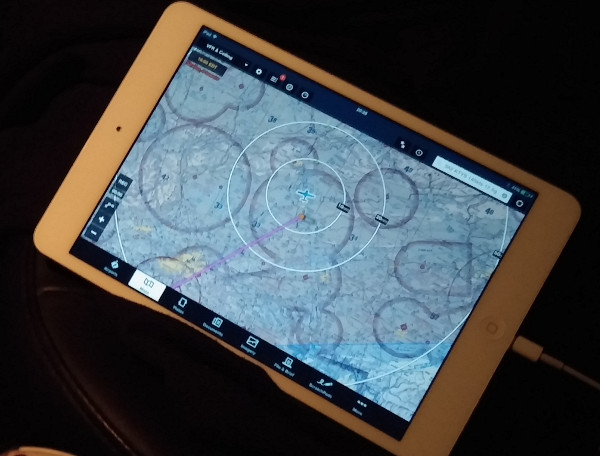
Photos that amuse me. I was driving somewhere and messing with the
Stratus with ForeFlight.
Before everything got crazy in March, here are some overall posts that kind of cover January and February. In two separate posts to avoid photo overload.
I am ever-so-slowly collecting parts and tools to put my 1972 VW
engine back together. I'm going to tap the case to plumb in an oil
filter. To do this, I got the proper drill bit, tapered ream, and 3/8
NPT tap:
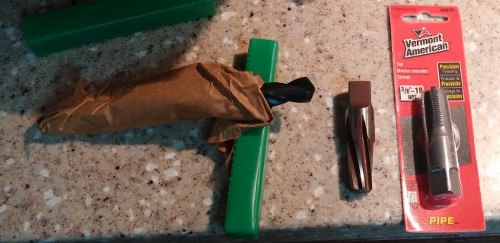
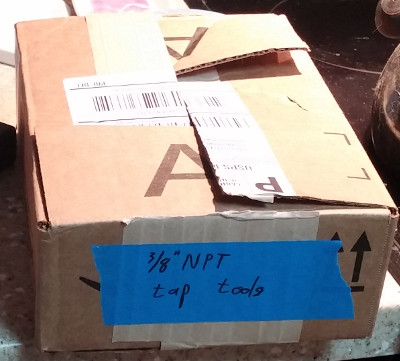
And, in a fit of organization, I put them in a box and labelled them!
Amazing!
Rare picture of all three cats:
A minor home improvement. This is in the "library" on our ground
floor. I put a rack for coats on the left wall here, so that when we
have coats to hang up, we can do it somewhere other than the official
coat closet in the center of the house which is far away from the
doors and also where the cat food lives.
Pangur disapproving of whatever I'm saying on the phone.

I made some moderate effort earlier in the year to organize my stuff
on the main floor (culminating in the drawer that serves as a desk
from the last post). Here's my half of the library table desk
organized (which I'm sure was short-lived, but an important step nonetheless).
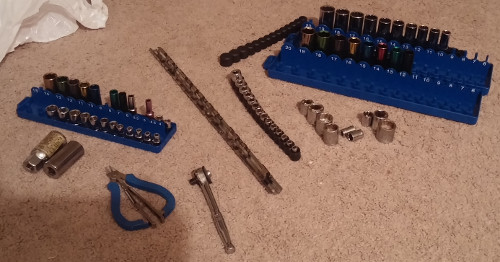
Also in the organizational front, I got some nice storage trays from
Harbor Freight and made organization out of the chaos of the socket trays in the
tool box.
And finally Thrice doing her Meerkat impression.
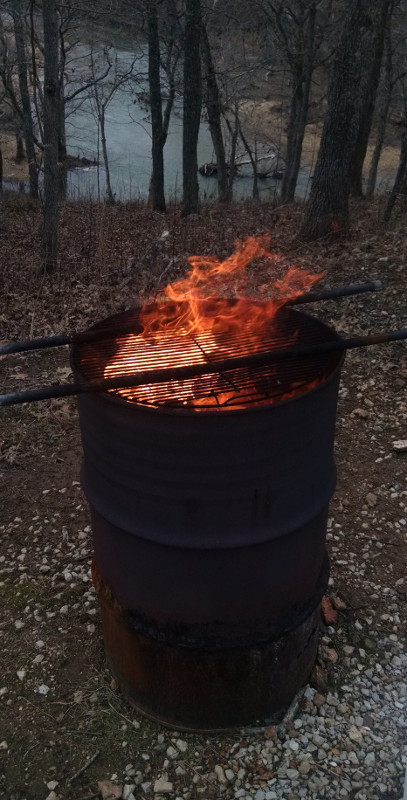
At the Cabin over Christmas. Burning paper trash here. I just liked
the shot of the burn barrel and the creek.
It's been a hell of a year. As of October, all of the settings of the Back to the Future movies are now in the past. Our "Log In Date" for our adoption portfolio was mid-November, so that's exciting. We're taking Mandarin Chineese (mostly spoken, some written).
Aaaaaaand my father-in-law died a couple of weeks ago. :-( Thus we ended up here longer than expected, and we had (and still have) lots to do. Oy. An ugly transition. Very sad. We're still getting used to it.
So I'm going to try to get posts up that summarize the interesting bits of the year. Here's the one for this trip.
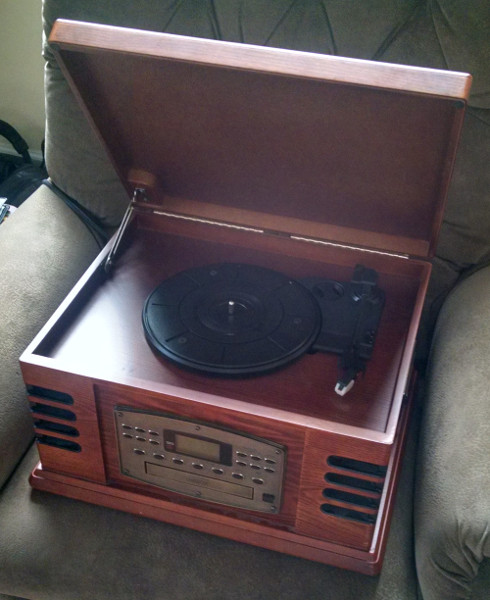
One interesting thing: my wife and I gave this record/CD/tape
player/radio to my father-in-law in...it must have been 2002. I tried
to play a CD in it, and the drive is jammed. Apparently he used it so
much that he wore out the drive mechanism. I'm incredibly gratified.
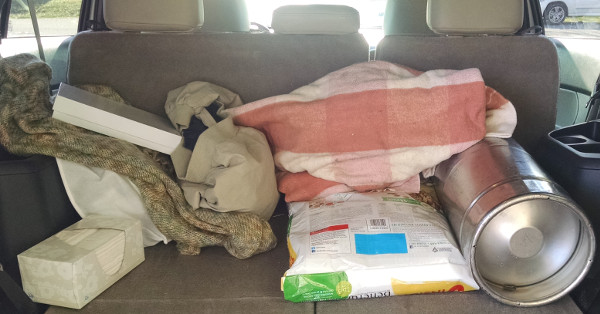
This is the back of the Explorer about to head back from the memorial
service. The cylinder on the right is a 1/6th keg of beer, so that we
wouldn't run out when all the people came back to the house. We
swapped it in before the night was over. People got a kick out of my
walking across the road to the liquor store and bringing the keg back
with my funeral clothes on.
And I got some Taurus driving in while running errands; some day driving
and some night driving:
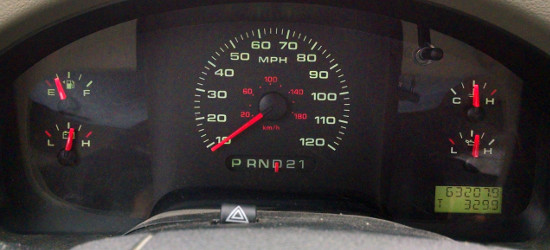
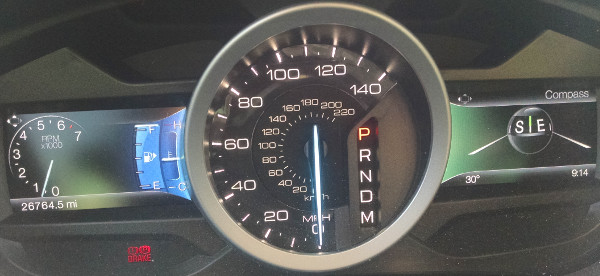
And I got to drive the Explorer a bit. It's fairly new one, so it has
the fancy digital dash.
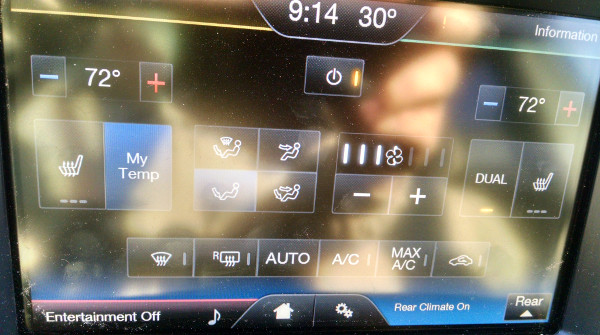
And the climate controls are complicated enough to launch a space ship.
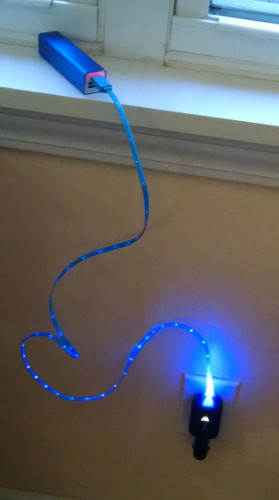
Charging back-up cell phone batteries. The cable is obviously better
because it has glowy lights in it. :-D The charger is one of the a
great set of Sprint chargers that are both car chargers and wall
chargers, and they have lights on them.
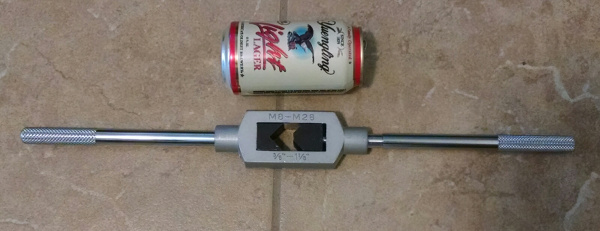
My Christmas present to my self is this comically large tap handle. I
got this because I'm going to tap the engine block of my VW for an oil
filter, and the tap is large enough that it doesn't fit in a normal
tap handle. The beer can is for scale.
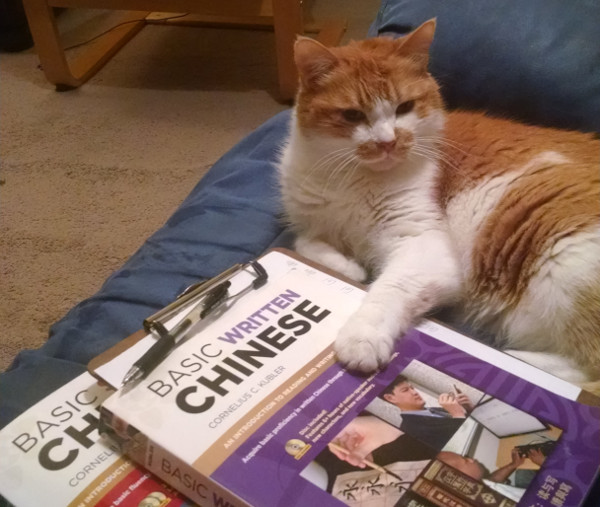
I was sitting on the couch studying for my Chinese language final.
This photo is absolutely not posed; Jasper came, sat down with me, and
put the royal paw on my books. I think it's a hilarious pose; it's
great that he looks so stern.
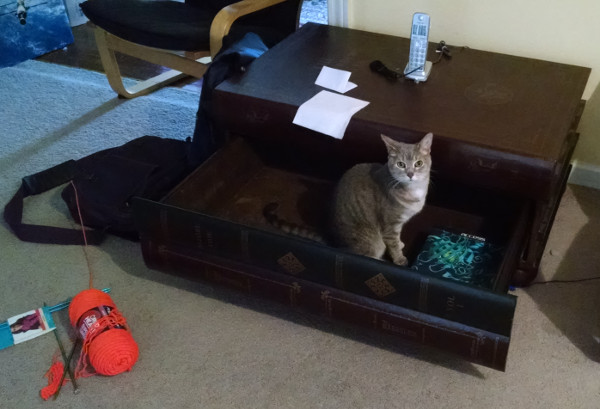
I've had a long-term project around the main floor of the house to
kind of get my stuff organized in a longer-term way. I like having a
working desk that I pile stuff on to work on or sort, but of course
that gets piled up. So I cleared out this drawer, so it can be the
"to be sorted" or "to be gone through" piles, so it's out of the way.
Of course, as is no surprise, Pangur is helping.
All for now. More entries on the year as I get photos edited.
I normally get at least a couple of cell phone photos of the rental cars I drive, but this trip, I didn't manage to do it.
R and I flew Delta from TYS to MSP to attend Convergence and see friends. Our original plans had been to go to Oshkosh and GenCon later on in July (this year they're the same week) but there's a Big Exciting Thing happening the last two weeks of July and the first week of August which shifted our schedule (more on this in another post in the near future, I'd imagine).
We flew up on Friday morning on the direct flight, and so we got to the hotel at around 11am. Even though we spent most of the weekend at the hotel, we went ahead and rented a car for the sake of convenience. It also meant that we could go directly to the hotel as fast as possible to get our badges (which turned out not to be a problem).
We rented a car from Enterprise. They didn't have any compacts, but has it turned out, they had a Toyota Prius available. I wouldn't have reserved it; my understanding is they're typically a premium-cost vehicle, but they had it available and it was only a slight upcharge from the reservation we'd made. So we rented it and drove it around the city from Friday morning when we got in through Tuesday late afternoon when we left.
It was interesting to drive, not too different than other cars with a couple of exceptions. Steering as normal. I had to really push down a lot on the gas pedal to accelerate well; I later found out that was probably because we were in "eco" mode; it apparently changes the value on the accelerator curve. Acceleration actually wasn't bad, except for the squishy pedal. The one thing that was really strange was when the gas engine would just stop when you were driving slow (like driving around a parking lot). That's eerie the first time it happens.
Proximity key fob for ignition, which is fine, and push-button start. Since it's a Prius, of course, it may or may not actually start the gasoline engine when you start it. THe proximit fob unlocks the door before you touch it, which I HATE; you can't check before you leave the car that the driver's door is locked.
The gearshift is purely electrical, so it has an odd feel. You have four postions that you move the gear shift to from rest; Reverse, Neutral, Drive, and Braking. Park is a separate button next to the gear shift.
One huge thing that this car fell down on was that it didn't have a "your lights are on" warning buzzer.
So all in all, a perfectly fine car to drive. I'm glad I drove one, but I wouldn't go out of my way to do it again. The gas milage frankly isn't enough better than conventional cars that I'd want to have one for that reason, and putting up with its quirks makes that easier.
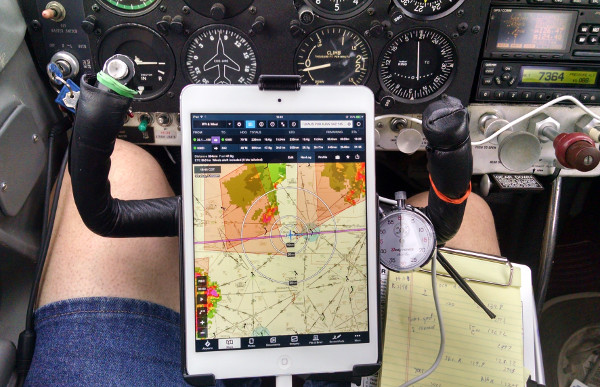
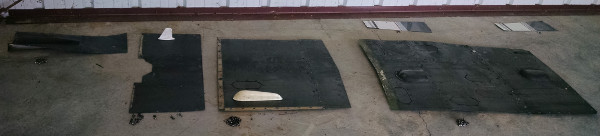
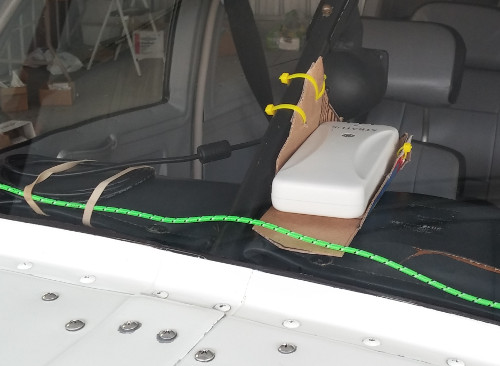
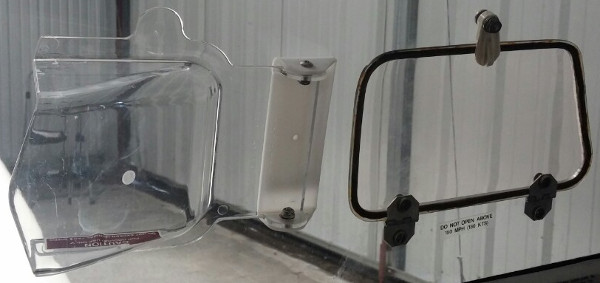
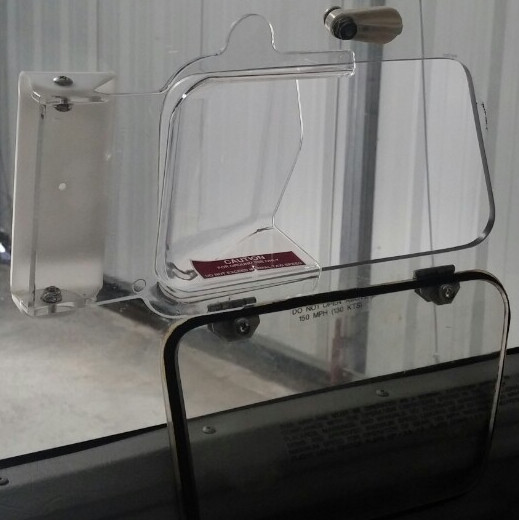
Here's what I've been doing with the Stratus. Here's my working
cardboard template that I'm getting into shape.
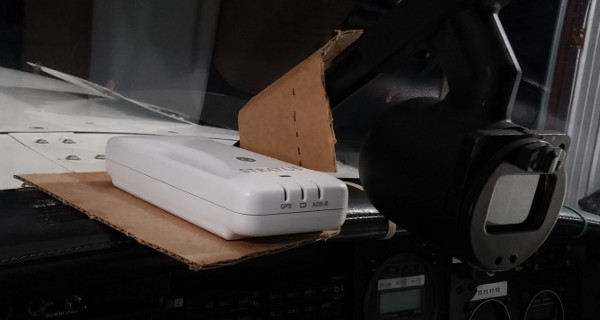
I'm basically making
a basket or tray that holds the stratus along the axis of the
airplane, so that I can see the status lights, and so that it doesn't
slide off into my lap from the glare shield. I did this very early in
the year.
A few weeks later, I put together a more precise version of the tray.
Here I've put it together.
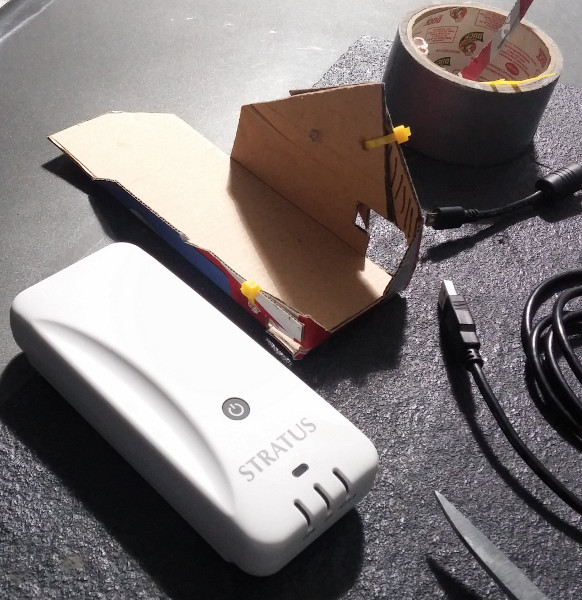
Eventually the thought is to make the tray
out of Aluminum so it's stiffer, but the cardboard will do for a
short-lived version.
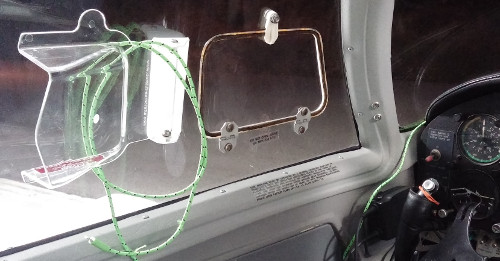
The green cord is a USB power cord that runs along the top of the
glare shield and then comes over by the pilot to power the iPad.
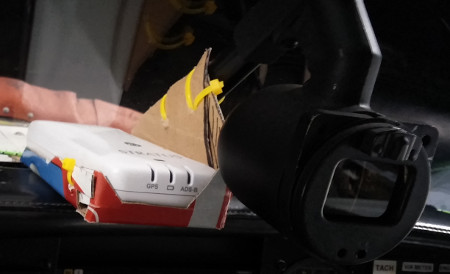
The cardboard tray, cable tied into place on the compass mounting
tube,
with the Stratus sitting in/on it. And the power cable to the
Stratus:
Here's what the setup looks like from outside the windshield:
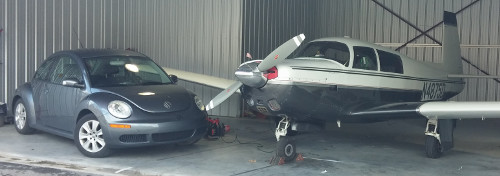
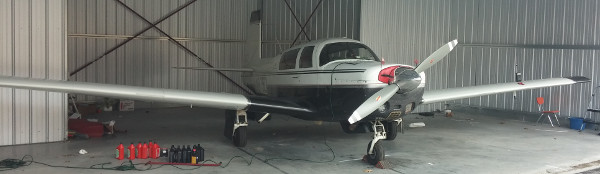
If I park the airplane just right, I can get the car into the hangar
with the airplane still in it and shut the door:
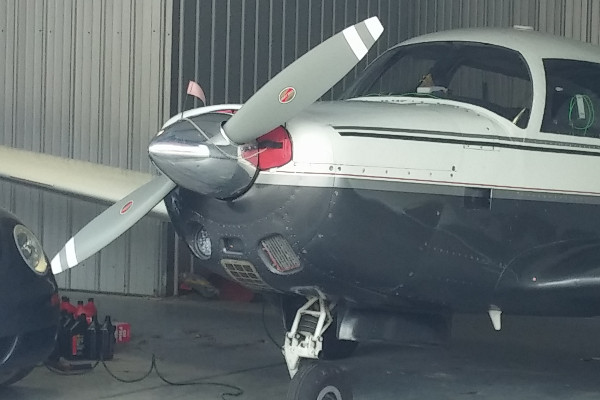
A closer view of the above shot. You can see the oil cooler nicely
here in the lower corner of the cowl. You can also see the Stratus in
its mount under the windshield.
And after a couple of hours of futzing and prepping, the airplane is
ready for its trip to Texas (another post).
The weather was likely to
be fairly cold the morning that we left; you can see the extension
cord going in the oil door on the cowl; it's attached to the engine
heater plug and comes from a timer on the other end. I set it to
start warming the oil several hours before we got to the hangar. It
worked great.
The one real problem I've ever had with my 2008 VW has been the wiper motor. I had the motor replaced early on under warranty, and then a couple of years later, I had the gear mechanism replace on my dime. I guess it's just under-engineered, because it started to intermittently fail over the winter, and failed completely in January (when I was loaning the car to someone--OOPS!).
It failed on me COMPLETELY when I was out shopping. I drove it home, in a bit a rain, very slowly. I do NOT recommend that. I won't do it again. That was kinda scary.
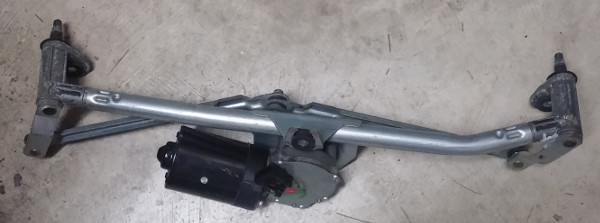
Anyway, I got it home (that was a Friday, I think) and so I got out
the big manual for the car. I decided that getting to the wiper motor
assembly didn't look too bad, so I brought that car into the garage
and tore into it. It wasn't, indeed, that bad. Here's the motor and
wiper arm assembly out of the car:
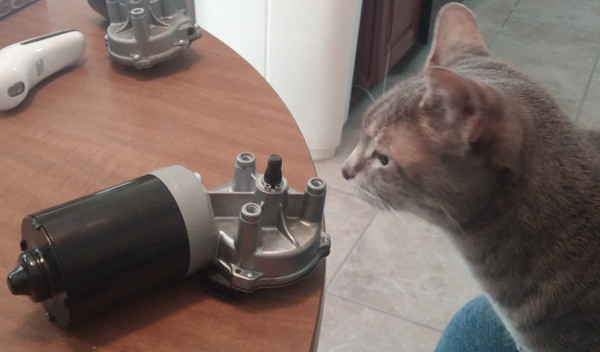
and so first thing
Saturday morning, I drove down to the VW dealer in Knoxville and
bought a new motor.
Pangur, inspecting the new motor:
I installed it, and so by mid-afternoon, less than 24 hours after it
had completely failed on me, the car was recommissioned. So it may
well happen again, but now I know I can repair it quickly for only the
cost of the part itself.
Wow--March was quite a month. Even in January, March was already shaping up to be a busy month. I had significant trips/commitments early in the month and late in the month. Then I had the bright idea to stick a really busy work trip with personal travel on both ends in the middle. So March was very busy with travel; as I write this on April 6, it's just finally settling out and this week should be back to a normal-ish schedule.
The first journey was a trip up to Cincinattii to help my wife run a conference. This was an absolute committment on my part, and has been on my schedule for at least six months. The two weeks of snowmageddon at the end of February were not encouraging for this trip. The conference was Friday/Saturday. Earlier in the week, the state of Kentucky wasn't doing too badly, but it was looking a lot of the state would get snow dumped on it on Wednesday and Thursday, so us just getting to the conference was looking iffy.
Given the snow that was expected to land on Thursday, if we started heading north on Thursday morning, it was likely we wouldn't be able to get out of town. So we decided to outmaneuver the weather. Wednesday afternoon (in fine weather) we drove to Lexington and stayed in a hotel right on the north side, next to the interstate, so the roads we would be driving on would have the best snow removal possible.
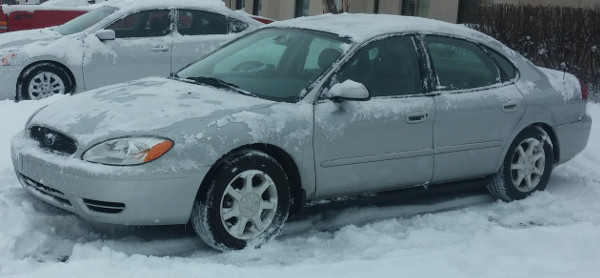
That worked fine. But we did get the expected snow over night. When
we got up, the car was caked with nigh on a foot of snow:
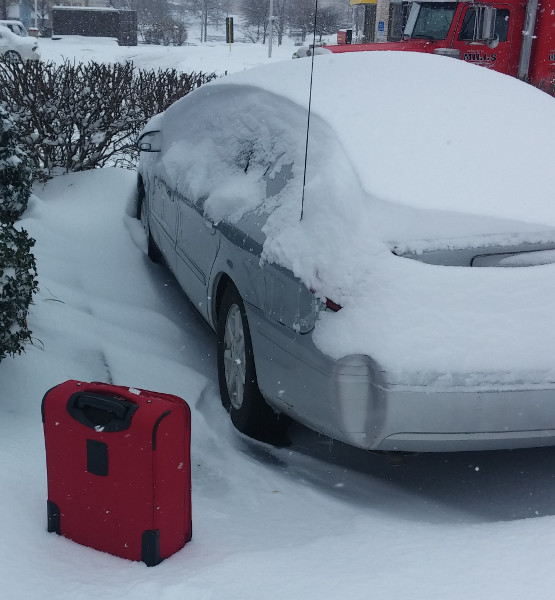
That morning, I did the first clear-start-scrape-defrost cycle
I've done in many many years. I know people in Minnesota do that
every day in parts of the winter, but it's been a while for me. I
also backed it across the parking lot so that it was clear of the snow
piles around it. The end result was pretty good:
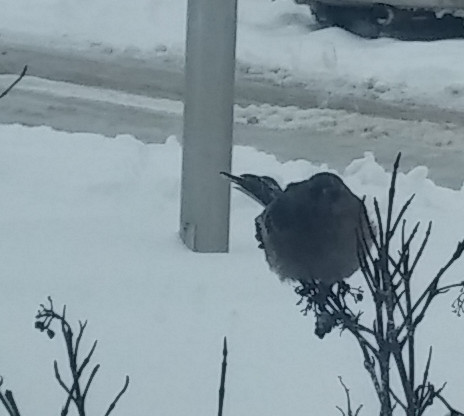
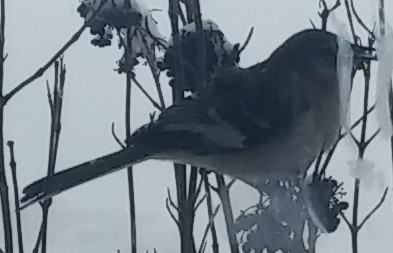
While we were having breakfast I made some poor attempts at bird
photography while we were having lunch.

Due to the higgledy-piggledy of the snow and its effect on the
conference schedule, the conference days itself were super-busy, so I
really don't have anything to show. One really nice thing: right
across the street from the hotel was a Joe's Crab Shack:
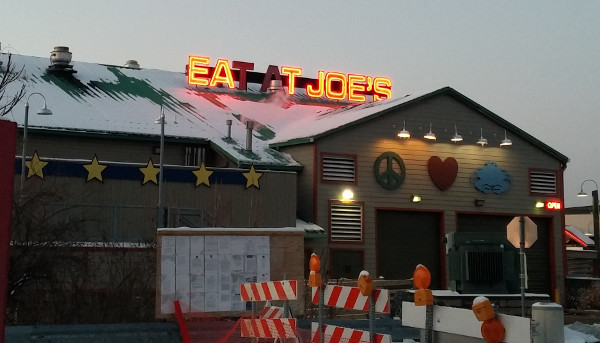
I think if I were reviewing that as a design for an establishment in a
game, I would perhaps ask them to pull back the character a bit.
And last thing: on the way home, I saw this advertisement in a truck stop bathroom. It got me thinking more about car (and also airplane) USB chargers, which is another topic that I've been working on this past month.
So the trip to Cincinatti was the opening salvo of the month. The big trip in the middle of the month was yet to come.
I've made a bunch of new-year's resolutions...which I've already strictly broken, but I'm going to pursue anyway. I wanted to excersize daily, which I've done 2 out of the 3 days. I've wanted to blog a lot; this is the start of that. More on that in another post.
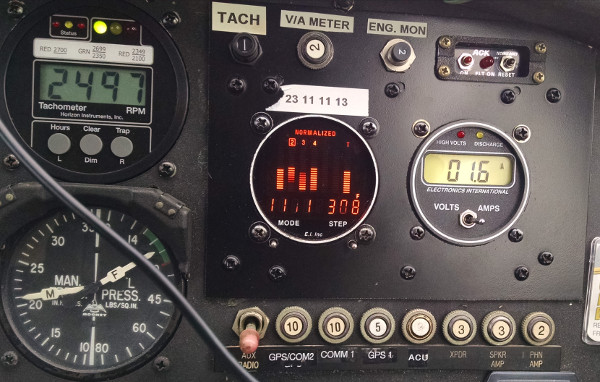
The airplane is doing well. I'm starting to have reasonable
confidence in it for trips, so that increases planning flexibility. I
installed a "kool-skoop" (their spelling, not mine) that brings in air
on a hot day when you're taxiing on the ground. Great tool, and
taxiiing in hot weather is much less annoying.
And I'm finally collecting the tools and parts to put my VW back
together. I still need to get a camshaft; I'm using the crank and
various camshafts sitting in the left block half to do some camshaft
testing.

I'm starting a big cleaning project; that starts today. The plan is that will be finished 2 weeks from today on Sunday.
The fall has been good, but busy. Work is good, the fall conference went really well. There have been a couple of changes, so I don't have photo editing and uploading sorted out yet, so this post is text-only.
The plane is doing superbly well. I took two signifnicant trips in it, in October and November, and absolutely NOTHING went wrong. This was a first. So I'm beginning to trust it much more for trips and such. The one last thing I want to do for this winter is to install an engine heater, so that I can electrically pre-heat the engine when it's cold. That will make life easier on it.
I didn't work on my old Beetle at all this fall, but I've started doing that again recently. I'd like to get it back in commission in the spring. I'm going to rebuild the engine, and now I'm working on assessing exactly what parts I need. The crankshaft is reground and I have new bearings. I was convinced recently that I probably really do need a new camshaft, so in the last week I've been working on assessing what exactly I need. I'll have another post on that soon.
I got a new phone early in the year. The way it mounts as a drive is different than older phones, so pulling photos off of it is different. You can easily pull images from folders that you've created, but it doesn't seem to want to pull images directly from the raw camera volume. That technique worked so well for so long; I don't get why that needed a whole new protocol. :-/
And *just* recently (Wednesday) we got new laptops. My wife was looking for one, and pinged me about a deal on Amazon. I liked it enough that I decided I wanted one too. They are Lenovo X140e Thinkpads. So I've gone away somewhat from ultraportables, but it's a relaly nice laptop, and not TOO heavy, with lots of battery life. I'm typing on it now. More keyboard throw and sound than I'm used to, but it's not bad.
More soon, but I at least wanted to get something up here.
So up until recently, I hadn't driven a New New Beetle. (I don't think that's what it's called. To me, the post-1998 VW "Beetle"s were the "New Beetle" so when they changed the design for 2013, I think it was, I think if it as the New New Beetle.
Anyway, I'd been wanting to drive one. Enterprise rental car had one when I was renting one time, but I didn't know that until I was in the parking lot and it was too late then.
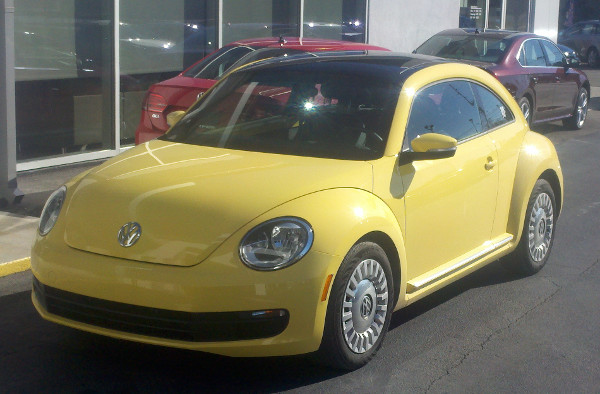
Since my plane was down for 5+ months over the winter, and the last
flight I took in it was the one that ended with it being damaged, I
thought it might be a really smart thing to go get some dual time with
an instructor. So I took two flights over the winter to get some
take-off and landing practice. That was very useful, and I'm glad I
did it. One of the times I combined it with taking my car for an oil
change. I borrowed one of their fleet vehicles while mine was being
worked on; it was a Beetle:
Instrument panel:
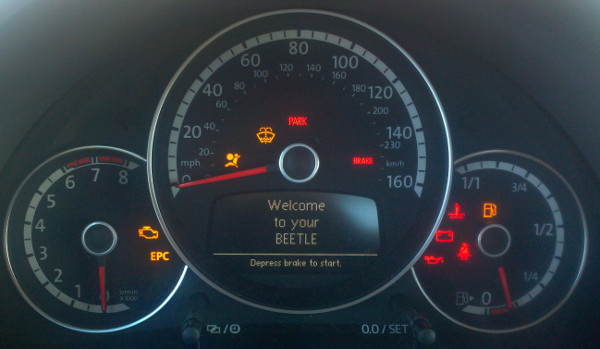
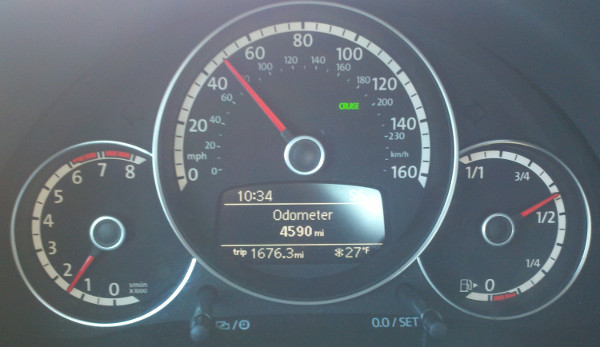
They've moved away from the single round instrument, so that's a
change. A very nice instrument panel, though.

They did a really superb job of sculpting the right side of the dash
board:
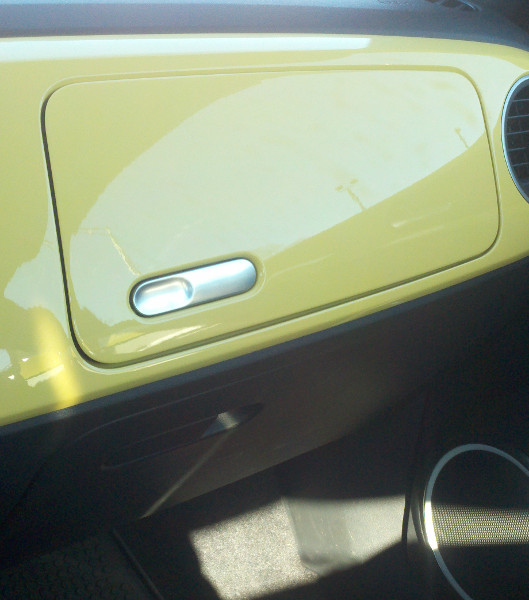
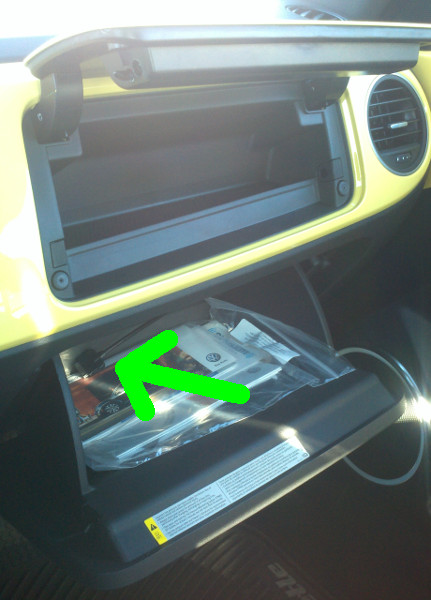
The upper glove box is meant to look like the vintage Beetle's only
glove box. However, there's another, bigger one down below (which
contains an iPad cable, presumably for audio, highlighted by the green arrow):
The luggage area is definitely bigger than mine, which is great. It
actually does have a latch:
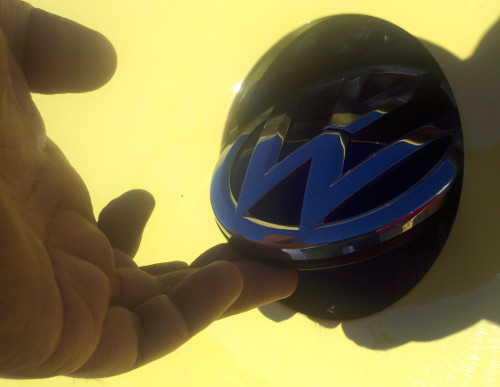
Which is the VW logo in the back.
It was very nice to drive. I liked it. I think I like the aesthetic of my car better, which more suggests an original Beetle, but this would be a fine car.
Buying an airplane a year and a half ago was a first (and probably only for a long time) experience. However, except for this last July, where I took a couple of big trips, I haven't had a chance to really fly it due to mechanical stuff. Once it's back together, I expect I'll be able to. So as far as the airplane goes, this spring/summer should be the first real season of travel in it.
I knew my vintage VW had problems even before I rebuilt the top end of the engine in 2008. When I rebuilt the top end, I found all kinds of other problems; the heads were machined wrong, they weren't attached to the engine right, the oil pump was messed up. Now that I've split the case, I've found other problems (some created by me). The big one is that the camshaft was wearing severely, so it's time it's replaced. Also--I bought new tie rods and new bushings, so I can finally get the front suspension into shape. If I can get the engine rebuilt and everything else all together, it will be a real car.
Harold Ramis, who played Egon Spengler in Ghostbusters and was one of the writers died a few weeks ago. He's young enough and Ghostbusters is enough of a milestone in my head that I hadn't ever thought about himm being gone. And David Letterman, while healthy as far as I know, announced the other night that he'll be retiring in the next year or so.
So I've had endings of things and renewal on my mind a bit of late.
So when several of my favorite songs came up on the satellite radio
during important times when I was driving, I've been (whimsically)
considering those to be good omens.
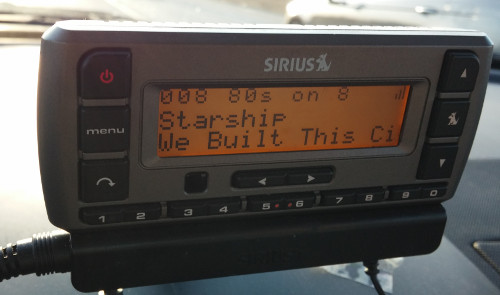

And this one in paticular when I was driving down to pay the hangar
rent:
So in that theme I'm going to try to carry farward and do things this spring/summer that I've meant to do before but just never have. I'll try to get slides scanned. I'll get a Christmas/update letter sent out. (I almost got there last year but I stalled). I'll try to get my stuff in the basement organized. I'll get the old front stoop demolished and the new one built (I'll talk about that in another blog post.)
And blogging once a day (on average) for the month of April is part of it. We'll see.
So I split the engine case of my vintage VW the other day:

So I found out what was putting the grit in the oil. I had used a crappy after-market distributor distributor clamp. The distributor is what holds the distributor drive shaft in the case agains the motion of the crankshaft, which is turning it but always trying to push the shaft out of the case. If the shaft gets too high, it eats up the brass gear on the crankshaft that's turning it.
That brass gear is toast, about 20% of the gear is gone. So I need a new one. And I'll replace a lot of other stuff in the engine. I got out my micrometers last night, and the camshaft is pretty badly worn too.
So I'm going to do a more thorough re-build than I had been contemplating. I'll add an oil filter to get the maximum amount of life out of it. I have other parts on order, I just need to find a machine shop that will regrind the crank.
I've been horrible about blogging. I blogged a bunch last August/September and and then like three times since then. Oy. However, Molly Lewis, the wind beneath my wings as far as internet presence goes, vlogged pretty close to every day in April last year, which was an inspiration to me. So I'm going to try again this year to blog every day in April.
I have a bunch of stuff to write about, including lots of photos, but my laptop needs a reboot before I can edit photos and I need to go to bed. So a brief list:
Lots of good stuff to write about this month. And hopefully some new flying photos in the mix.
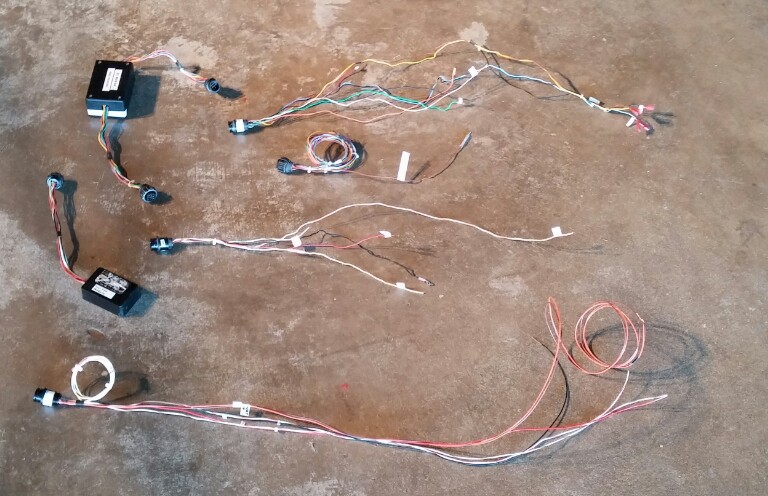
Ok, I got the photos. This is in January. I took my commission a
little far as far as "cleaning up" the wiring, and and actually
removed a bunch of the accessory wiring. Here it is, spread out on
the floor:
And here was a couple of weeks ago, with everything back in and lit up
for the first time:
I took a hybrid work/vacation trip to Minnesota in September. Work flew me up for meetings mid-week, and then my wife flew up on Thursday and we spent the weekend there and flew back home.

Pangur ignoring me as I prepared to leave.

This is a great mural in the middle of the main concourse in the
Minneapolis/St. Paul airport. Just right of center is an image of the
airport itself. In the lower left is an image of FCM (Flying Cloud),
where I landed and parked my plane when I was in town in early July.
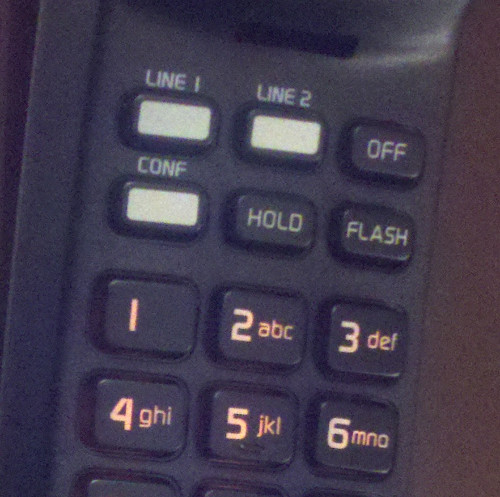
I stayed in "The Saint Paul Hotel" in downtown St. Paul. It's a
super-swank hotel; the doorman had tux and top-hat; I felt a bit out
of place. The phones there remind me of #2's phones in "The
Prisoner":
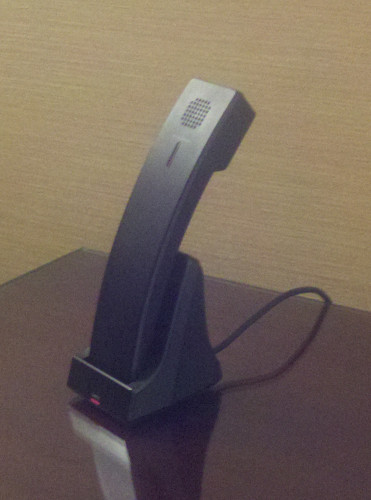
The in-room phones have multiple lines:
9 pillows per bed--and not a large bed at that.

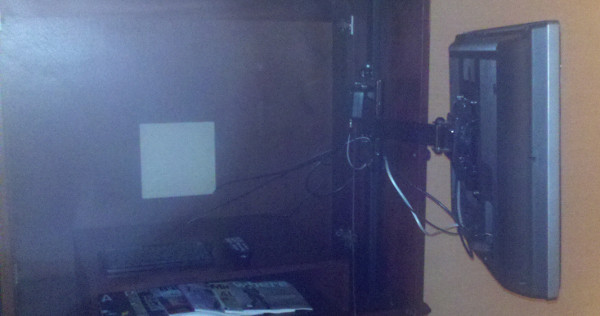
All the furniture is really nice with real wood finish. The TV was
inside a wood cabinet; but on a flexible stand so it can be positioned
so you can see it in the bed.
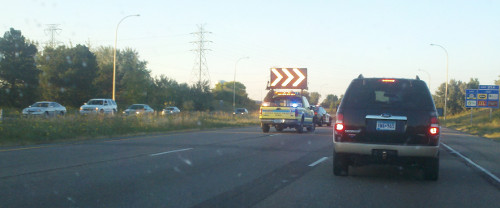
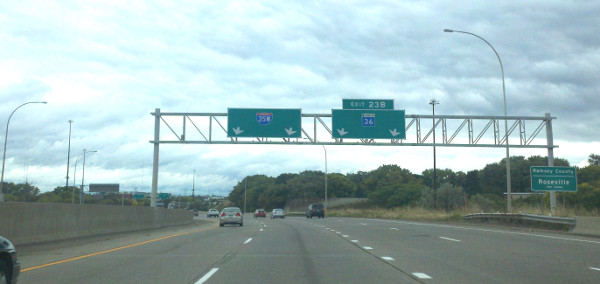
After one of the days of meetings, I snagged a ride with my friend
Laura from college. She picked me up in downtown. This is us heading
north on 35W, stopped in a traffice jam. Laura said "nothing good comes when the flashy-light
truck passes you". True that.
For many years, I've employed the Zen method of renting cras. I
sometimes have some idea of what I want when I go to the rental
counter, but I usually take the recommendation of the person there, so
I rarely get what I was thinking I would.
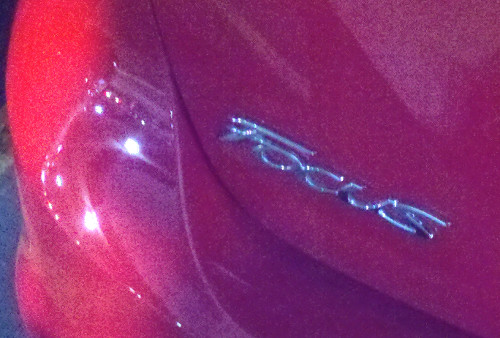
However, this time that backfired on me. I got a Focus, which is a
fine car, but I've driven them on rentals before. However, when I
went to the parking lot, THIS was parked next to it in the rental lot:

It's a NEW New VW Beetle; I've been wanting to try one out since they
came out a couple of years ago. I was so annoyed. :-P
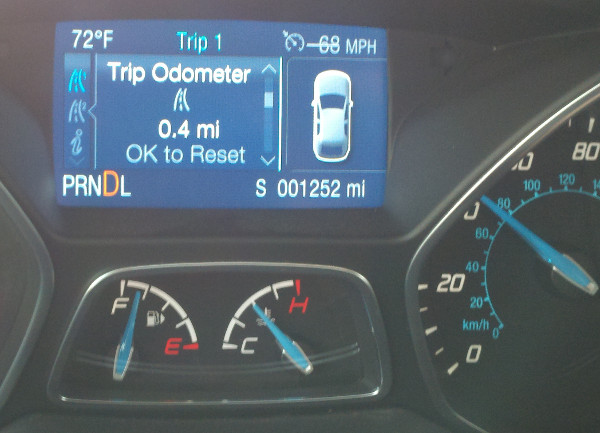
The Focus I did end up driving was fine.
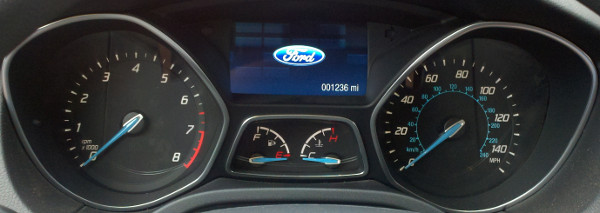
This is the first car I can remember that TELLS you how fast you have
the cruise control set:
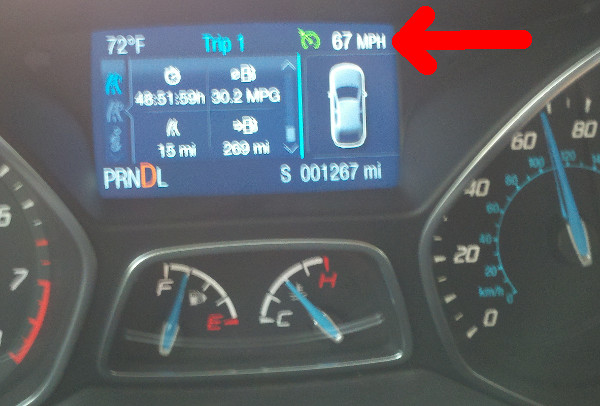
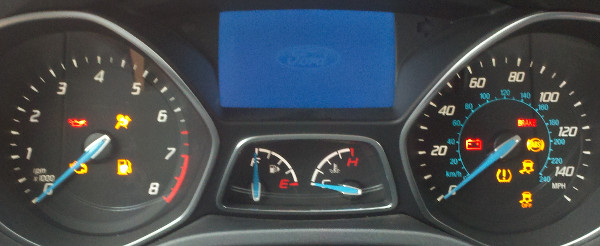
And then still shows the speed you HAD set it, but with it crossed
out, when you have the cruise dis-engaged:
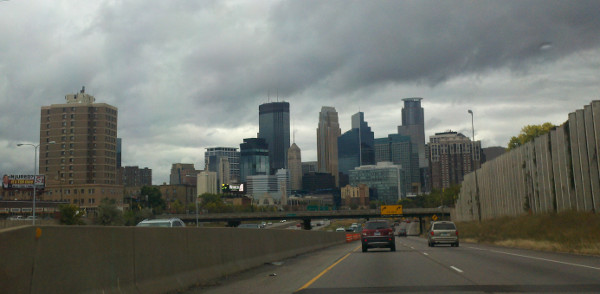
I realize I'm biased because I was born in Minneapolis, and growing up
it was always the "big city" that we'd go visit. But I've always
liked the downtown Minneapolis skyline:
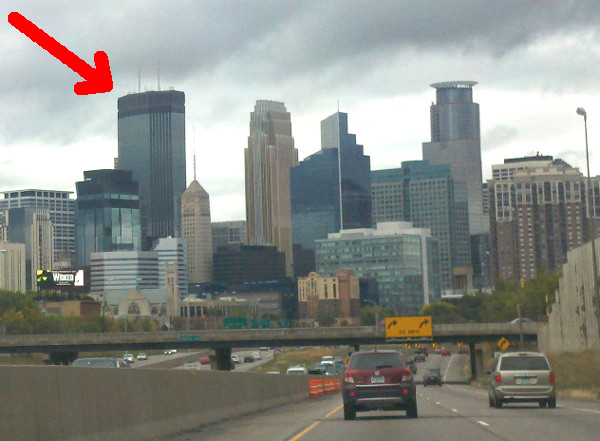
In particular I like the IDS tower, which was build around the time
that I was born, so it was kind of a destination when I was growing
up:
Driving north on 35W:
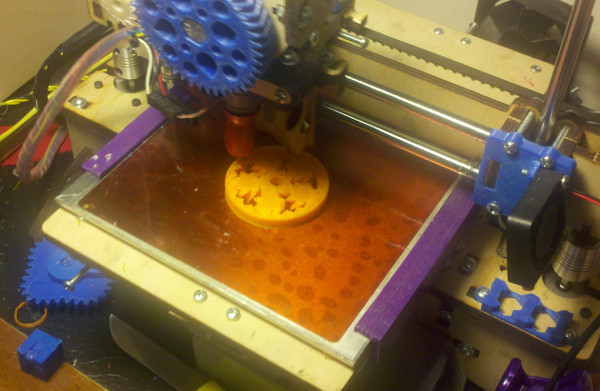
Laura's 3D printer printing a captured thrust-bearing. (I will talk
about that another time. It's a lovely fidget-toy; it lives in my
office.)
We also visited Uncle Hugo's:

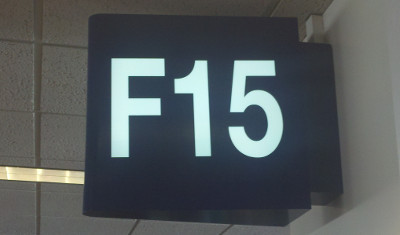
I liked our gate number
Pangur inspecting the take, and my new suitcase.