2017 February 12 17:30
Sleeping overnight in Meridian, Mississippi on the way back home, I
was figuring the trip was going pretty well. I'd been delayed by half
a day by weather, but that was vastly better than several of my
colleagues. So I headed to the airport first thing Monday morning to
fly the last leg home.
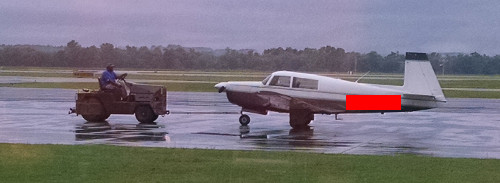
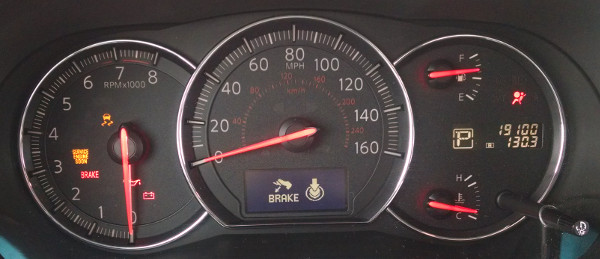
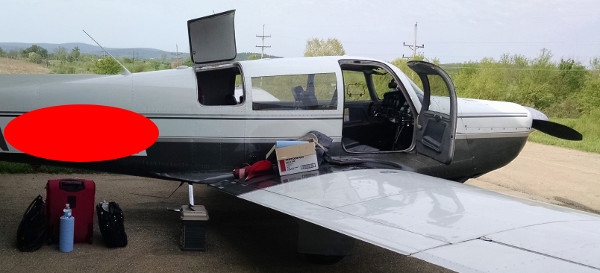
.....aaaaaand there was no response from the electrical fuel pump.
It's not NECESSARY to fly the plane, or even to start it, but it IS
the backup in case the engine-driven fuel pump fails. So I had it
towed to the local repair place:
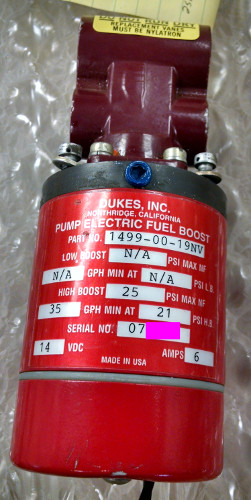
Here's the culprit, ready to be shipped off as an exchange for an
overhauled pump:
The shop on the field was mostly a turbine-airplane place, but I was
able to help a mechanic get the proper access panel off and get him to
the electric fuel pump. I then arranged to overnight the bad pump to
the people with spares, and my wonderful wife (thanks darling!)
shipped a check to the repair place (they don't take credit cards).
Then I rented a car a drove back home, and left the plane there to be
fixed once they got the pump back.
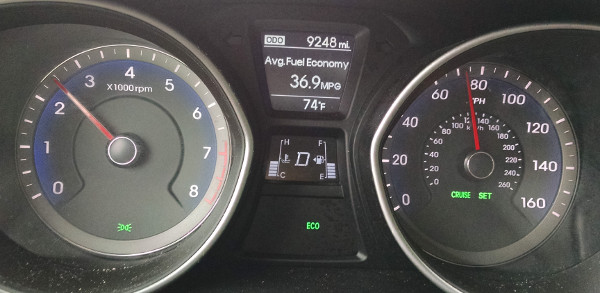
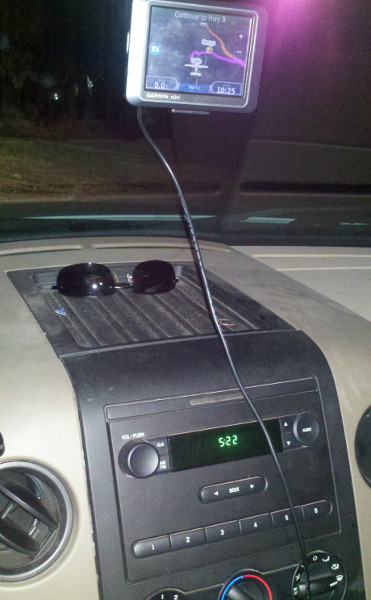
I ended up renting a Hyundai of some sort. I felt it was good omen
when songs like this kept coming on the satellite radio:

Obligatory instrument panel photo (pretty efficient car):
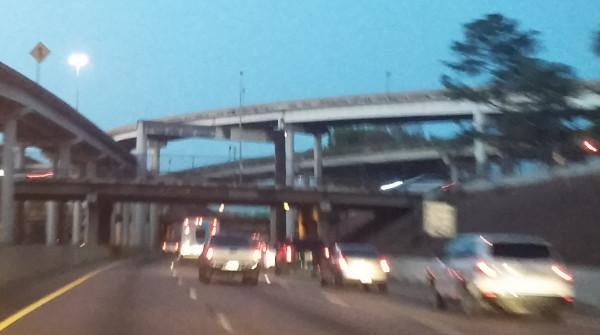
And a nice underpass on the way home.
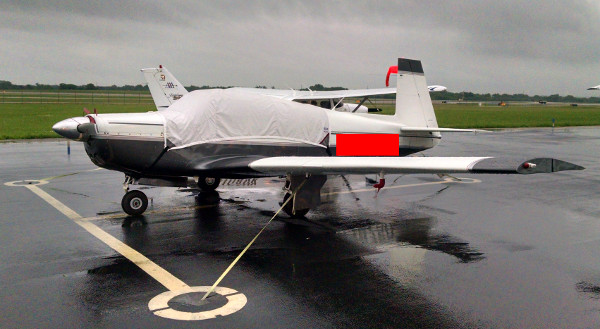
I did get the airplane back eventually. But first, other house
stuff.
2017 February 10 09:07
Back in Austin, the plan was to fly my plane to Kerrville to the
Mooney fly-in, so that I could, finally, have my plan parked on the
field in front of the Mooney factory. The weather was crappy enough
that I decided to leave it tied down in Austin
and rent a car and drive to Austin instead.
My vague memory of the original planned sequence was this. I flew
commercial from Oregon to Austin Friday morning. I got into Austin
mid-afternoon Friday. I had planned then to fly my airplane to
Kerrville and stay Friday and Saturday nights, and then fly all the
way home on Sunday.
(My vague recollection is): The weather was bad in Austin when I got
there, so I decided to wait to Saturday morning to fly. I was so
tired I mostly went to bed. Saturday morning, the weather was
slightly better but I'd have to be doing an instrument approach into
crappy weather into Kerrville, so I decided not to. I rented a car to
drive to Kerrville and back. (A lot of this is because I was giving a
talk on electronic flight bag solutions that I hadn't finished yet.
I'm a really really bad procrastinator sometimes.)
I rented the car in a huge hurry Saturday morning because I had to get
on the road. I drove to the hotel in Kerrville and then sat in my
hotel room for an hour finishing my talk. I gave the talk, that was
fine, and then that evening was the banquet, which I stayed for the
food and about the first half of the entertainment part. Since I was
leaving so early the next morning, I ditched out of the rest of the
evening.
I left super-early Sunday morning, like 4am. My plan was to race the
thunderstorms that were coming in to Austin and try to get off the
ground going east before they hit. It was interesting to drive with
thunderstorms right behind you in the dark on roads you don't know. I
got to Austin, and before I could get out of the rental car, it was
bucketing down rain.
The car was GREAT to drive; I found out later one of the reasons it
accelerated so smoothly is that it has a continuously-varable
transmission. What with all the hurrying, I never got a photo of the
outside of it. I just have these three instrument panel shots. I
managed to figure out from screenshots that this is a Nissan Maxima.
Very nice car.
Mooney was prototyping a plane that they're going to be selling. A
small two-seater. Here's a couple of shots inside.
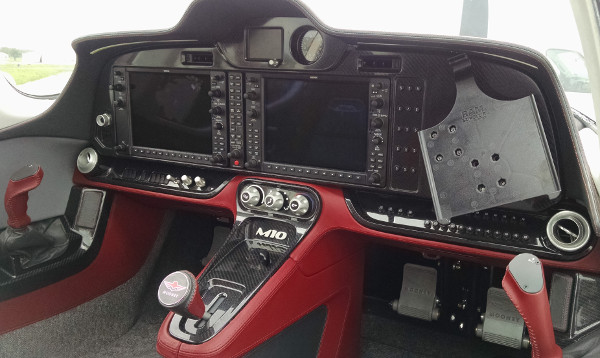
Note the single-level engine control in the center console. All
glass-panel; I think that's a Garmin 500? And with an iPad mount
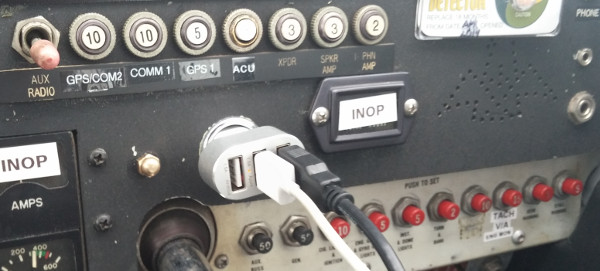
already built-in. And USB power jacks in the center console:
As usual, there were tours of the Mooney factory. Here's the final
assembly area:
And the wing assembly jigs:
The oval holes in the wings are fuel tank inspection/service hatches.
These mooneys will have fuel tanks that fill more of the wing than
mine. My tanks only have three service hatches per side.
I dropped of the rental car just as the storms hit. So I ended up
chilling in the FBO for several hours. I actually used their pilot
nap room to make up for having such a short night. I left
mid-afternoon; too late to make it halfway home but early enough to
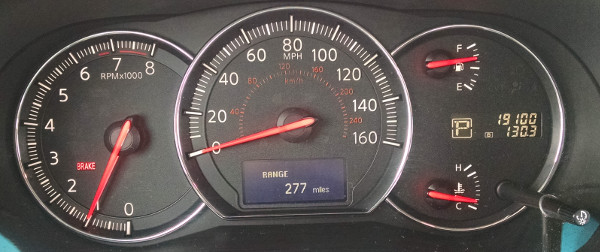
get fuel in Meridian Mississippi again.
So I grabbed a hotel there for the night.
The saga of leaving Meridian the next morning will be the next post.
2017 February 10 08:40
Ok, so we're up to May 2015. After the long annual, I had another
trip scheduled. This one was a weird double-trip that happened
because a work event ended up being the the week that I had a
(previously scheduled) Mooney event in Texas the following weekend.
So what I ended up doing was combining the travel for the trips. I
few myself to Austin, Texas in my plane, then the next morning,
grabbed a United flight to Oregon via LAX. I did the work event in
Oregon, then flew back to Austin. The Mooney event was in Kerrville,
which is near San Antonio. My plan had been to fly my plane from
Austin to Kerrville, but when I got to Austin from Oregon, the weather
was crappy enough that I just rented a car instead. I drove the car
to Kerrville, went to part of the event, and then drove back to Austin
early early the next (Sunday) morning. The trip back is another
story.
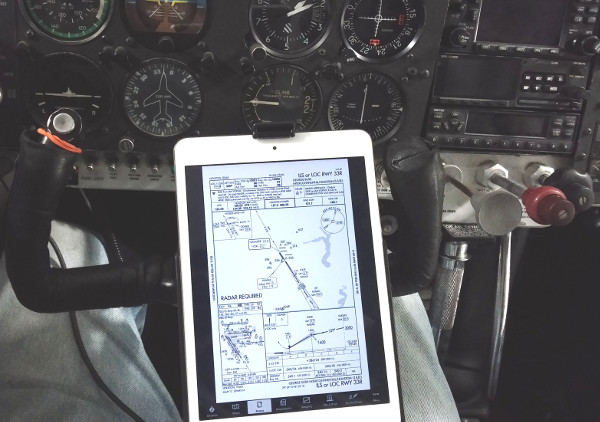
The trip down was exciting. The whole lower midwest, including a lot
of Texas, was being hit by thunderstorms that day. Here's the view on
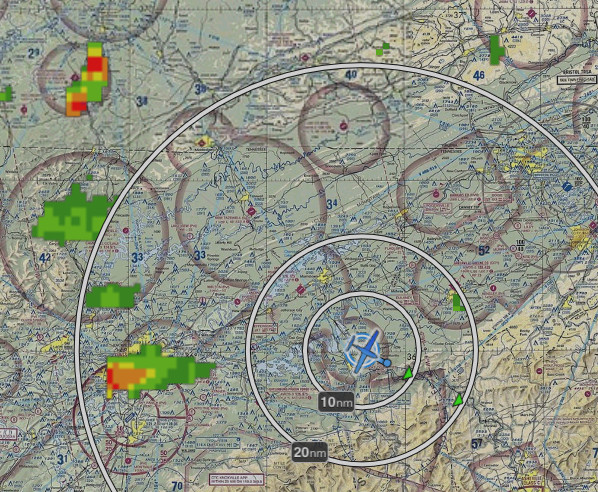
my iPad dodging the storms on the way down.
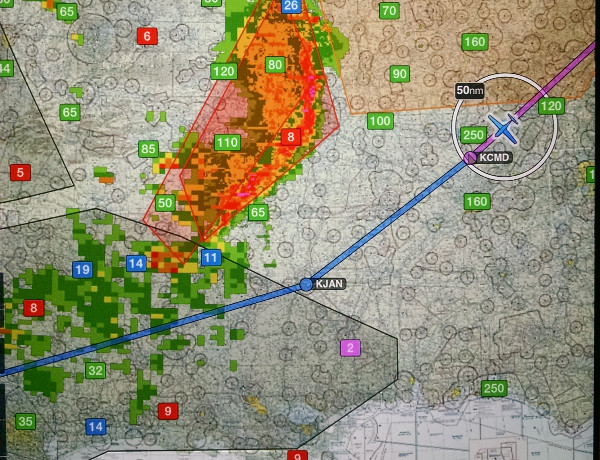
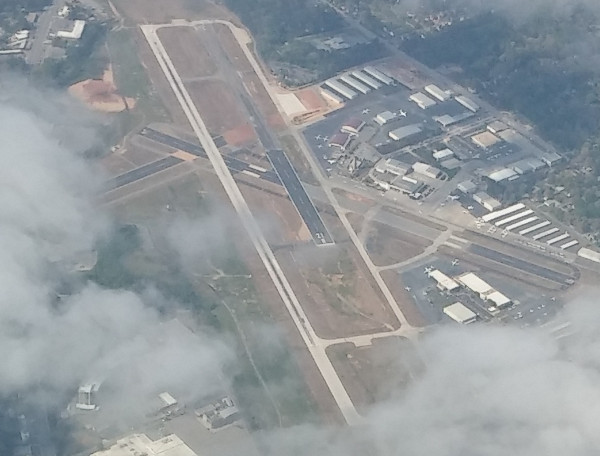
I stopped for fuel in Meridian, Mississippi. It's an army pilot
training base, so my Mooney was parked among a bunch of army training
airplanes.

I staying in Meridian for a while, waiting for the storms to pass. I
left there with enough time to get to Austin just before dark.
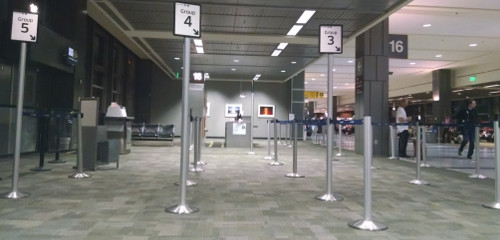
The next morning, flying out of Austin, United had a fantastic system
for getting boarding groups lined up. This is so much better than
most other airlines where people sort of hover around the boarding
gate until their group is called. It was noticably faster.
Leaving Austin in someone else's plane.
Coming into LAX, we could see the big canals that are used in lots of
movies.
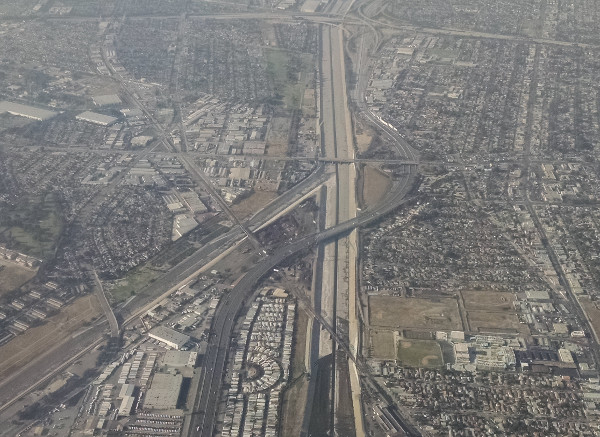
And lots of big interchages.
At work in Oregon, this is the villiage just down the street from the
resort where our meetings were. Here's my "Prisoner" throwback
selfie.

The weather for most of the trip was pretty temperate (if stormy), but
one morning during the trip we got snow. This is the view out of my
room in the evening.

All for now. The next entry will continue with being back in Austin.
2016 December 19 08:42
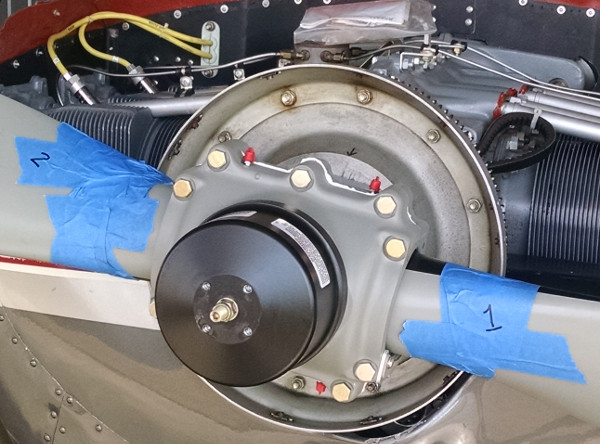
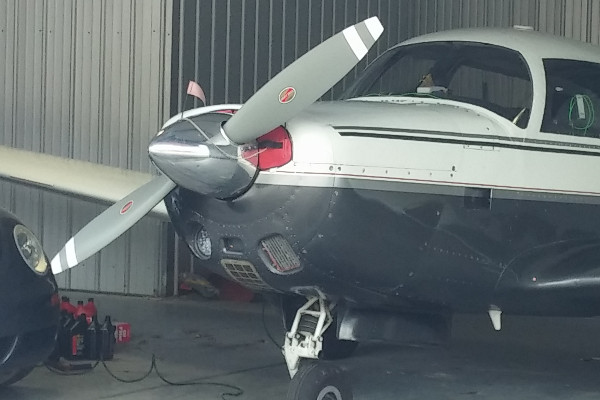
Spinner bulkhead re-attached with new hardare.
Getting inspection panels re-installed without dropping them inside
the plane is sometimes tricky, especially
when they're on vertical walls. Here's the trick my mechanic taught
me about that. Form a handle with tape:
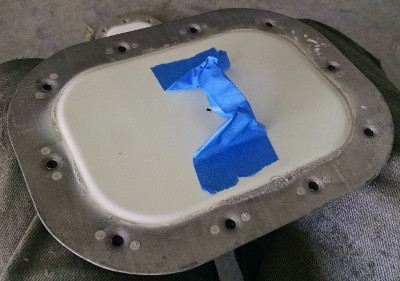
which allows you to hold it in place until you get the first couple of
screws attached:
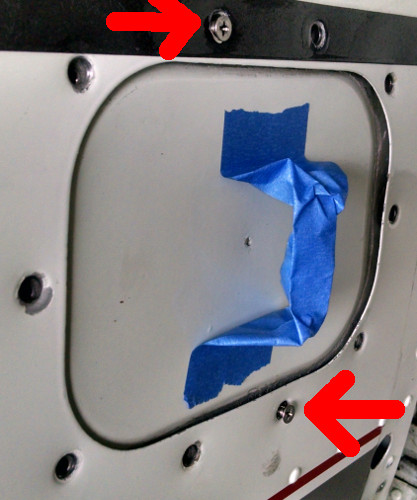
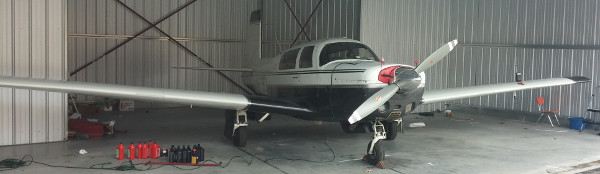
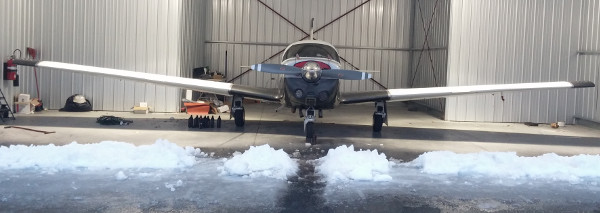
All buttoned up, ready to fly.
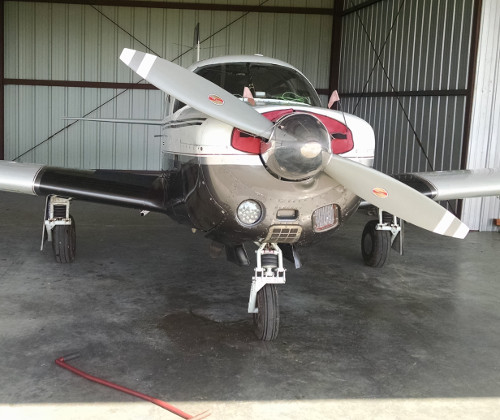
Getting ready to fly the plane home after the annual; charging all the
things.
Heading home, loading the plane.
2016 December 19 08:41
April/May 2015 was the first annual for my airplane since the
propellor was replace and engine overhauled in 2013-14. This was the
first semi-normal annual. Still plenty of work done, but not major
systems were replaced.
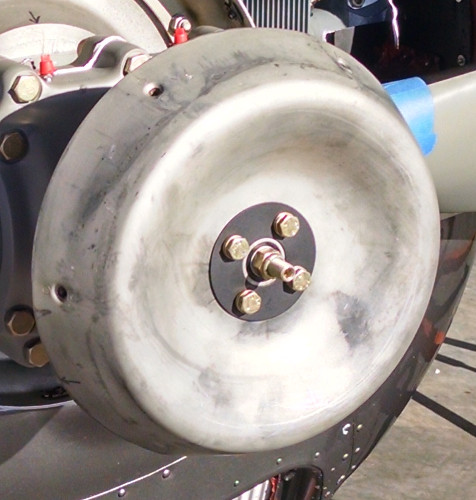
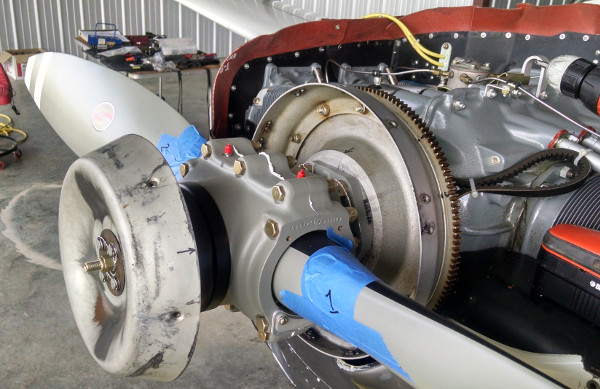
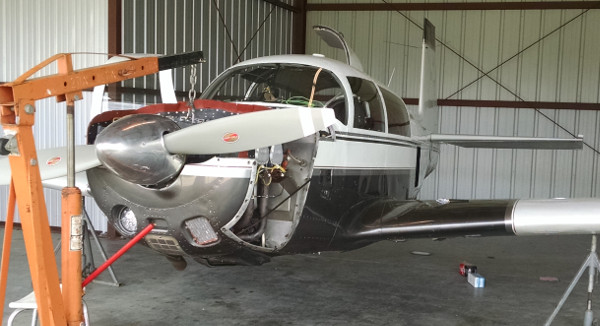
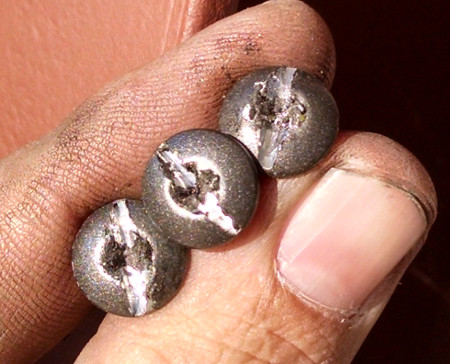
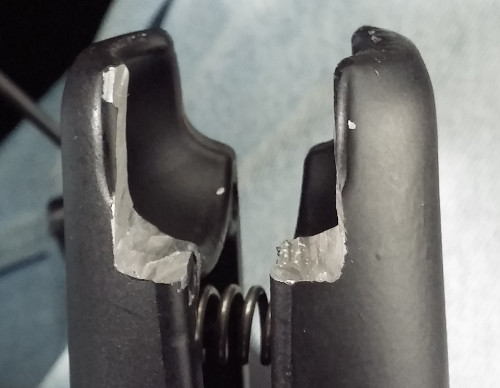
Taking apart the spinner to annual the propeller.
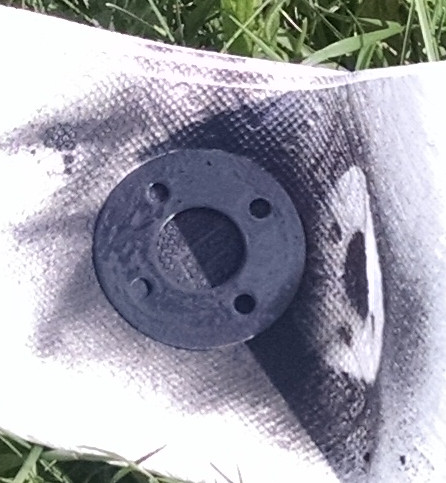
The pressure plate was a bit rusty and wasn't holding pressure on the
front spinner bulkhead.
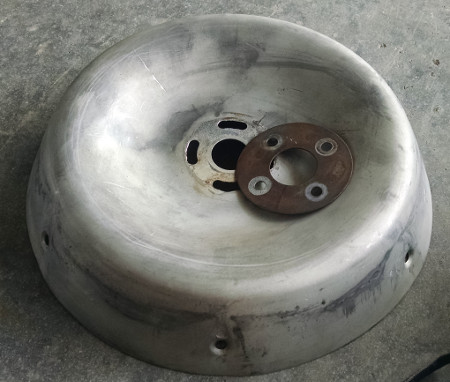
We painted the pressure plate so it at least wasn't corroding.
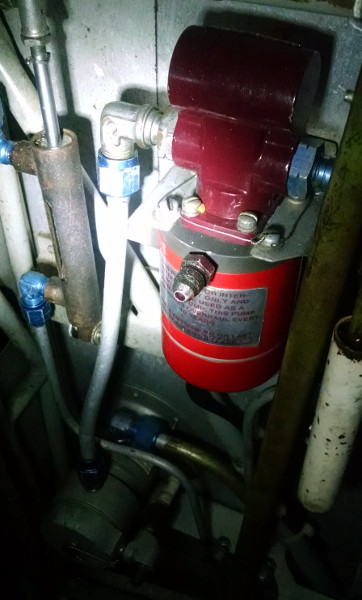
Prop dome with the spinner bulkhead removed.
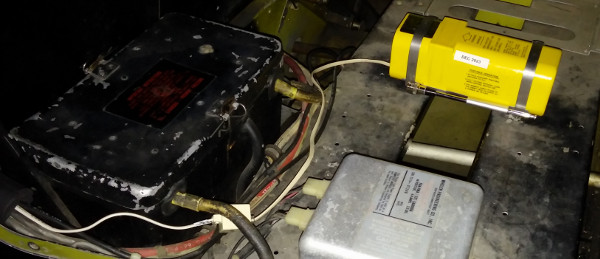
Electric fuel pump, fuel selector and fuel system sump at the bottom
of the photo.
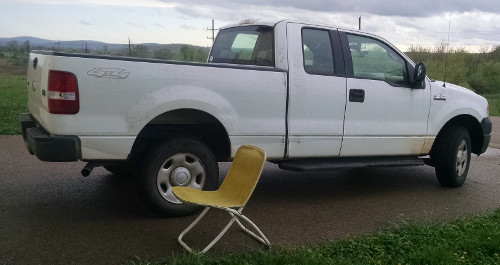
While parts came in and we worked on stuff for the annual, I was
driving my father-in-law's truck around.
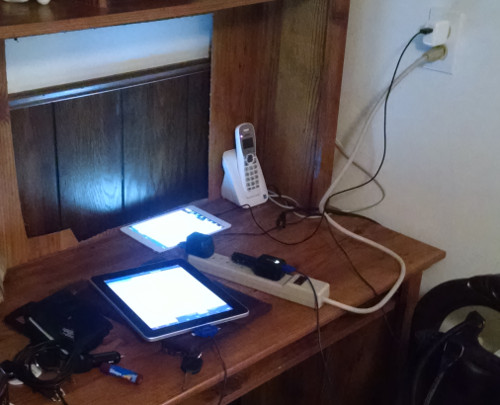
When we had a break, I took a couple of days and drove to HQ and spend
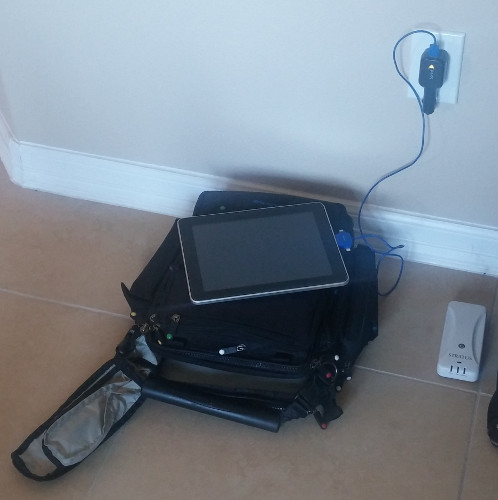
a couple of days in the office. Here's the office recharging setup.
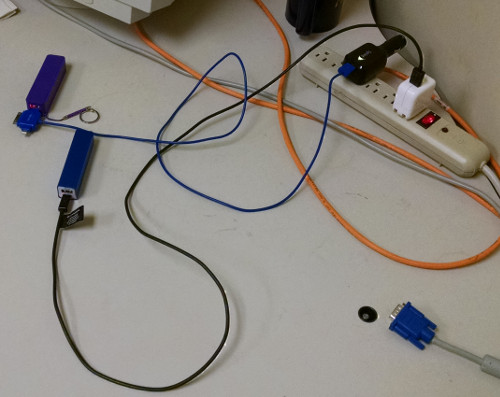
I spent a good bit of time during this trip testing chargers in the
truck for use
in the airplane.

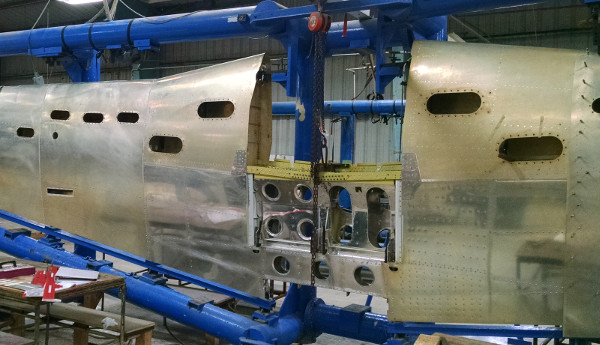
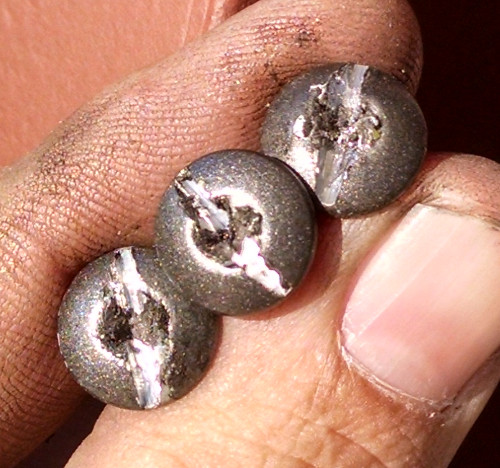
Back to the annual, all the belly panels off.
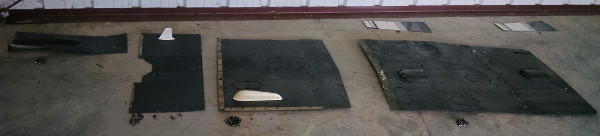
It was my first time taking the panels off. Over a couple hundred
screws; I stripped three and had to extract them by cutting a slot
with a dremel tool.
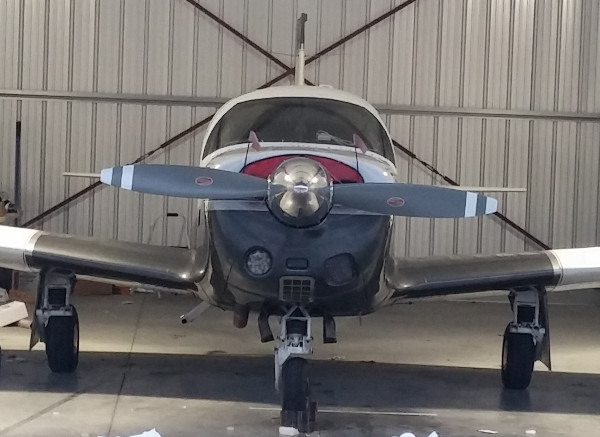
We did some work on the landing gear. Here's the plane on jacks, gear
retracted, looking vaguely Airwolf-like.
2016 August 03 08:51
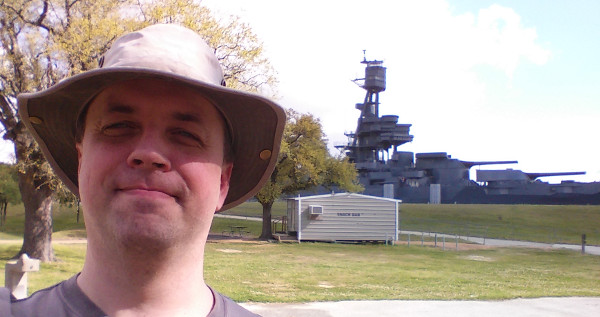
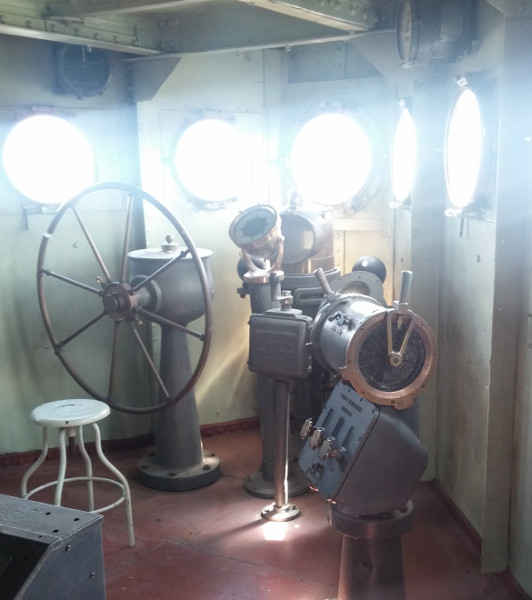
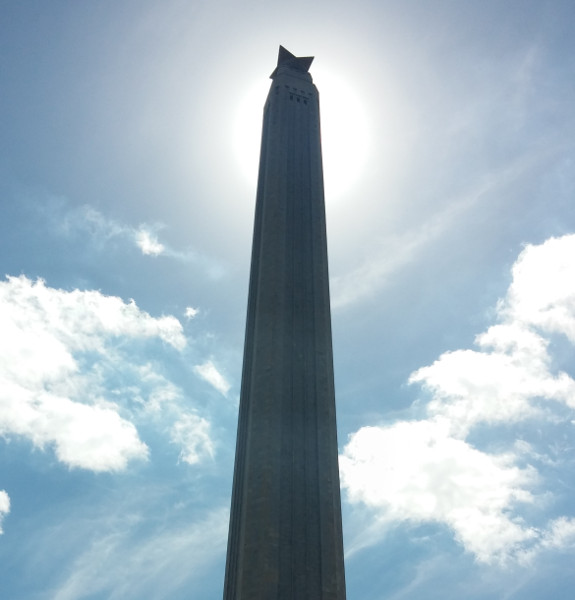
On our other big sight-seeing day in Houston, we went downtown and the
USS Texas memorial ship, and the memorial to the
Battle
of San Jacinto.
Battleship selfie. You know, like you do.
My wife, on one of the anti-aircraft turrets, taking aim at plagerism
and comma-splices.
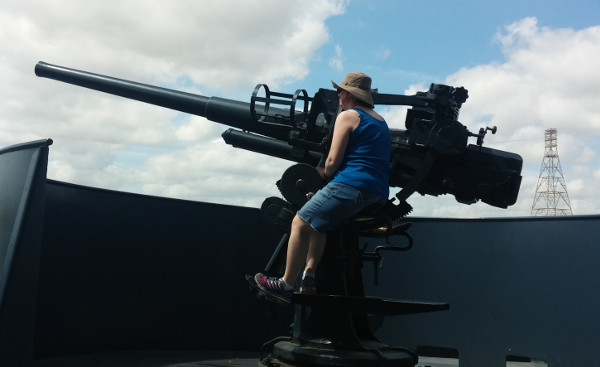
A lot of the gear on the battleship still kind of works, which is
cool. This turret doesn't shoot, obviously, but the articulation
works.
Bridge, which we couldn't go into but could photograph.
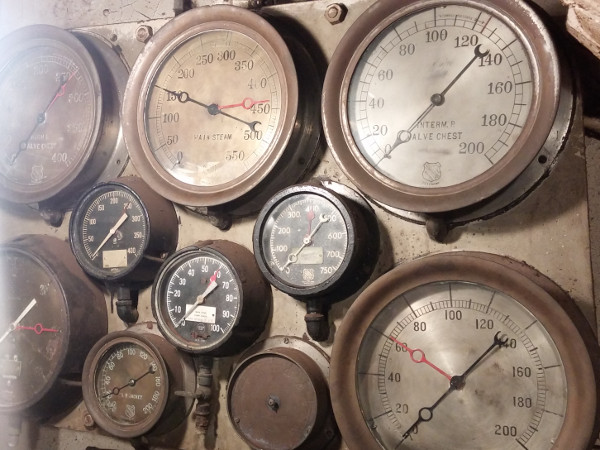
The engine spaces were amazing, but it was difficult to get photos,
because everything's massive but you can't tell because there's
nothing for scale. I did snag one photo of the engineering main
instrument panel:
The battle site is an interesting walk-around, but not a lot to
photograph, other than plaques and a lot of grass. The memorial
itself is amazing and huge. Here it is looking like one of the final stars in
Super Mario 64:
Everything really is bigger in Texas. Driving back to the house, we
have to wait for a crossing oil tanker.
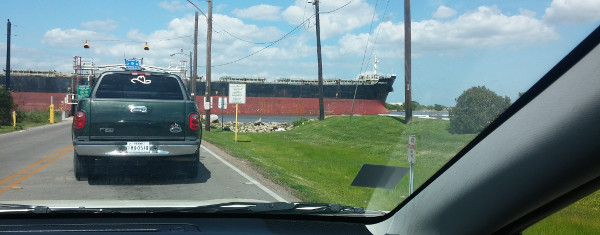
(I think we were actually waiting for the ferry, but I liked the photo.)
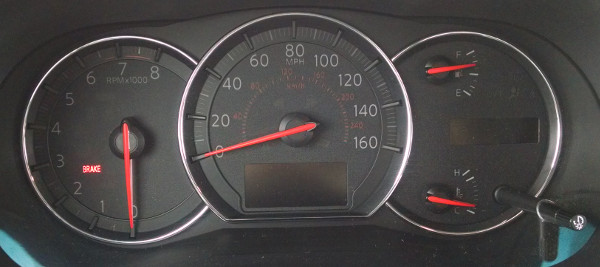
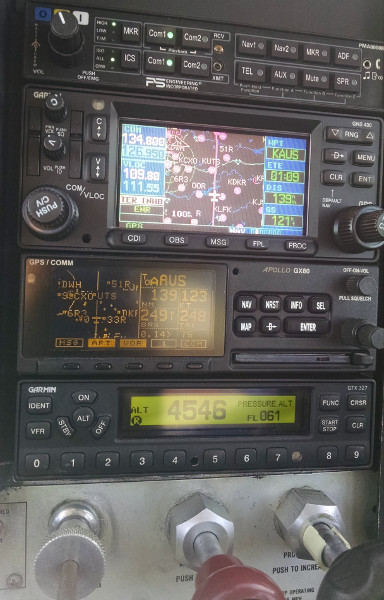
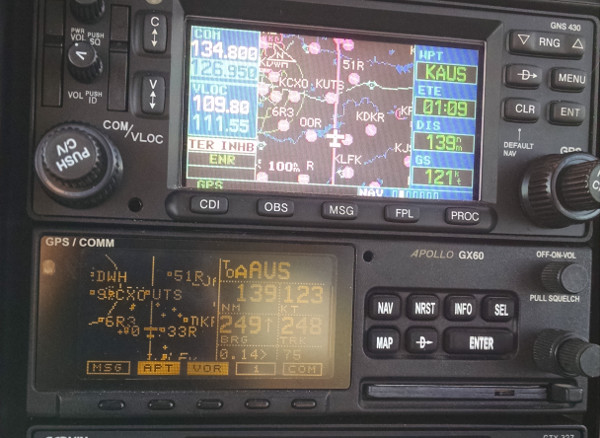
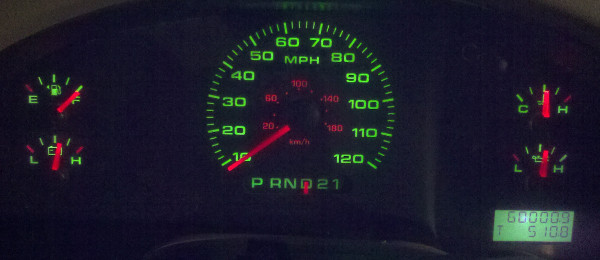
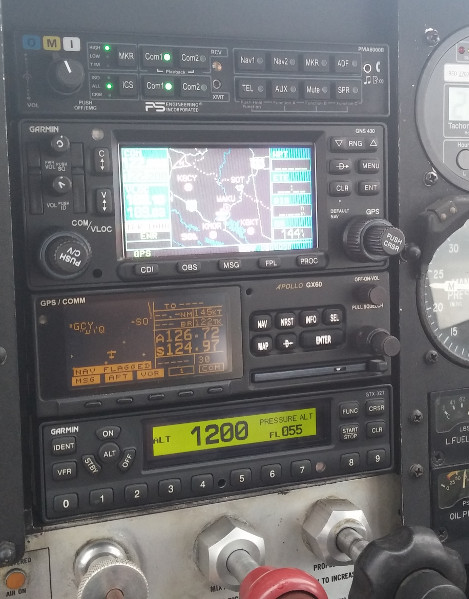
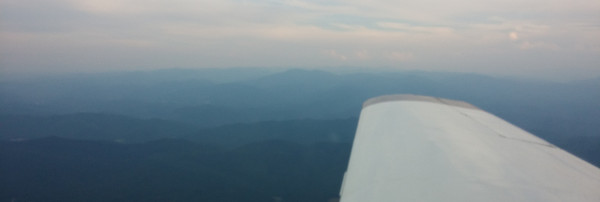
Flying back home, gratuitus instrument panel photos:
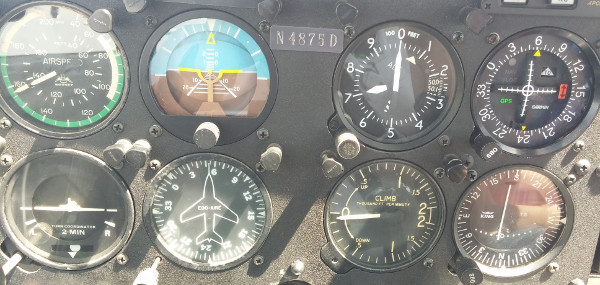
One nice thing about this trip was that it was the major long-distance
trip that my wife and I have attempted to take in our airplane where
everything went flawlessly. Two legs out, two legs back, the airplane
was completely consistent and dependable.
2016 August 03 08:28
Continuing a series of posts that I last worked on, in....er....
February,
one of the places we visited in Houson (visiting my brother and sister
in law) was the NASA Center in Houston. As a space nut, this was a
pretty awesome trip.
The guest rooms we stayed in were very well-equipped:
While we were out on the town for a day, I charged all my stuff.
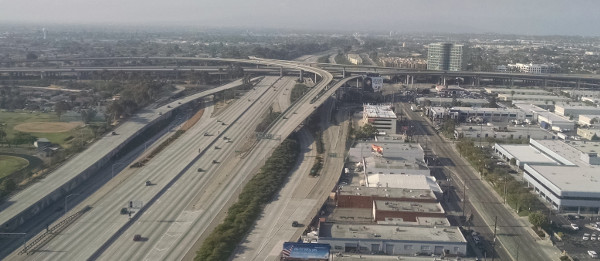
A few highway photos while we were driving into town.
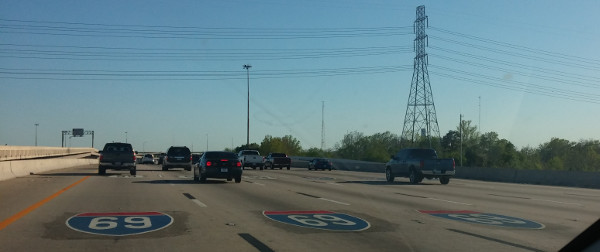
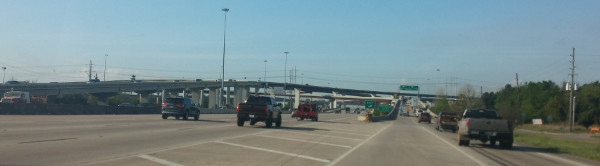
Houston is VERY big on flyover-overpass exchanges. Here's a good example.
A bit of skyline.

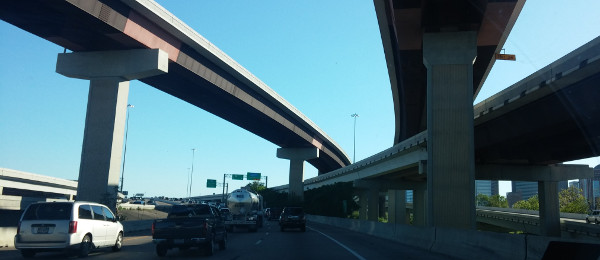
Another overpass set; at least three layers!
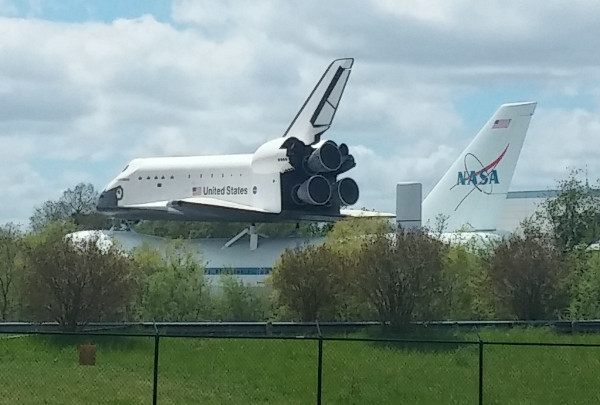
A lot of the stuff on display at NASA in Houston is so big that it
doesn't particularly lend itself to photography without serious
wide-angle gear, and I just had my phone. I attempted to take a few
shots to commemorate the occasion.
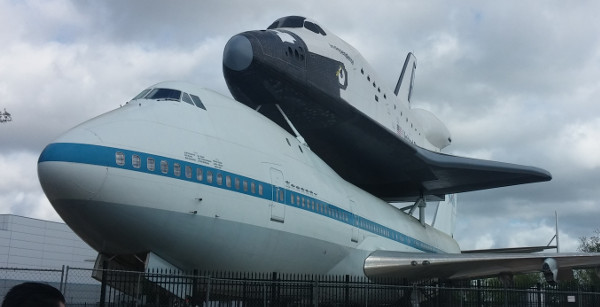
Here's one of the shuttle carrier 747's with an engineering mock-up
shuttle on top of it, parked outside the museum:
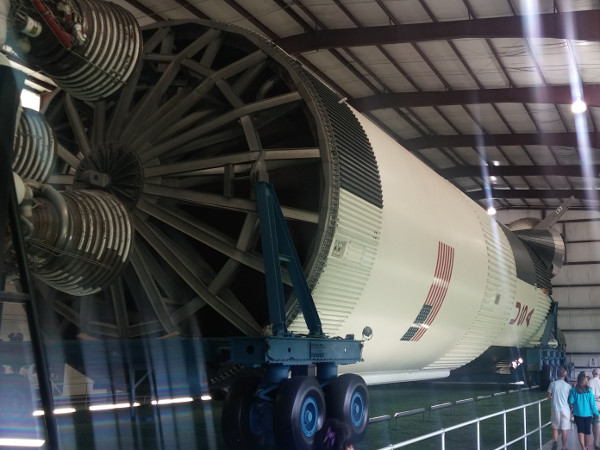
Another highlight of Houston NASA is that they have a complete
Saturn-5 laid out in a horizontal display building. This is looking
down the first stage from the second stage. The first stage is
sitting on its ground carrier vehicle; look at the enormous tires!
An (I'm guessing) engineering test Command Module (the brown bit) with
its escape tower on the right.
As of this trip, I have now seen all of the Saturn-5 rockets on public
display in the US. There's one at Saturn Apollo Center at Kennedy
Space Center in Florida, there's this one at NASA in Houston, and
there are two at Huntsville, Alabama, one inside like the other two
are, and one stacked vertically outside (which is REALLY impressive to
see). I've read there's one more Saturn 5 first stage outside
somewhere in Louisiana; maybe I'll go fly over it someday.
Outside the Saturn 5 display building, they have some rocket engines,
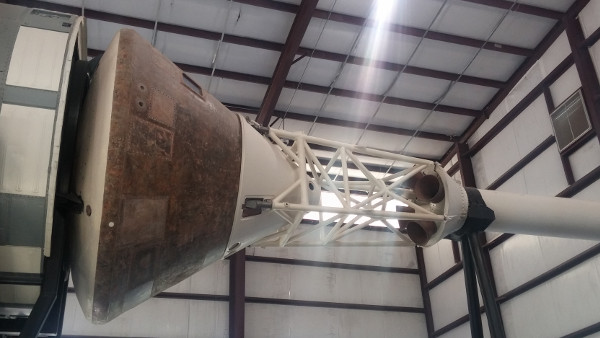
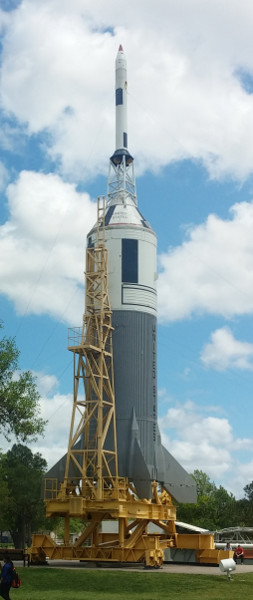
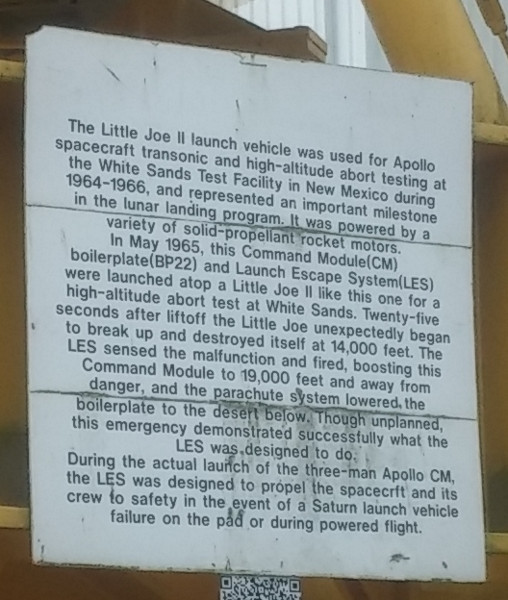
and this. It's a "Little Joe" test vehicle that NASA used to test the
escape system for the Apollo Command Module. You can see it here,
sitting with a command module mounted on top of it.
Another flyover interchange.
2016 August 01 16:49
While I'm catching up on the status of things....
The plane is fine. In the annual this spring, we dug into the
hydraulic system. The hoses were original, and pretty stiff. The
flap up/down control was super-stuff. It turns out I was wrong about
the diagnosis of that; it was the cable, not the pump. That's fixed.
The retraction speed is fixed. We don't really know what the problem
is with the pump that had been in there, but I bought another one and
that one worked fine. I still have the bad pump to try to figure out
what was up.
The brakes still act slightly funny; it will be interesting to find
out if it's better or worse when it's cold. We'd decided that the old
problem with the mag checks might have been a weak plug, so we put a
massive back in the bottom of #2. However, a couple of flights later,
I had another bad mag check, so bought and installed a brand new
fine-wire plug there, and it's been fine ever since.
I need to take it down to Knoxville tomorrow to get its IFR sign-off.
After that, I can start flying it more, potentially.
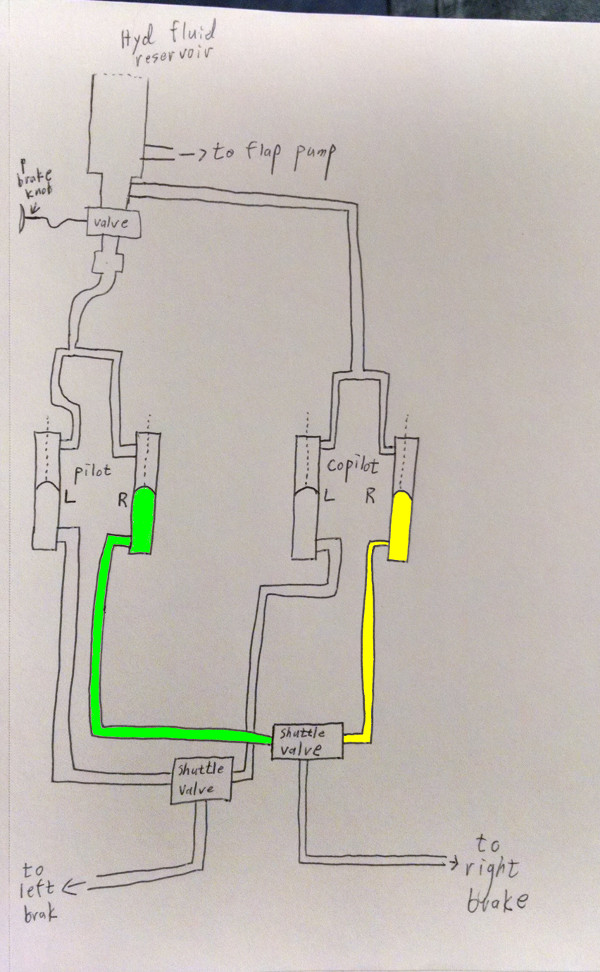
2016 March 20 22:26
A schematic map of the brake system in my airplane. Figured out from
looking at the hydraulic lines in the airplane.
2016 February 20 23:28
Then at the end of March 2015, I flew my wife and I to Texas in our
plane. It was pretty awesome. First we had some prep. As part of
that, I made a tool to try to not make too much of a mess of the plane
when removing the oil filter, which I needed to do to change the oil.
(I *really* wanted to have summer oil in the plane before flying it to
Texas in April.)
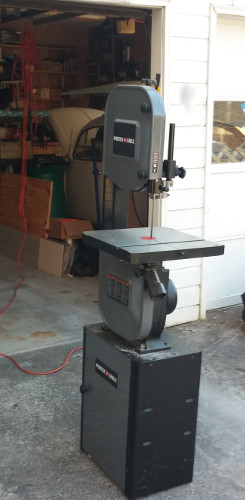
Bandsaw out.
Saw some 4-inch PVC pieces to shape.
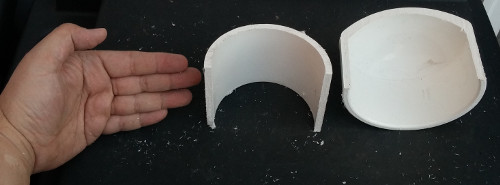
Primed, painted, and ready to glue together.
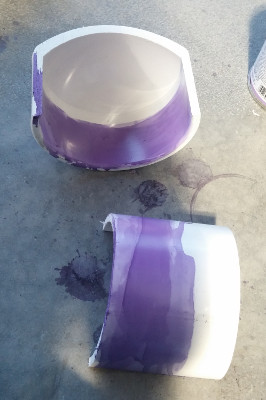
Here's the finished piece, sitting below the oil filter. This is a
catch pan to sit under the filter as you unscrew it from the back of
the engine that catches most of the oil that drains out of the filter
itself as you disconnect it. That keeps that oil from running down
the front of the firewall and out on the nose landing gear tire and
making a mess. (In the later oil change, I discovered that leaving it
to drain for a couple of hours to let the filter mostly drain also
helps a lot.)

It was supposed to be chilly the morning that we left, so I took
advantage of the engine heater we'd recently installed. Here I've
plugged the source end of the extension cord into a light timer.
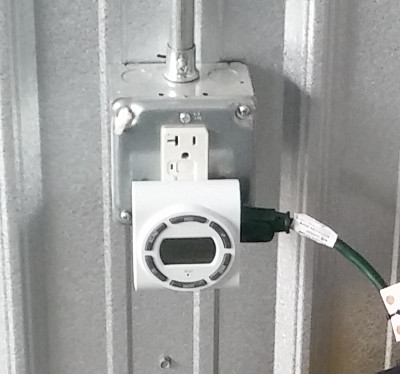
The other end plugs into the heater plug inside the cowl; here you see
the end of the extension cord going into the oil door.
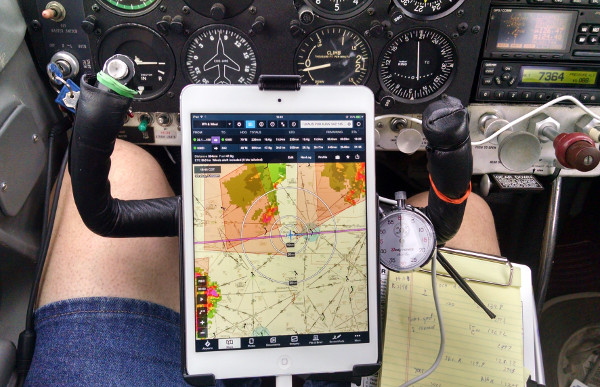
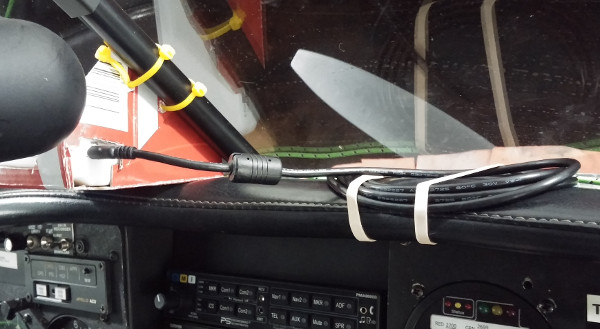
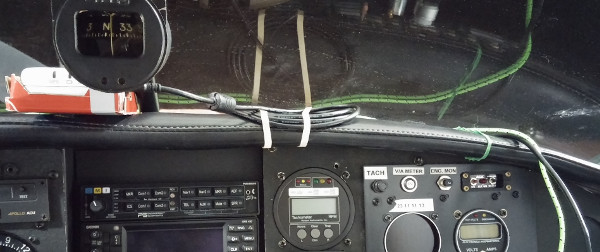
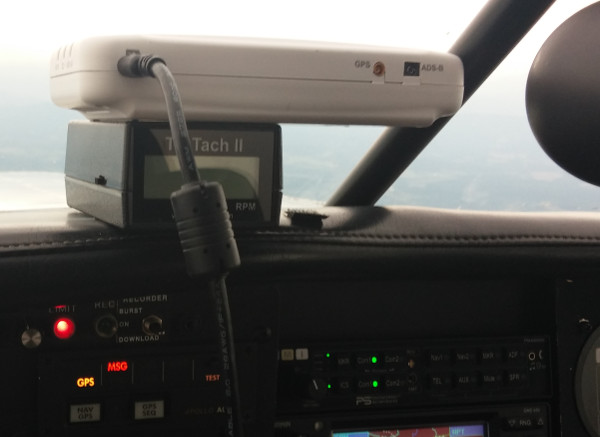
I got the Stratus mounted and power cables run to it, so that I could
use it all the way down and back. A nice addition for long-distance
flights.
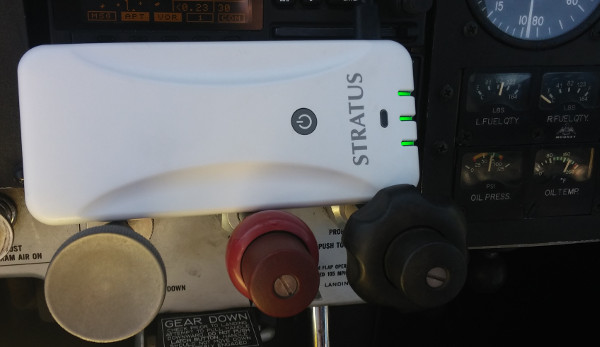
Flying down, I took the Stratus out of its mount on the windshield
because it seemed to be overheating. I was very amused to see that it
still picked up ADS-B ground stations and GPS signals just fine,
sitting here on the throttle and having no view of the ground and
almost none of the sky.
We flew the whole flight down IFR. We took two legs to fly it.
Flying into KIAH at the end of this flight was my first time flying
into a class B. It was fun and interesting. The controllers were
very nice to me. Taxiing was fine, except for my blowing my taxi
instructions slightly and getting yelled at by the ground controller.
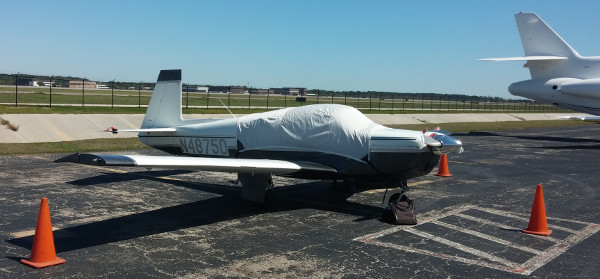
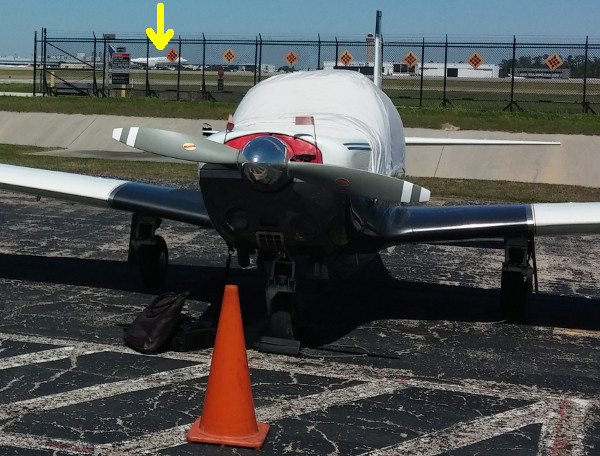
The FBO was clearly used to bigger planes, but they were very nice and
accomodating. They parked our plane along their flight line, with
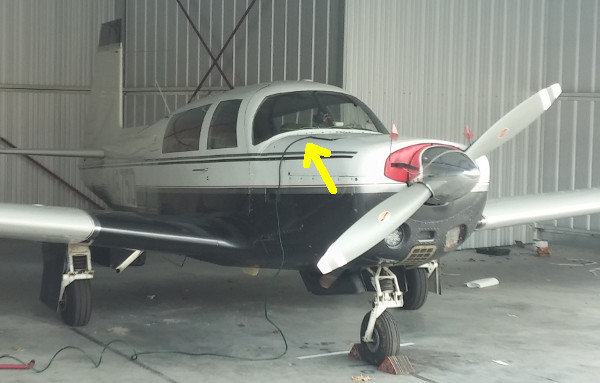
cones to make it more visible.
There's a plane taking off (indicated by the arrow) on the runway
right behind our plane. Neat!
2015 October 03 23:49
Wow. What a year I've had since February. February was vey snowy,
and March wasn't any different. (All the things I mention in passing
here I will hopefully write a whole blog post about with photos. I
just want to get the sequence down here while I'm thinking about it.)
At the beginning of March, I worked with my wife on her professional
organization's conference, which almost got snowed out. So the
planning and the aftermath of that took more time an concentration
than we expected (we drove there and back; much snow).
In the middle of March I took a conference trip to
San Jose California (flew commercial). On the way, due to airline weirdness, I spent a
couple of days driving around Minnesota. Then the conference in
California, and then I spent a day at the Computer History Museum in
Montain View, and then flew back home. Then, with less than a week at
home, I flew wife and I to Houston to visit her brother there. Much
touristing was done, then we flew home.
April: Got a front mini-porch put on the house. Got a new phone.
April 6, my maternal Grandmother died, so my wife and I made plans to
fly up to be at the funeral. We flew up on April 10 and back on April
12. Then the rest of the month was getting my airplane annualed.
This was the most normal annual I've had, but still, it ended up being
extended for a week because we had to get a part of adjust the front
landing gear.
Plane annualed and flown home at the beginning of May. Mid-May, flew
my plane to Texas (dodging storms), then flew commercial to Oregon for a several day
work thing, then commercial back to Texas. Then a Mooney event in
Texas, and then attempted to fly home. Got to Mississippi; the
electric pump on the plane failed when I went to fly home. So that
was a week and change of wrangling to get that back.
Sometime early in the spring, we decided that we were going to start
actively pursuing an international adoption from China. We decided to
target bringing the kid home in summer of 2016. We spent a lot of time
in May, for instance, sending out from background checks from all the
states we've each lived in since turning 18 (turns out I've lived in
several.).
The first big component of the paperwork was the home study. This
included three visits with a social worker. The first two were in
May, the last one was June 10. During that visit, the social worker
talked about their upcoming hosting program. We told her that we
hadn't been interested, but it turns out, they'd lowered the fees. So
we decided to sign on.
So as of June 10, suddenly we were preparing for having a kid in the
house. So things suddenly got super-busy. June wasn't bad; I didn't
have a lot of trips, but lots of paperwork and working in the room
that our guest would be staying in.
At the beginning of July, we went (flew commercial) to Minnesota to
Convergence. Then we came back and spent time finishing prep for the
kid. He arrived on July 16th, and flew back to China on August 9th.
That's a whole story for another time. The conclusion is that we can
be parents, we want to be parents, and in face we're going to pursue
being parents to that child (which you can do if you're the host
family).
So now starting 3rd week of August, my wife and I are both taking
spoken Chinese. The 2nd weekend of September, we went to the planning
meeting of the conference that organization will be throwing in
March. The next weekend we hosted a Chinese Med School instructor (I
took him flying). This weekend my wife is at a conference; but I'm
writing this blog post because this is the first real chance I've had
to catch up in forever.
Yesterday and today I ordered a bunch of parts for my vintage VW. I
hope to put it back together in a few weeks.
Phew. Just typing that made me tired.
Final answer: busy summer, and we're super-excited that we'll be
adopting a really great and sweet kid this coming year. Not a ton of
flying, but some good stuff in March and in May.
Details on a lot of this stuff in the (hopefully near) future. This
was just the overview. Photos too.
2015 April 28 23:00
I meant to come and have the annual of the plane take 3 or perhaps 4
days. *sigh* It's not super-bad, I get to stay and play with the
parents-in-law who are awesome, but it's been two weeks as of tomorrow
and I miss my wife and cats.
This post is about what I've been doing. Early on we cleaned and check
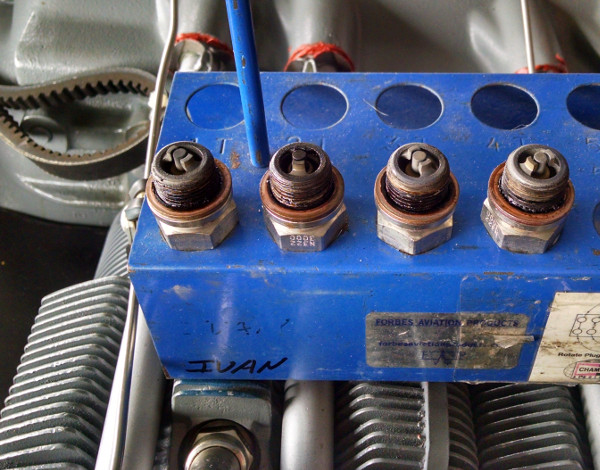
spark plugs; everything looking healthy there.
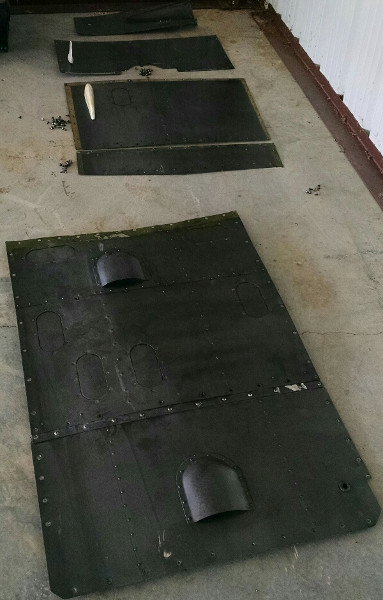
One of the big things I've done this trip is take all the belly panels
off my plane for the first time. Here they are laid out with piles of
screws.
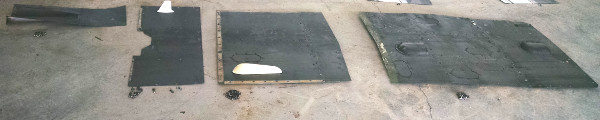
I forgot to put something in the picture to scale; the panels
are about 2 feed wide, top to bottom in the image. There's about a
few hundred screws holding them to the airplane.
Getting the screws out wasn't trivial. Three of them had actually
completely frozen, so I had to cut a slot in their heads with a dremel tool to
get them out.
Another thing I got to mess with was taking off and putting on the
spinner.

I painted the pressure plate (highlighted by the red
arrow), and then installed the forward bulkhead with new screws. Just
waiting for the mechanic's approval to put that part back together.
So what's the fuss about? Why did I stay longer? Well, I needed to
have a spacing collar installed in the nose gear for better handling.
THe collar is the silver ring; the white plate is the pressure plate
at the top of the gear doughnuts.
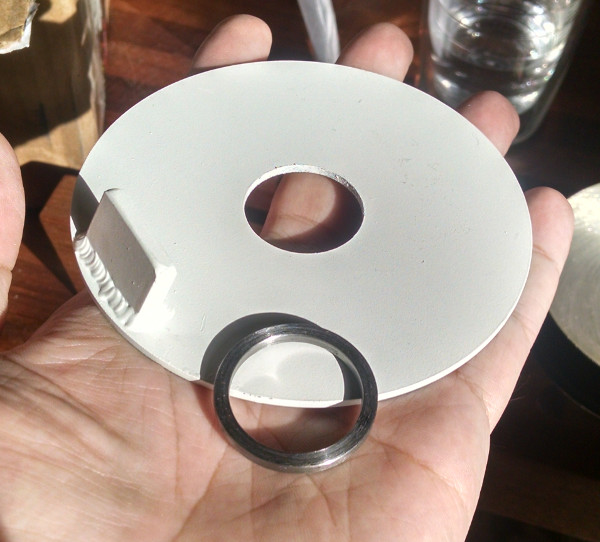
And as long as we're taking the nose disk shock tower apart, I decided
to have the shock disks in the nose gear replaced.
Also, while I've been driving back and forth to the hangar (1 h 20 min
each way) I've been testing chargers to see which one worked best
charging my iPad mini.
So tomorrow, hopefully by mid-day the nose gear will be back together
and I can start planning for the trip home.
2015 April 07 10:04
Here's what I've been doing with the Stratus. Here's my working
cardboard template that I'm getting into shape.
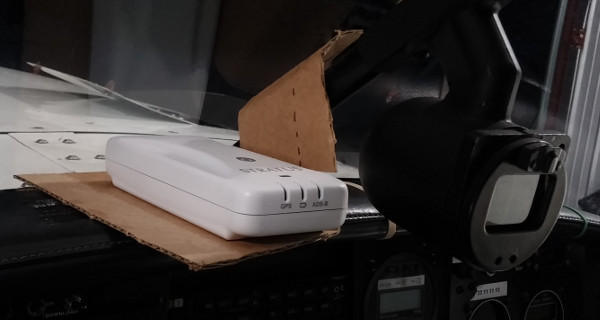
I'm basically making
a basket or tray that holds the stratus along the axis of the
airplane, so that I can see the status lights, and so that it doesn't
slide off into my lap from the glare shield. I did this very early in
the year.
A few weeks later, I put together a more precise version of the tray.
Here I've put it together.
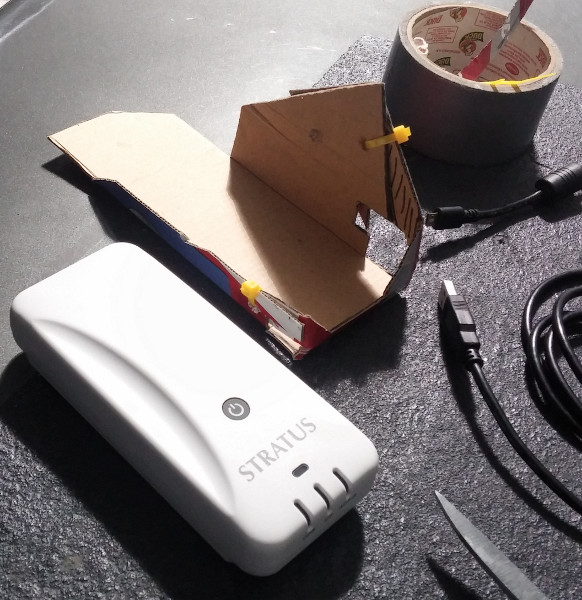
Eventually the thought is to make the tray
out of Aluminum so it's stiffer, but the cardboard will do for a
short-lived version.
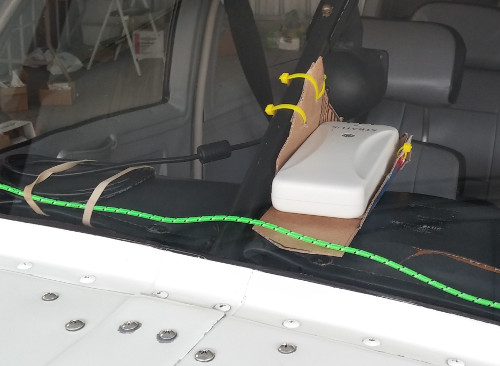
The green cord is a USB power cord that runs along the top of the
glare shield and then comes over by the pilot to power the iPad.
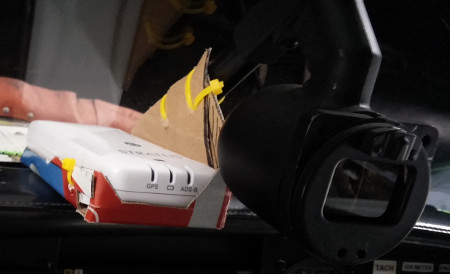
The cardboard tray, cable tied into place on the compass mounting
tube,
with the Stratus sitting in/on it. And the power cable to the
Stratus:
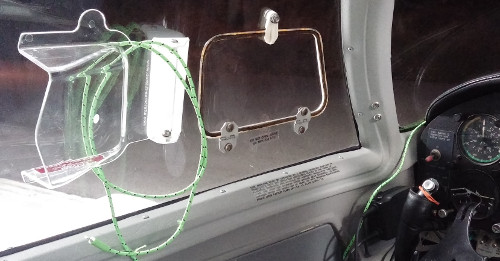
Here's what the setup looks like from outside the windshield:
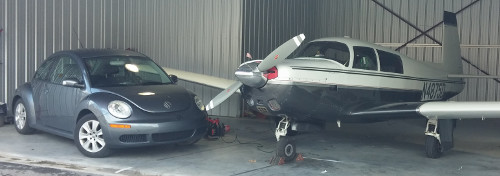
If I park the airplane just right, I can get the car into the hangar
with the airplane still in it and shut the door:
A closer view of the above shot. You can see the oil cooler nicely
here in the lower corner of the cowl. You can also see the Stratus in
its mount under the windshield.
And after a couple of hours of futzing and prepping, the airplane is
ready for its trip to Texas (another post).
The weather was likely to
be fairly cold the morning that we left; you can see the extension
cord going in the oil door on the cowl; it's attached to the engine
heater plug and comes from a timer on the other end. I set it to
start warming the oil several hours before we got to the hangar. It
worked great.
2015 April 07 09:38
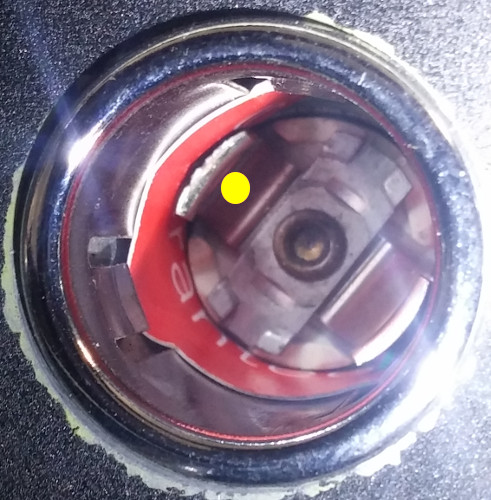
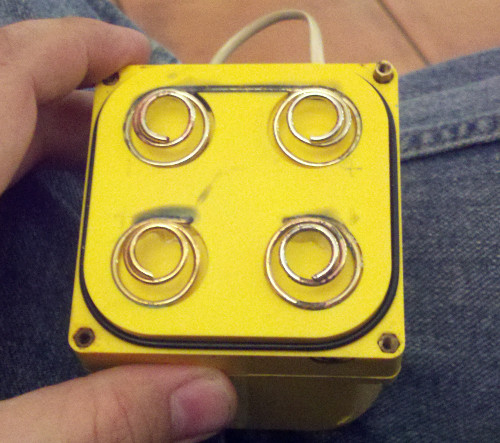
An addendum to the last post. When I went to test the Bolse charger
in flight, I noticed that it kept popping the breaker. The below
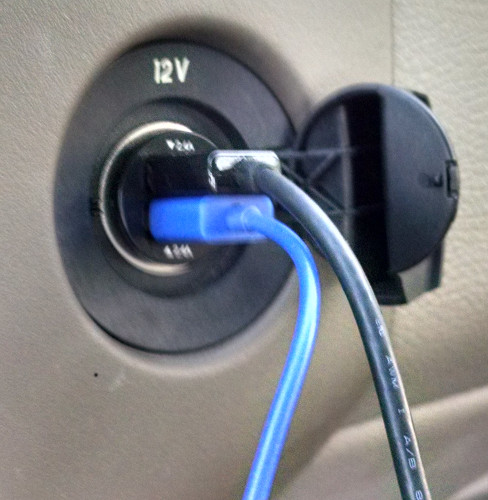
photos are the "before" of the inside of the lighter socket.
Here's the bottom of the socket.
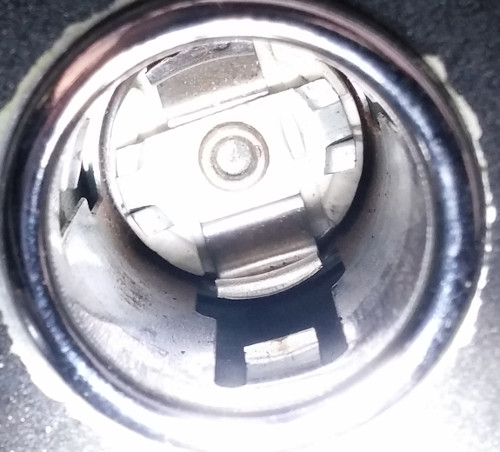
The outer barrel is connected to
ground. The center stud at the back is connected to positive voltage
through a breaker. There's a tang also connected to positive voltage
that sticks out toward the camera that's also at positive voltage.
Notice on this side (which is lower right in the
socket as it sits in the plane) there's a nice cutout in the barrel
for the tang to make sure they don't touch.
Now here's two other shots of the other side of the lighter socket.
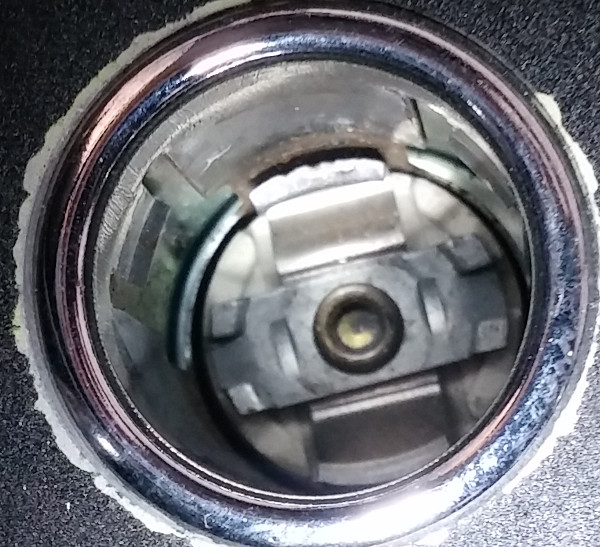
Note that there are TWO cutouts, but the other tang lands directly in
between them. In other words, if the tang gets pushed out from the
center, it touches the side of the barrel. As you can see, it's done
so quite a bit; the edge of the tang is eroded.
What it looks like to me here is that the barrel and the pieces that
sits in the back of the barrel don't match. I presume there's a
three-tang pattern and a two-tang pattern, and someone later replaced
the back part of the barrel with the wrong piece. Since it causes
shorts, I almost wonder if it wasn't a former owner doing some "hangar
fairy" maintenance. Also mildly amusing that no one since then
noticed it.
2015 April 06 22:40
Last year sometime, I bought a charger to go in the airplane. It has
three outputs, with different current capacities marked on the
USB ports:
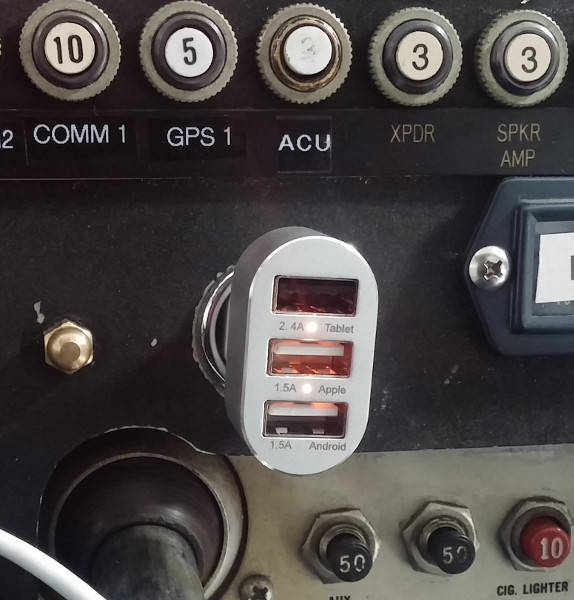
It worked pretty well for my accessory electronics in my airplane
while I was flying. The 2.4A output was enough to charge the Stratus
GPS/ADS-B unit, and the lower 1.5A output would charge my iPad.
Well, I got another one to charge the two devices, a newer one without
the labels, with the hopes that since all the outputs were the same,
it would be able to supply full output current to all three outputs.

Not so much, it turns out. Only output that can charge the Stratus is
the top on, and the other ports act the same as the labelled one. So
in other words, the unlabelled one is the same as the labelled one
just without the physical labels. Oh well. More recently I've been
investigating other charging solutions. (Both of the 3-output white
chargers are "Bolse" brand.)
One interesting thing I ran into while testing the newer charger was
that if I pushed it into the power socket (formerly lighter socket)
all the way, it would trip the breaker. Looking inside, you can see
why:
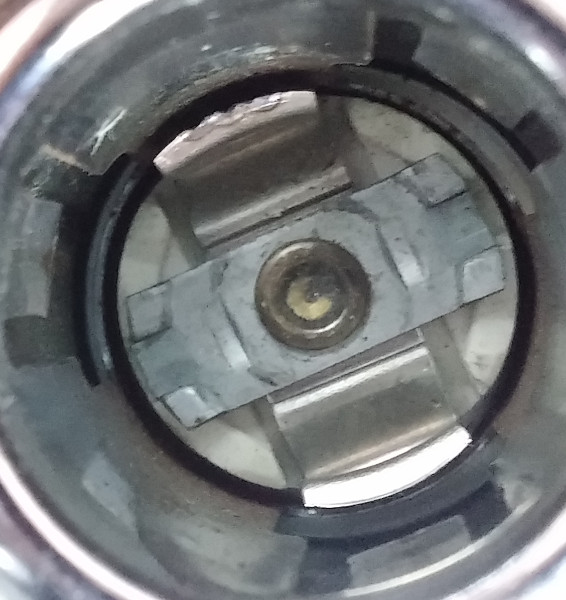
The yellow dot indicates the tang on the hot part of the socket. You
can see it's scored on the edge where it's touched the side. I
suspect that someone put the back part of the socket from a car into
the socket from the airplane. This is something I'll have to talk to
my mechanic at annual (which is soon). My temporary solution is the
red cardboard strip that keeps the tang from touching the grounding
barrel.
The reason that I'm getting the charging stuff set up is that I
bought an iPad mini 2 for my electronic charts.
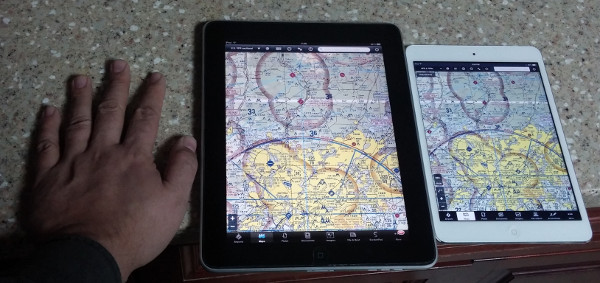
Next to my hand is my
old iPad 1 that I've had for a few years, and farther away from my
hand is the mini. Both are running foreflight here.
I have a RAM ball mount on the bottom of the pilot's yoke in my
airplane. I have a RAM mounting arm and an iPad mini mount to hold
the mini in front of the yoke. Here you see how I've modified the
arm, so that the arm will sit up flush with the yoke shaft:
And here's the iPad mini on its mount on the yoke. This is basically
my view sitting in the pilot's seat.
The full-size iPad is pretty
bulky, but the mini is perfect. I can read the approach plate (as
shown) but I can see the panel and switches just fine. I've flown
four big cross-country flights with it mounted this way, including a
real instrument approach in significant IFR conditions, and this
worked great.
Oh, and another thing: The Bolse charger wasn't able to charge the
Stratus and the iPad mini continuously for all the flights. Sometime
during the second flight, it stopped charging the stratus. I don't
know if it gets too hot or what, but the flights were finished under
battery power. Which is fine, but I wish I could get a solution that
would continue to charge for arbitrary amounts of time.
I realized the other day that I don't have any ANY photos of the
airplane in the last dozen or so blog posts, here here are a couple.
This was March 1 when I went out to the hangar and test the fit of the
iPad and test the charger. After two weeks of basically being snowed
in, we were able to get out of the house, but the hangars still had a
ridge of snow from it falling off the roof of the hangar building.
And just because it amuses me, a closer version of that same photo:
I love the asymmetric look of the nose, the landing light on the right
side and the oil cooler on the left. If you look closely, just to the
right (from our point of view) in the windshield is the Stratus taped
to the glare shield. The saga of the mounting technology for the
Stratus is another post entirely.
2015 January 06 00:33
So, after I broke the airplane (November 2013), we did all the initial
insurance stuff, and got a mechanic involved and got him working on
removing the propeller and the engine. Since we didn't have a car
there, we drove my father-in-law's truck back home.
So we went back to their place for Thanksgiving. While we were there,
I went to the airport and helped with the final removal of the engine,
and then we put the engine and the (broken) propeller on the truck,
then I drove it to the house. Then the next day, I got up
super-early, and drive the prop and the engine to repair places in
Tulsa, Oklahoma, and 6+ hour drive each way.
Because I really really wanted to get the engine and prop to their
respective places during business hours, I was in a big hurry. I only
got a few photos on that trip, and none at all of the back of the
truck with the stuff loaded, which totally bums me out. Ah well; here
are a few of them (along with a couple of others relating to the
electronics).
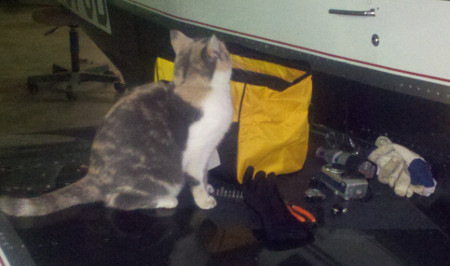
Patches the airport cat inspects my tool bag; this is the day of the
engine removal.
5:22am, I'm about to head out. My GPS is on the windshield, dialed in
for Tulsa.
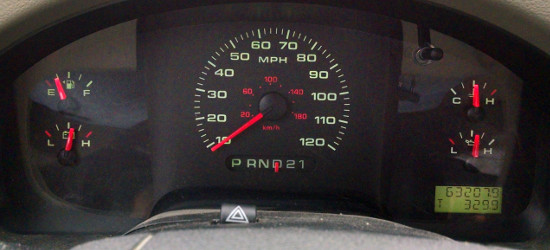
The panel of the truck; my view for most of the day.
That's it. Like I said, a super-busy day.
Later on, the following January:
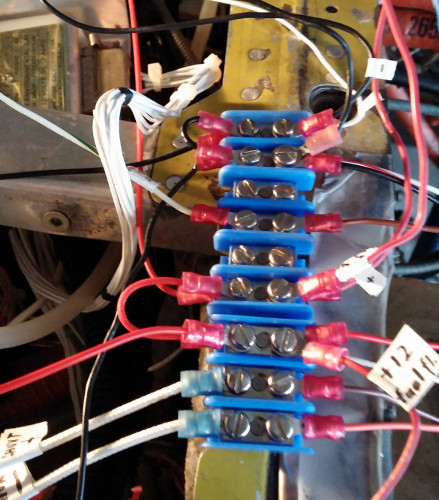
Before I bundled the wires all in for the new instruments, I had a
test setup to make sure all the components worked right. This was the
temporary wiring panel. And here's the instrument sub-panel, turned
on for test for the first time:
2015 January 05 00:03
The story so far: On November 1, 2013, I broke our airplane. Due to a
combination of freakishly gusty wind and my missing a couple of
details, I put the airplane down but we ran off the runway and clipped
the propeller. This lead to insurance replacing the prop and helping
with engine inspection, to which we added getting the engine overhauled.
Due to various circumstances, that meant that getting the airplane
flying again was a several month process. Since it was going to be
down all that time, I decided to go ahead and update and fix some
things that needed doing.
I was mostly happy with the instrumentation in the airplane, but one
thing I was NOT was the ammeter. It was an analog galvanometer, and
it frankly barely worked. It had some bias in it, so the zero it
read in the air when the battery was all charged was different than
what it ready on the ground when everything was off. Consequently, I
didn't feel that I could tell reliably from that meter if the charging
system was working or not. So I decided to install an EI digital
volt/ammeter. However, there's no slot, so I had to make one. There
was a blank part of the panel, which it turns out covered up a place
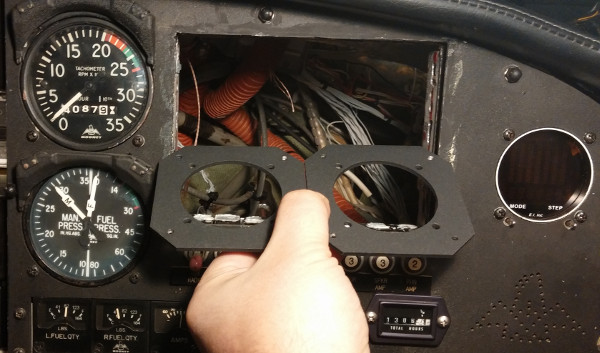
where you can put avionics. Over the winter, I fabricated a panel to
fill that space.
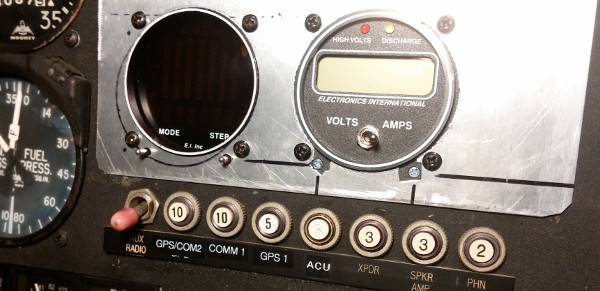
The new sub-panel was to hold the new ammeter, and the engine monitor
which had already been in the plane but putting it there would move it
closer to the pilot and easier to see and operate. It would also hold
the breaker for the engine monitor, the breaker for the volt/amp
meter, and the breaker for the new digital tachometer that I was also
putting in.
Here's how the airplane sat for over four months. The engine was
gone, being overhauled. Sad.
This is where I was realizing that I could fit two instruments
into that space, but not using those inserts.

Test fit of the test panel. The ammeter is installed.
At this point I'd realized that it would make sense to have the engine
monitor closer to the pilot (on the left) because you're always
looking at that and often using the switches, and the ammeter goes
better farther away on the right because it's easier to glance and and
you're basically never touching it. Thus the test cuts for the
switches in both sockets. This is still the test panel. I've made
marker lines on it so that I can use it as a template for cutting and
drilling the real panel.
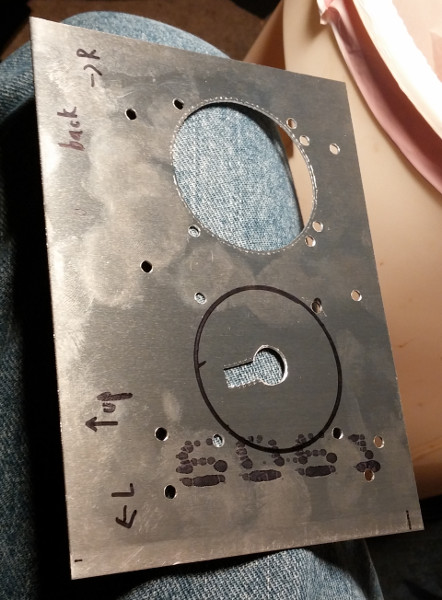
The real panel, cut from 6061-T6 Aluminum. I've cut out one of the
instrument holes and I'm in the process of nibbling out the second
one. I've drilled the holes for the stiffening ribs (which will have
to be re-done).

All the holes are in, including the ones at the top for the breakers.
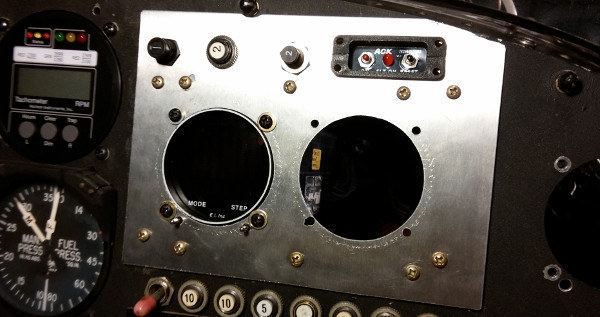
Final test fit, before being...
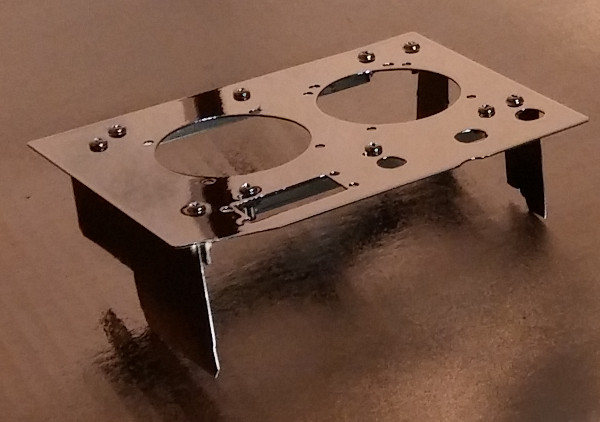
painted black.
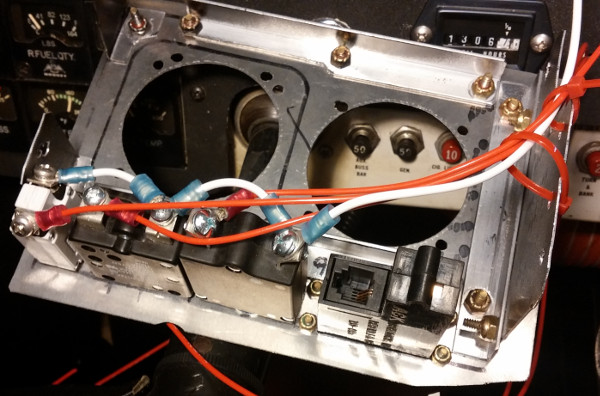
Here's the panel wired and ready to go in.
These
two
posts
have photos of the final panel in the airplane with the gauges running.
So far, so good with new-year's resolutions. I've blogged for 2 of
the 4 days of the new year (including this post) and I've walked on
the treadmill for 3 of the 4 days.
2015 January 04 00:09
I've made a bunch of new-year's resolutions...which I've already
strictly broken, but I'm going to pursue anyway. I wanted to
excersize daily, which I've done 2 out of the 3 days. I've wanted to
blog a lot; this is the start of that. More on that in another post.
The airplane is doing well. I'm starting to have reasonable
confidence in it for trips, so that increases planning flexibility. I
installed a "kool-skoop" (their spelling, not mine) that brings in air
on a hot day when you're taxiing on the ground. Great tool, and
taxiiing in hot weather is much less annoying.

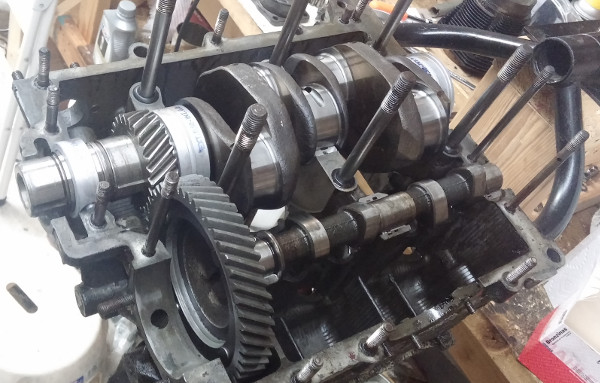
And I'm finally collecting the tools and parts to put my VW back
together. I still need to get a camshaft; I'm using the crank and
various camshafts sitting in the left block half to do some camshaft
testing.
I'm starting a big cleaning project; that starts today. The plan is
that will be finished 2 weeks from today on Sunday.
2014 December 07 09:39
The fall has been good, but busy. Work is good, the fall conference
went really well. There have been a couple of changes, so I don't
have photo editing and uploading sorted out yet, so this post is text-only.
The plane is doing superbly well. I took two signifnicant trips in
it, in October and November, and absolutely NOTHING went wrong. This
was a first. So I'm beginning to trust it much more for trips and
such. The one last thing I want to do for this winter is to install
an engine heater, so that I can electrically pre-heat the engine when
it's cold. That will make life easier on it.
I didn't work on my old Beetle at all this fall, but I've started
doing that again recently. I'd like to get it back in commission in
the spring. I'm going to rebuild the engine, and now I'm working on
assessing exactly what parts I need. The crankshaft is reground and I
have new bearings. I was convinced recently that I probably really do
need a new camshaft, so in the last week I've been working on
assessing what exactly I need. I'll have another post on that soon.
I got a new phone early in the year. The way it mounts as a drive is
different than older phones, so pulling photos off of it is
different. You can easily pull images from folders that you've
created, but it doesn't seem to want to pull images directly from the
raw camera volume. That technique worked so well for so long; I don't
get why that needed a whole new protocol. :-/
And *just* recently (Wednesday) we got new laptops. My wife was
looking for one, and pinged me about a deal on Amazon. I liked it
enough that I decided I wanted one too. They are Lenovo X140e
Thinkpads. So I've gone away somewhat from ultraportables, but it's a
relaly nice laptop, and not TOO heavy, with lots of battery life. I'm
typing on it now. More keyboard throw and sound than I'm used to, but
it's not bad.
More soon, but I at least wanted to get something up here.
2014 June 28 20:56
It's been sort of a busy spring. I've been dealing with all the stuff
of getting the airplane back in the air, and getting all the minor
bugs fixed. Then I had to wait to get it signed off for IFR flight.
I also had to go and get myself current for IFR since I hadn't flown
much over the winter. And the time this took was extended because the
weather has been stormy and horrid all spring. It was really
difficult to find a solid half day so that I could just go flying and
wasnt' worried that I was going to get fogged in and waste the trip
down to the airport. And what I really need to do now is just take the airplane out and fly
it a bunch, to make sure the engine's all broken in.
But finally...finally...Thursday evening I had a chance to just take
it out and fly. I did check a couple of last things that I'd had
fixed or adusted, but everything worked fine, I had a smooth
uneventful flight, and everything just worked.
And the significant old squawks were gone and no new ones showed up.
I spent a little
effort paying attention to the storms and rain around the area, I did
fly through a little rain, but even that was uneventful. It just
worked. Nothing happen. I just spun the engine for an hour and a
half, and then came back home. It's been so rare that that's
happened,
and it was lovely.
And of course, since taking instrument panel photos is my fetish, here
are a few:
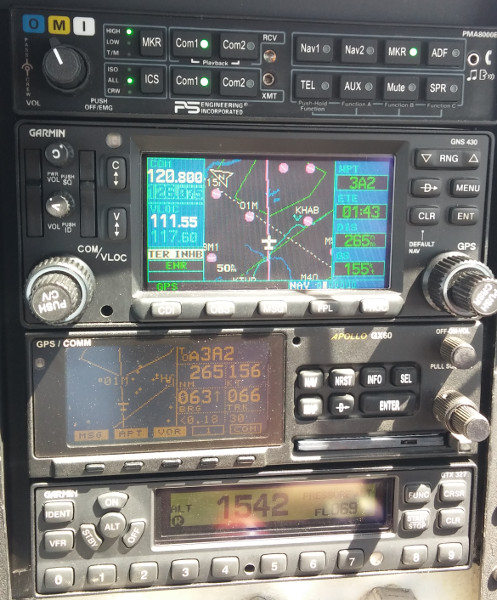
GPS/radio stack. Nothing special about this except no rubber bands on
the controls at the bottom keeping them from slipping (fixed the
friction during winter annual). Also--I checked for the old
electrical fault by banging on the ceiling. That's definitely gone
now. Whoo-hoo!
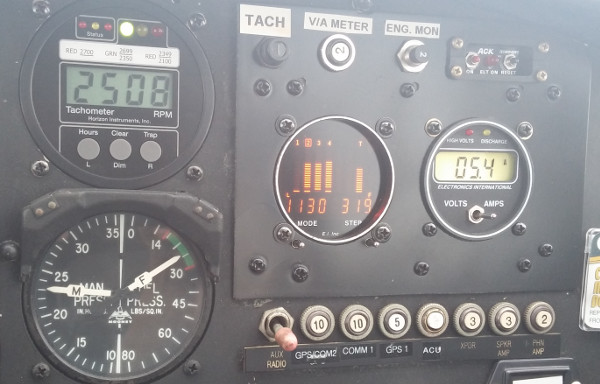
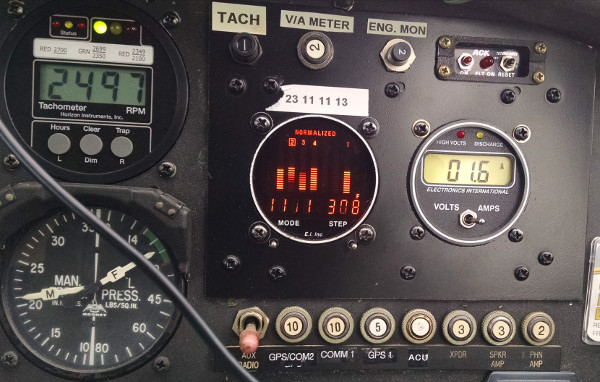
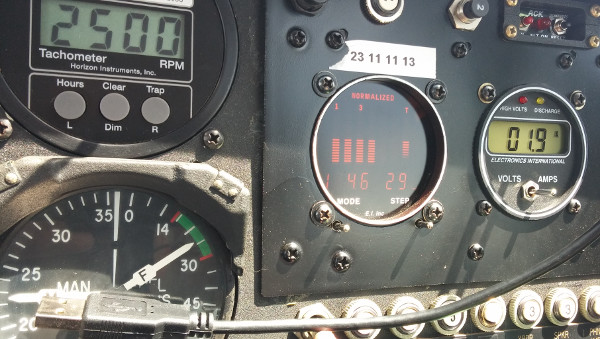
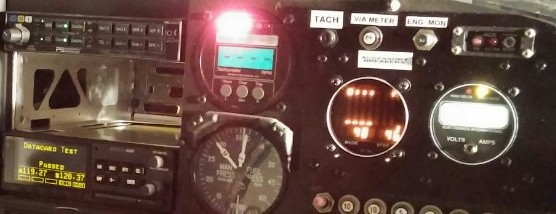
The new digital tach is in the upper left. The new ammeter is to the
right. Both working just like I'd hoped. (To airplane people: the
reason cylinder #1 isn't showing any EGT is because a mechanic
replaced the #1 exhaust probe without asking and put in the wrong
kind, so it's flaky. I forgot to fix that this winter.)
Bottom row engine gauges firmly in the green at cruise.
Another thing that happened over the winter while the mechanic was
adjusting the door was we tore the leather strap pull-handle. He
re-attached it, but had to shorten the strap a bit, so my Stratus
GPS/ADS-B device no longer fits in the door strap. So I have to find
a new place for it to sit. Here's the temporary location, on the left
side of the glare shield on top of the optical tach I have taped
there. This allows Foreflight to display my position and display
weather radar in flight, like so:
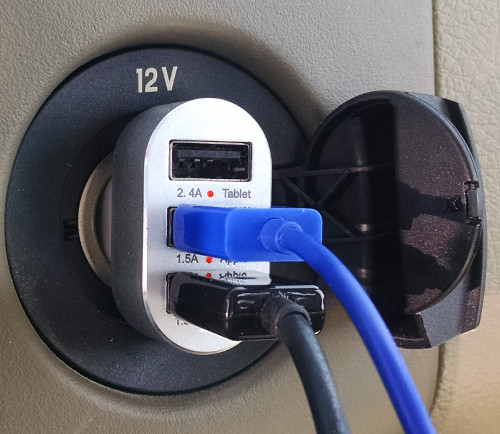
Since I was using both my iPad and the Stratus, I got to test out the
lighter socket charger that I got. Historically, I've had problems
with chargers holding voltage enough to charge devices in the
airplane.
Here it is for sale on Amazon.
I'm very pleased that it worked
like a champ!
That charger has three slots, a 2.4A, and two 1.5A slots. The 2.4 is
labeled "tablet", and then the other two are labelled "Apple" and
"Android". Since generaly the iPad tends to be very power-hungry, I
plugged the iPad cord into the 2.4 slot, which worked fine. However,
the Stratus power light blinked red when plugged into the 1.5 (which I
think means it can't charge). So I switched them, and it actually
worked. So the Stratus was running and charging happily on the 2.4 A
slot and my iPad was running and charging on the 1.5A slot.
Successful test!
Oh, and just in case there was any question, the Great Smoky Mountains
are lovely and picturesque from the air.
Another 5 flights or so like this would be really really groovy.
Here's hoping.
2014 April 26 20:31
I flew through Atlanta on my way from Texas to Missouri to pick up my
plane a couple of weeks ago. Departing Atlanta, we flew over
Peachtree DeKalb airport, where I've flown a few times and gone for
flight instruction and classes and stuff.
They used to have an east-west runday, but the west end of it's been
remove and hangars built there. I assume that's a good thing; it
means the airport is growing and being used. And it was frankly
plenty busy as it was. Here's some photos that I managed to snag out
the window:
I looked in the publications about the airport; the change was fairly
recent.
Recently, I looked at
the airnav.com page for PDK, and it had an old
photo. I sent them a copy of the second photo above, and as of this
writing, April 26, my photo is now the one for that airport. Cool!
(I'm sure they'll get a better photo with fewer clouds in the not-too
distant future, but for now, it's neat that I have a photo there. )
2014 April 24 21:55
I was planning on blogging every day in April. Ha. I got busy and
went to the MAPA convention and got delayed (again) until I could fly the
plane back and I've just been busy. I should stop promising to do
that.
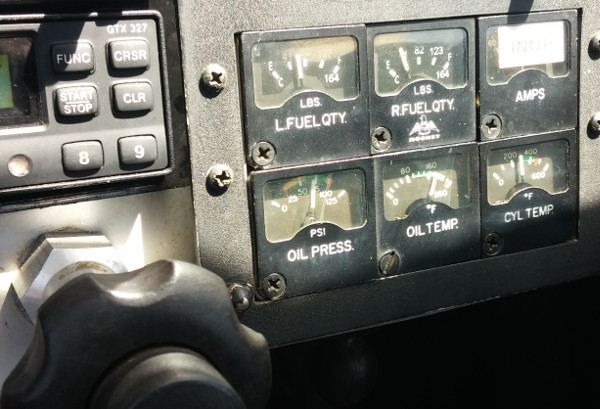
Anyway, the airplane is physically flyable, annualed (so it's legal to
fly) and back home. Yay! Here are a few photos of the gauges while
flying back the last leg from Bowling Green.
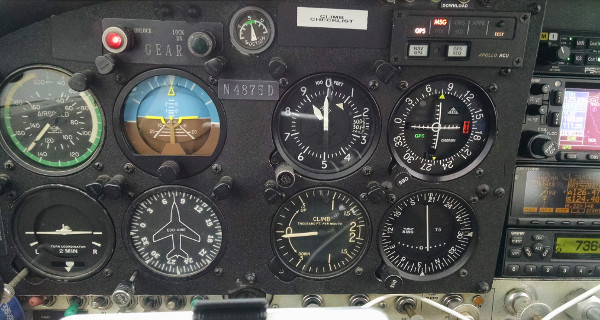
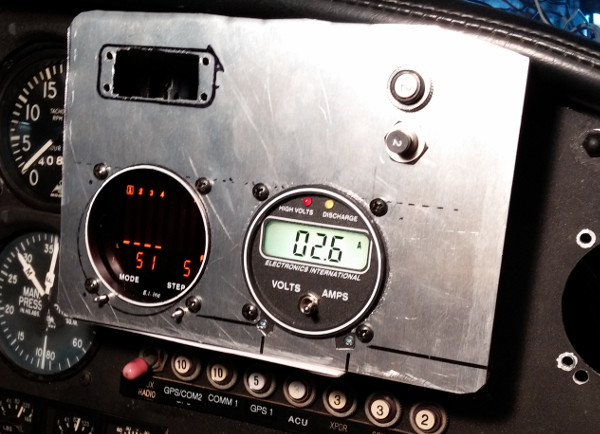
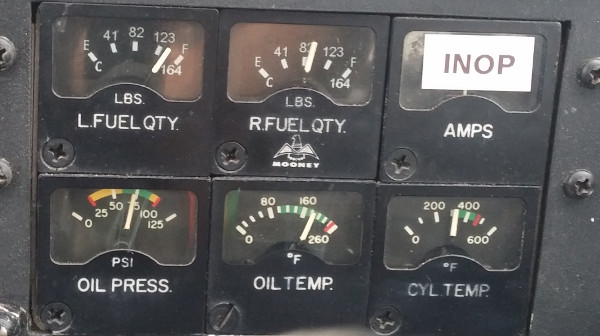
Here's the stock 6-pack engine cluster.
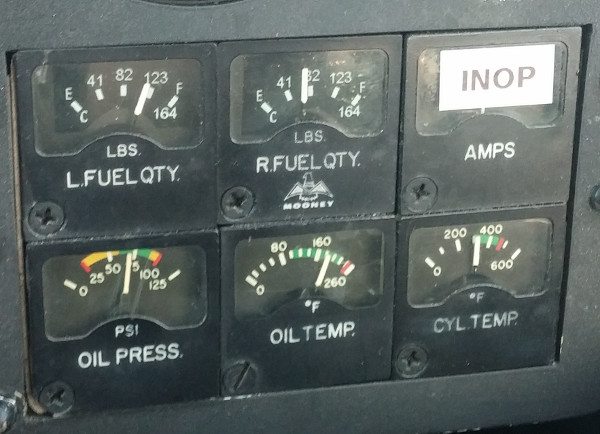
The upper right gauge, the old
ammeter, has been replaced by a new digital one (see next photo) and
so it's marked INOPerative. The important thing here is the bottom
three gauges are all firmly in the green (actually, the cylinder head
temp, the lower right one, is basically below; this plane cools
superbly well at cruise).
And here's upper-right side of the instrument panel:
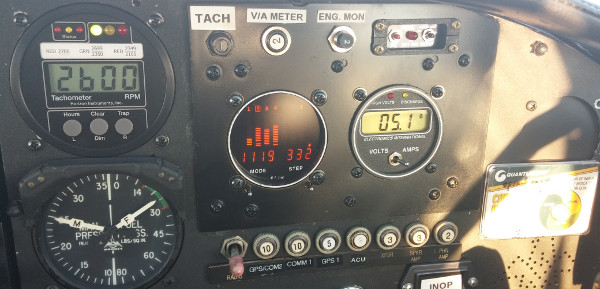
In the lower left is the stock manifold pressure gauge and fuel
pressure gauge. In the upper left is the new Horizon Tachometer. I
really like how it looks and how it works. The area in the center was
a blank panel up to this winter's annual. The orange engine meter
(bar graph thing in the center) was all the way over on the right
where the blank round panel now is. I moved it closer so it's easy
for the pilot to see it and get at the switches. The third meter, the
one with the single switch right below it, is my new
volmeter/ammeter. I got it because the stock ammeter just didn't read
very well.
The area in the center that's shinier black is a panel that I
fabricated. The engine monitor is an older electronics piece, so it's
fairly long and kind of heavy. THe extra screws that you see in the
panel are attaching reinforcing rails to the back of the panel. Two
of the breakers are for the new instruments. The third is for the
engine monitor; it had been protected with an in-line fuse from the
avioincs panel, but I wanted it on all the time, so I instead put a
breaker and now it's powered from the main bus. And in the upper
right is the control/sense plane for the new ELT (emergency locator
transmitter).
2014 April 05 09:46
Since we decided to have the engine overhauled for our airplane after
the prop strike, and the airplane was going to be up for annual
anyway, I figured that was a good time to take care of all the stuff
that needed to be worked on and that would take calendar time, since
the time was incurred anyway.
One of the things I knew was up was the ELT batteries. Every civil
airplane in the US (with certain limited exceptions) is required to
have an "Emergency Locator Transmitter" (ELT) on board. This activates if
there's a sudden shock (because of a crash) and transmits a signal so
that search/rescuers can locate the plane by radio signal. The ELT is
internally-powered by batteries. Modern ELTs are supposed to have a
panel in view of the pilot that allows the pilot to turn it on or off,
and indicates whether its transmitting. In any case, I knew that the
batteries in the ELT were due for replacing this annual anyway.
My plane didn't have an ELT panel, so I'd been thinking about that.
So when I was at Oshkosh last year, I bought a used ELT (very cheap) with a new
install kit. First, I thought that it would be interesting to look
inside and see how they worked. Second, I though perhaps that the
install kit would allow me to put a panel in properly.
So, first step was to look at the old ELT and replace the batteries.
It turns out that there were problems with the old one; it had broken
mounting. Its batteries were also the style that had to be replaced
by a specialized battery pack, not with off-the-shelf batteries.
So I asked my mechanic if we could just use the used one that I'd
bought, which, as it turns out, can be batteried with Duracell D-cell
batteries. He said it was fine to do that, as long as it tests out
correctly. The one thing I needed to do was to clean off the battery
terminals. At some point someone had left batteries in it too long,
and the terminals were a little green.
So here are the battery terminals, nice and cleaned up and shiny:
Here's the ELT sitting on the desk, batteries in and tested. The cord
is plugged back into the ELT itself to act as an emergency carry
strap. Patches the airport cat looks on.
Here's Patches inspecting the left wing navigation light.
One thing I had to do was run the control cable from the back of the
airplane where the ELT sits to the control panel, which I installed in
the front instrument panel. Here's the left side of the body, with
the interior mostly out, with the cable (which is really a phone wall
cable) installed and indicated with red arrows.
And here's a close-up of the center section:
And finally, the ELT installed and ready to go, with the cable plugged
in and the unit tested.
2014 April 01 23:42
I've been horrible about blogging. I blogged a bunch last
August/September and and then like three times since then. Oy.
However, Molly Lewis, the wind beneath my wings as far as internet
presence goes, vlogged pretty close to every day in April last year,
which was an inspiration to me. So I'm going to try again this year
to blog every day in April.
I have a bunch of stuff to write about, including lots of photos, but
my laptop needs a reboot before I can edit photos and I need to go to
bed. So a brief list:
- We had a prop strike in the airplane in November. It's almost
ready to come back.
- I split the case of my vintage VW. It needs work before assembly;
it'll be a few weeks at least.
- We had a pipe broke, but I installed more shut-offs to isolate
that section, and then fixed it.
- We've been making headway on organizing the rooms in the house
- The front stoop is 80% demolished, and then we had the long winter
of doom, so it's been sitting for 5 months.
Lots of good stuff to write about this month. And hopefully some new
flying photos in the mix.
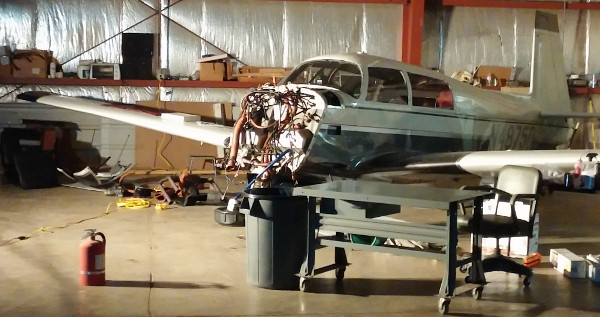
Ok, I got the photos. This is in January. I took my commission a
little far as far as "cleaning up" the wiring, and and actually
removed a bunch of the accessory wiring. Here it is, spread out on
the floor:
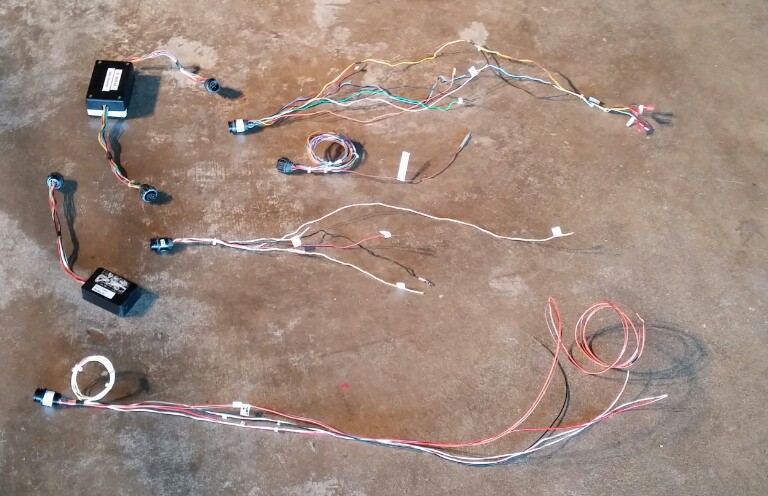
And here was a couple of weeks ago, with everything back in and lit up
for the first time:
2014 March 02 16:05
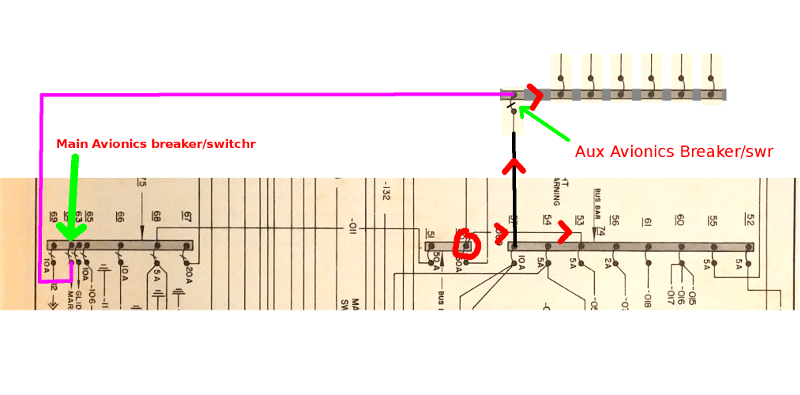
Every since I bought my airplane, I've wondered how the avionics
switches were wired in. There are three electrical busses that are
original to the aircraft, and then an avionics bus. There are two
switches to turn on the avionics bus; the main one in front of the
pilot, and an auxiliary one on the other side, next to the avionics
breakers.
Durin gone of my checkout flights, my instructor and I were flying and
wondering about debugging another problem. I had the main avionics
breaker on, and we wondered about auxiliary, so we turned it on as
well. A couple of seconds later, it turned off (it's a
breaker-switch). We didn't know why it did that, so we left it
alone. I've never touched it in the air, but I've turned it on on the
ground a couple of times.
But ever since then, I've wondered how it IS wired, and why it behaved
the way it did. Generally if you turn on two switches in parallel,
they'll each carry less current and so be LESS likely to trip.
However, I think I've figured it out. Here are a series of partial
electrical system diagrams. I cut out the bit of the diagram from the
origianl maintenance manual for the airplane. There are three
busses. The bus on the right is the "main" bus, and that feeds all
the loads that are always connected. It feeds the electrical turn
coordinator, and the interior lights, the lighter socket, and so on.
The bus on the left is the "auxiliary" bus, which has all the stuff
that the pilot turns on and off. Landing light, navigation lights,
strobes, rotating beacon, heated pitot tube, electric fuel pump and
that's where my primary avionics bus switch is. The bus in the middle
is called the "power" bus. It connects to the battery, to the
generator, and then feeds the other two busses. In both cases below,
I've circled in red the tie point where the battery and generator connect to
the power bus. It's not important except that's where the current
comes FROM in all cases.
One of the breaker switches on the left bus feeds the magenta
(purple-ish) wire that then feeds the avionics bus up on top. The
black wire on the left goes from the main bus, through a separate
breaker switch (the avionics aux) and then to the avionics bus.
First, here's how current flows to the avionics bus normally. The
main avionics switch (on the left bus) is turned on, the aux avionics
switch is turned off, so the black wire on the right doesn't carry
current because it's disconnected. Current flows (marked with red
chevrons) from the power bus
through a wire to the left bus, then through the main avionics breaker
switch through the magenta wire to the avionics bus.
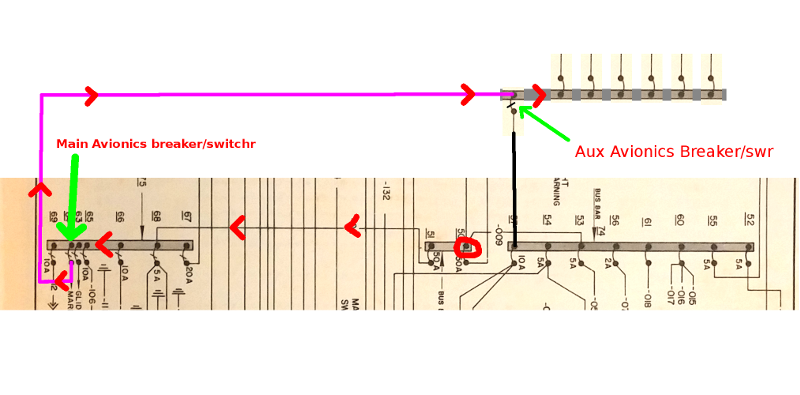
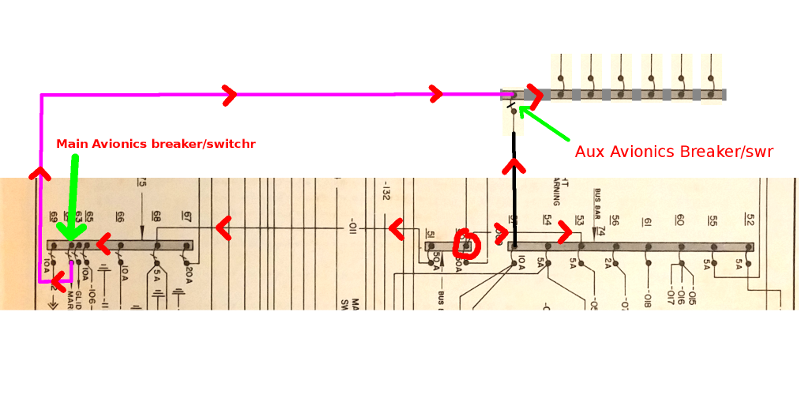
If the main avionics switch is turned off but the aux avionics switch
is turned on, here is the current flow instead. From the power bus to
the main bus up the black wire, through the aux avionics switch to the
avionics bus.
If BOTH avionics switches are turned on but there's nothing else in
the system consuming current, then the current flow looks like the
following. Some current flows through each breaker and along each
wire. Although I haven't tested it, I believe in this case that both
breaker/switches would stay turned on (wouldn't trip).
However, here it gets much more interesting. If, say, you had some
things on the left bus turned on. This would be consistent with my
circumstances when I was flying with my instructor; we were on a long
cross-country flight with some clouds, so I probably would have had
the nav lights and strobe lights on, at least. That's 10 or 12 amps
coming off the bus on the left. The current flow is something like
this:
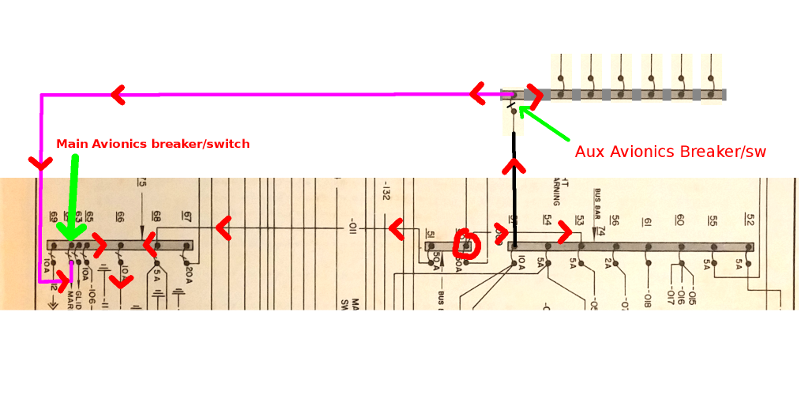
There are now TWO paths for the current to take to the left bus to
feed the lights that are on. One is the normal path from the power
bus to the aux (left) bus. However, current can also flow to the main
(right) bus, through the black wire, through the avionics aux
breaker/switch, then from the avionics bus through the magenta wire to
the aux (left) bus (opposite the normal direction of flow) and then to
the aux bus and then to the lights. How much current flows in each
branch is difficult to determine, and depends on the details of the
wires and connections, but no matter what, some current is flowing
through the aux avionics breaker switch that shouldn't be, and so its
current burden is higher than it ought to be.