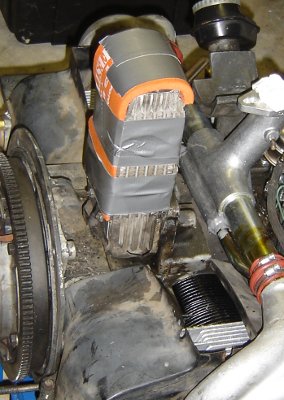
Working on assembling the Beetle engine.
I'm putting on the engine tin and last accessories. It's so much easier to put stuff on when the engine's out of the car. Here's the front of the engine, showing the newly installed breastplate tin:
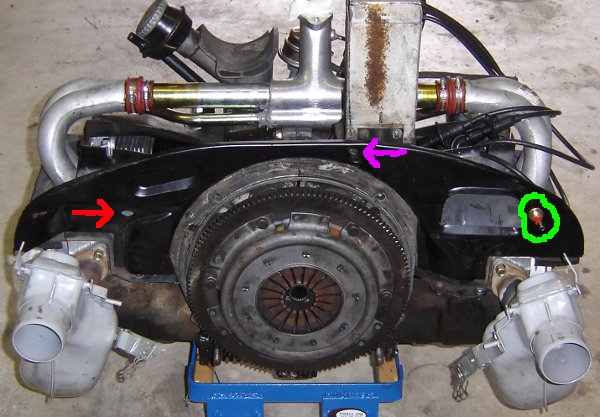
This is the "front" of the engine, the part that faces the body of the car. The fat grey pipes in the lower corners of the photo deliver hot air to the body of the car for the heater. The round flywheel in the center delivers mechanical power to the transmission, and the engine flange around it is bolted to the transmission bell, which holds the engine up. I've marked the three other items where the engine interfaces with the car. The red arrow on the left is where the wire goes to power the back-up lights. In the center, marked with the purple arrow, is where the throttle cable goes. On right right, I've circled in green where the fuel enters the engine.
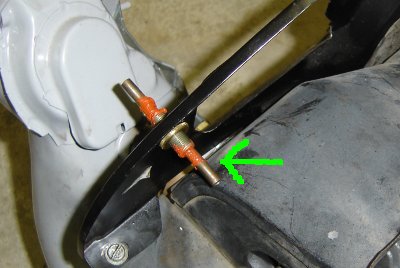
As you can see, instead of having a steel pipe through the hole in the tin, I've now put in a liquid pass-through. This will allow me to use hose on either side, and eliminated the possibility of the fuel pipe wearing through. In VWs without this modification, severing of the fuel pipe is a cause of fires.
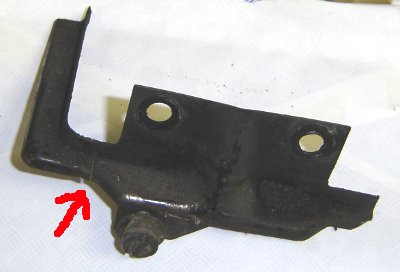
I had to deal with the "Hoover Bit" today. It's a bracket and air dam around the base of the oil cooler in a "doghouse" style VW engine. (it's named for Bob Hoover, legendary VW mechanic who talked about that part a lot on the internet 10 years ago or so.)
Here's where it sits installed at the base of the oil cooler:
The problem, and I knew I was going to have to deal with it soon, is that mine had a pretty big crack in it, and the side arm part was about to break off.
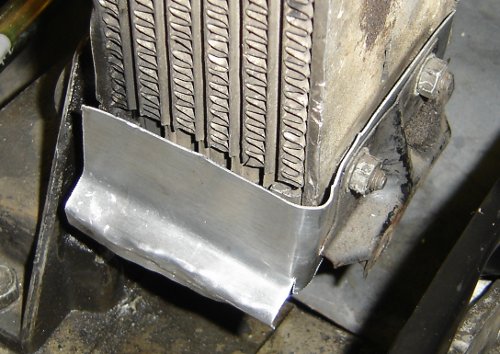
So I fabricated a piece of Aluminum that will do the job of the arm and fasten under the body the other part. In face, during this process, the arm fell off. here's the final configuration installed:
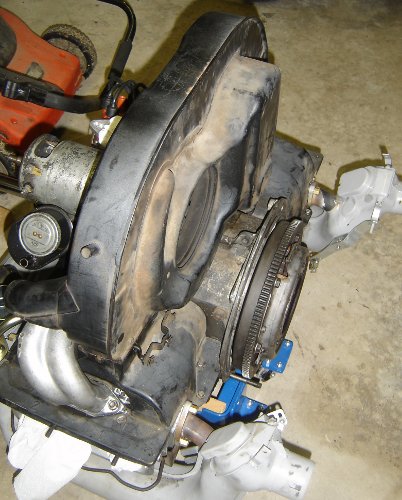
The next step is to install the "fan shroud", which is the main plenum of the cooling system. Here it is, sitting on top of the engine.
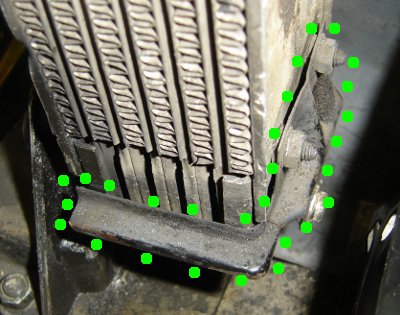
As long as I'm putting together the engine and trying to make things right, I noticed that there's an awful lot of space around the oil cooler to escape (marked by the green dots). This lowers the efficiency of the oil cooler and the engine will run hotter.
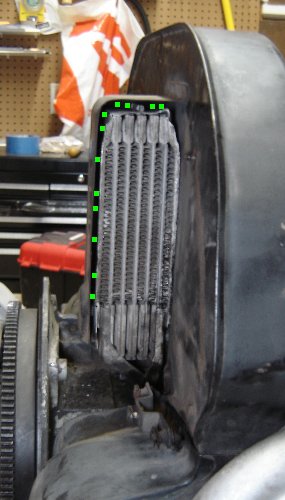
So I'm going to try to fill some of this space with foam rubber. Here's a cut-apart can cozy that I'm attempting ot glue to the side of the oil cooler. The adhesive might not take, in which I'll have to think of something else. In any case, I want to wrap the oil cooler so that the only way air gets past it is through it, not around it.
